Step 1
Download BitKinex from http://www.bitkinex.com/
Install with default settings.
Step 2
Open BitKinex, and you will see a window like this:
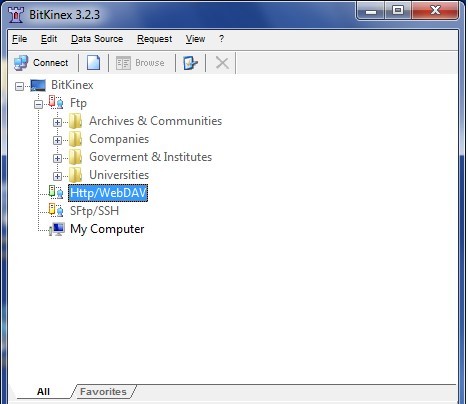
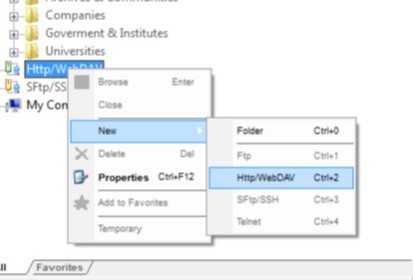
- Right click on Http/WebDAV
- Click New
- Click Http/WebDAV
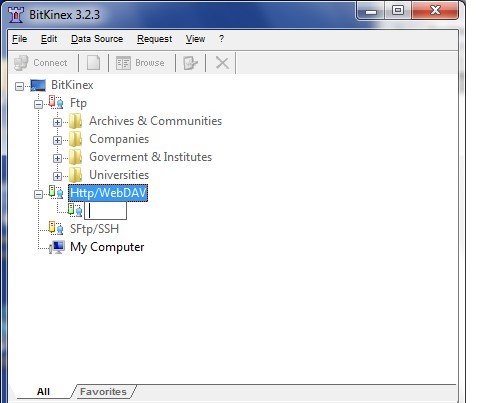
- In the box that appears, type the name you want to call the connection, e.g. My NAS
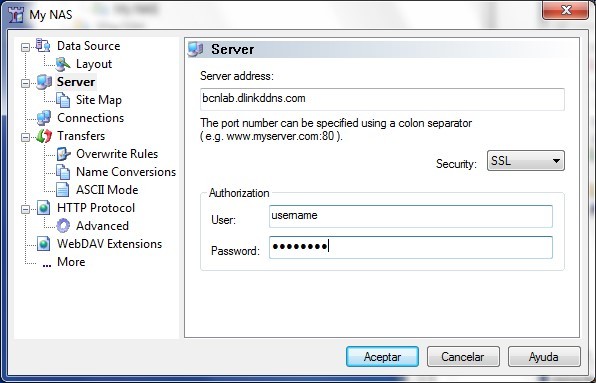
- In the new window that appears, in the server address, type the IP or hostname you use to connect to your DNS-320
- You can opt to use SSL or not
- Type in a user and password that you have set for webdav Access
- Click Site Map
- Select the existing path
- Change the path to read: /webdav/YOUR WEBDAV SHARE
- (Where YOUR WEBDAV SHARE is the name/path of the folder you have set as a webdav share)
- Click Update
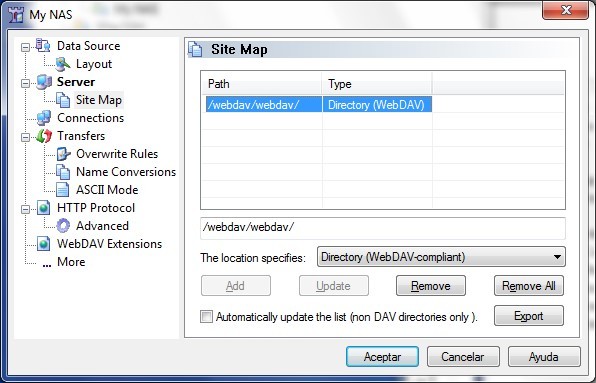
- Click Accept
- You can now right click the connection, and choose Browse to connect to your DNS-320 via WebDAV.