How to Add a Second Hard Drive – DNS-340L
NOTE – When inserting a new HDD to your DNS, you may insert it when powered on or when it is off and then power on the device
Step 1 – Open a web browser and enter the IP of your device

Step 2 – Login into the DNS using your credentials

Step 3 – Once inside the Web GUI, you will notice that it will automatically default to “Hard Drive Configuration” and you will see “Set RAID Type and Re-Format” or “Configure Newly Inserted Hard drive(s)”.
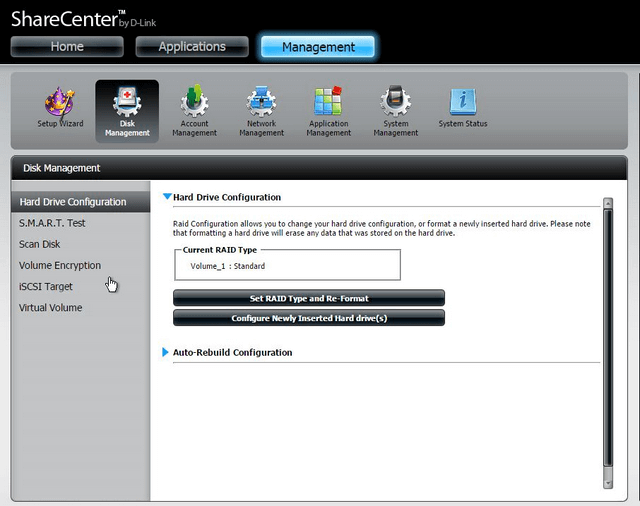
Click “Configure Newly Inserted Hard drive(s)”
RAID 1:
Step 4 – You will now be presented with the following screen
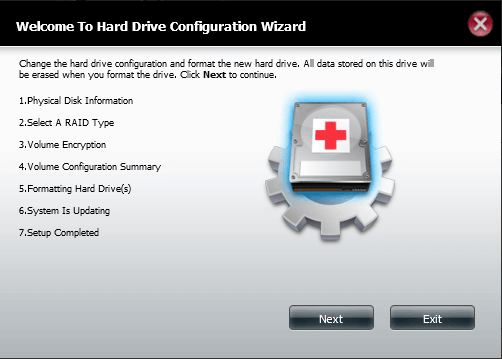
Click “Next”
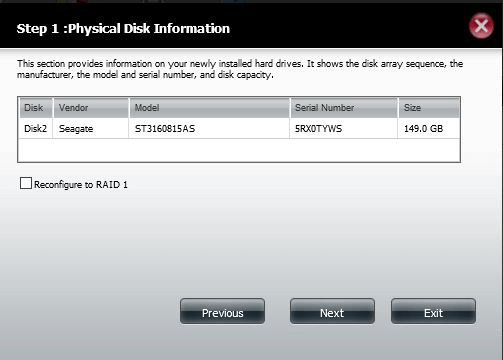
Step 5 – You will then be presented with the “Physical Disk Information”. In our example, are going to select “Reconfigure to RAID1”.
If you choose to create two volumes, please go to Step 11.
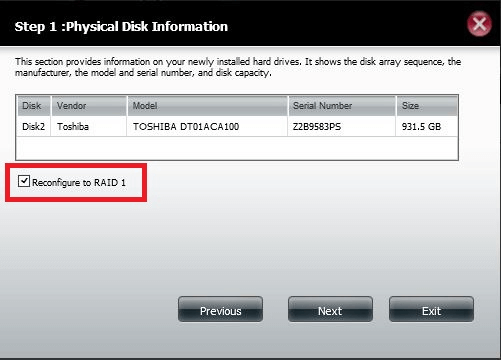
Click “Next”
Step 6 – Make sure the Volume is selected
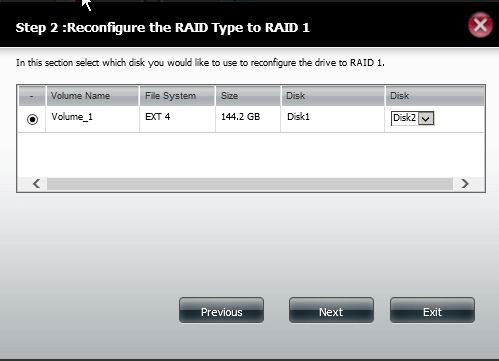
Click “Next”
Step 7 – Select “Enable Auto-Rebuild”
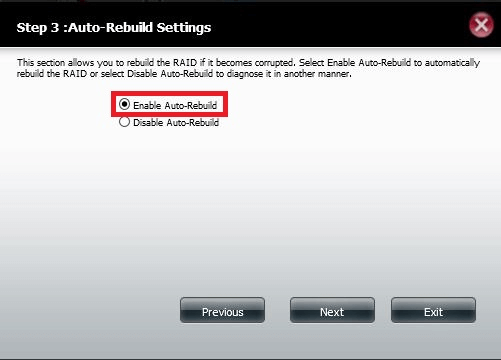
Click “Next”
Step 8 – The next screen will show the summary before formatting will commence
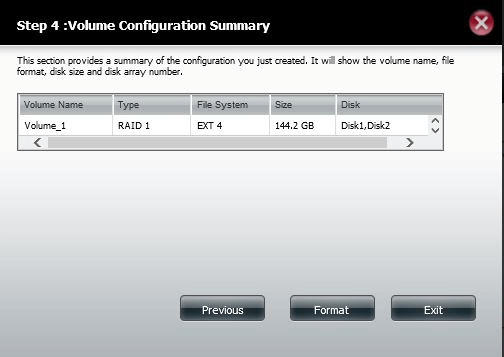
Click “Format”

Click “Yes”
Step 9 – Once the format process has completed the RAID1 configuration, you should see the following screen
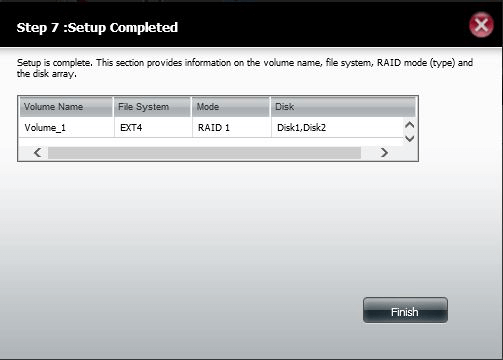
Click “Finish”
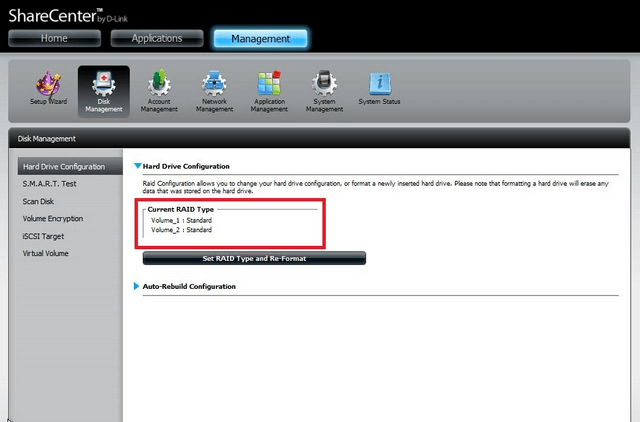
Step 10 – You should now see the “Hard Drive Configuration” and see the current RAID type as: Volume_1: RAID 1
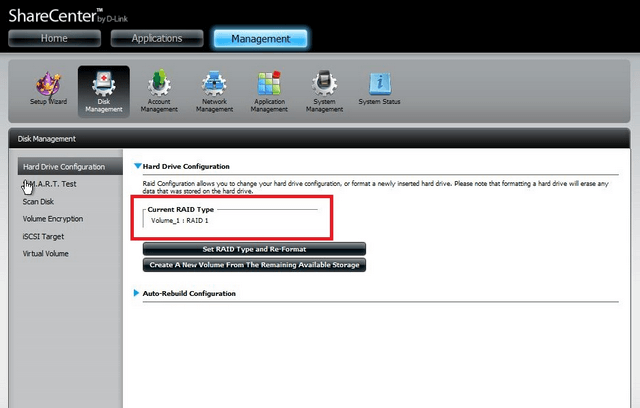
*Raid 1 configuration completed
Standard:
Step 11 – You will be presented with the “Physical Disk Information”
Click “Next”
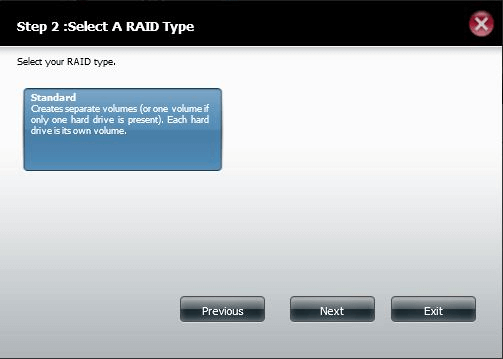
Step 12 – You should be presented with selecting the RAID type. The only RAID type available at the moment is “Standard”
Click “Next”
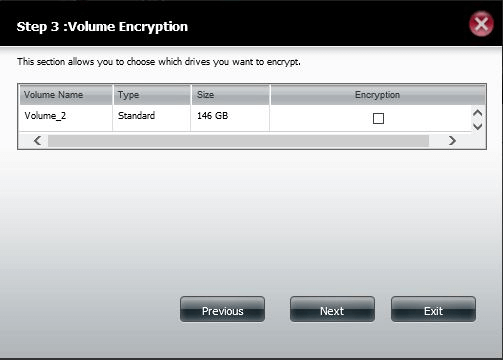
Step 13 – If you require the Volume to be encrypted, select “Encryption”. In our example, we have chosen not to.
Click “Next”
Step 14 – The following screen is the “Volume Configuration Summary”, here you can see what will be applied to the Volume when formatted
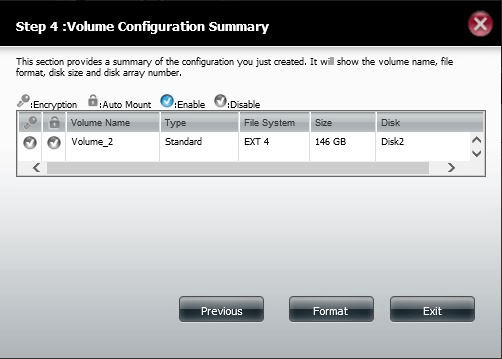
If you accept what you see in the above screen example, then click on “Format”. Once clicked you will be presented with the following warning
Click “Yes” if you are fully aware of the following process
Step 15 – The system will now commence to Partition the Volume on the NAS

Step 16 – Once the above has completed, then formatting will begin
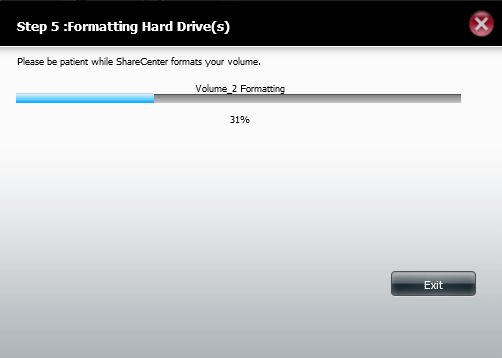
Please wait until it has completed the process. When complete you should get the following screen
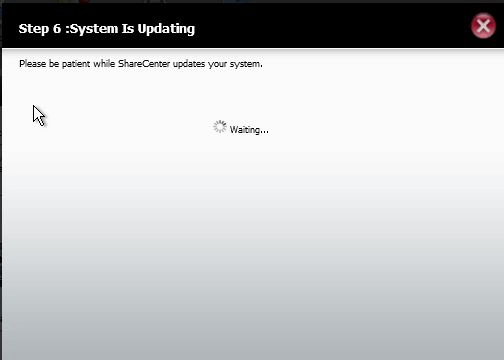
Step 17 – System in the process of updating
Step 18 – System Completed
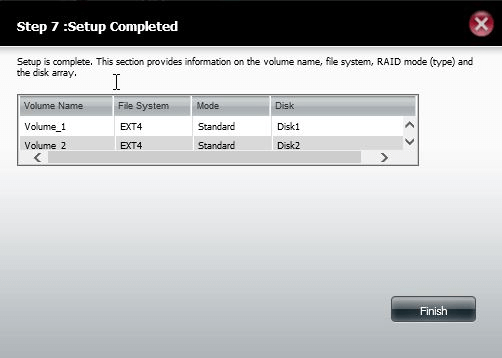
Click “Finish”
Step 19 – Hard Drive Configuration – Summary showing the above process of creating two Volumes
Ceci peut également aider.
- $name Lire la réponse
- Comment configurer un compte Dropbox sur le DNS-340L ? Lire la réponse
- Comment configurer Google Drive - DNS-340L Lire la réponse
- Comment configurer et connecter mon DNS-340L en iSCSI ? Lire la réponse
- Comment utiliser l’assistant de configuration (Wizard) du DNS-340L ? Lire la réponse
- Comment faire pour utiliser les clés USB et disques dur ex-terne et les mapper sur le DNS-340L? Lire la réponse