How to connect to DNS-320 via webdav in Windows?
Step 1
Download BitKinex from http://www.bitkinex.com/
Install with default settings.
Step 2
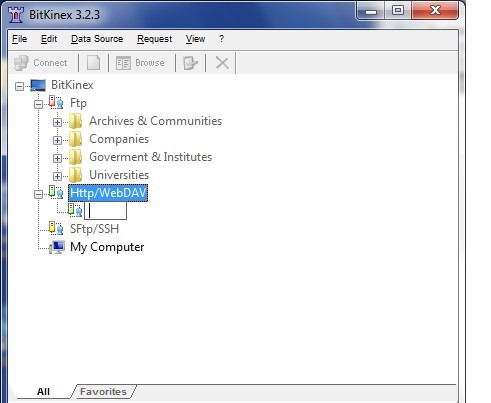
Open BitKinex, and you will see a window like this:

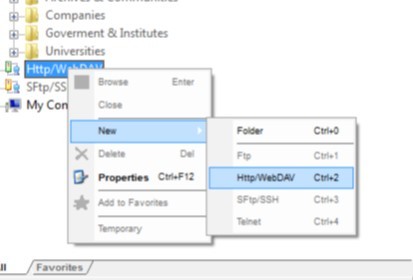
- Right click on Http/WebDAV
- Click New
- Click Http/WebDAV
- In the box that appears, type the name you want to call the connection, e.g. My NAS
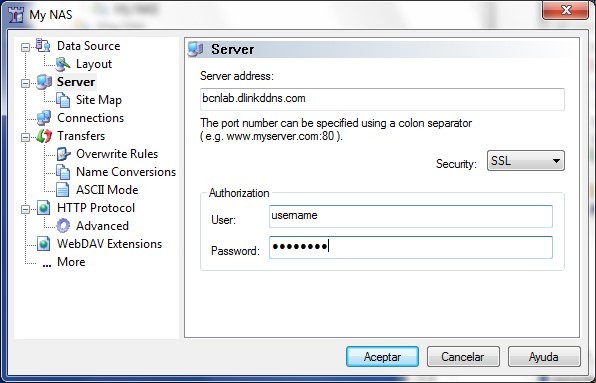
- In the new window that appears, in the server address, type the IP or hostname you use to connect to your DNS-320
- You can opt to use SSL or not
- Type in a user and password that you have set for webdav Access
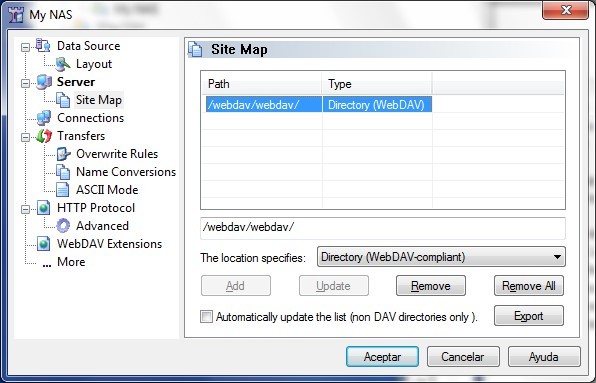
- Click Site Map
- Select the existing path
- Change the path to read: /webdav/YOUR WEBDAV SHARE
- (Where YOUR WEBDAV SHARE is the name/path of the folder you have set as a webdav share)
- Click Update
- Click Accept
- You can now right click the connection, and choose Browse to connect to your DNS-320 via WebDAV.
79 Други потребители намират това за полезно.
Беше ли това полезно за Вас?79 Други потребители намират това за полезно.
Благодарим Ви за обратната връзка.
Съжаляваме, че не успяхме да помогнем! Натиснете тук за повече Въпроси и отговори или за да отидете в секция Поддръжка.
Това също може да Ви помогне:
- How do I know if a drive has failed on my DNS-320/321/323/325? Прочети отговорите
- How do I restore my RAID1 settings if a drive has failed on my DNS-320/321/323/325? Прочети отговорите
- How to connect to DNS-320 via webdav in MAC OS X? Прочети отговорите