How do I set up and install my Baby Camera?
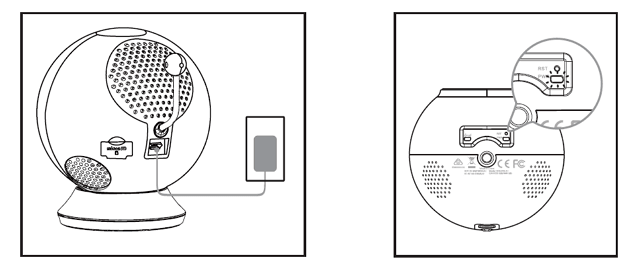
Step 1: Plug in your Baby Camera and wait until the Power LED turns green.
You can use the included power adapter, or you can use a portable USB battery (not included) that can supply 5V/2A of power.
Step 2: Download the free mydlink Baby Camera Monitor app on your smartphone or tablet.

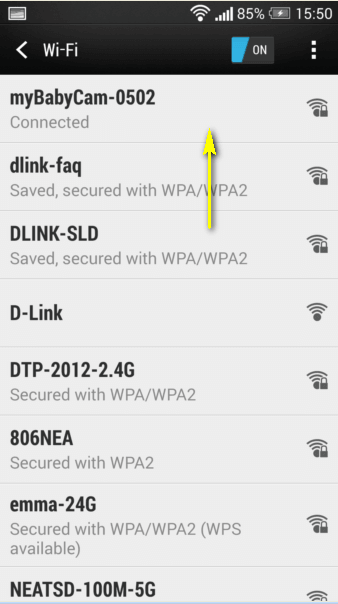
Step 3: Connect directly to the camera’s Wi-Fi signal. The Wi-Fi network name and password are located on the label on the base of the unit.
iPhone/iPad: Settings > Wi-Fi Settings
Android: Settings > Wireless & Networks > Wi-Fi Settings
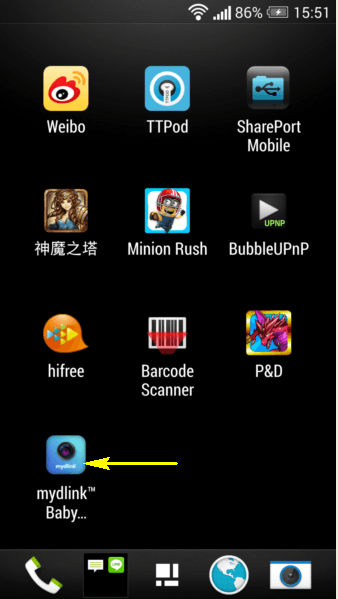
Step 3: Launch the mydlink Baby Camera Monitor app. The app will guide you through the configuration process.
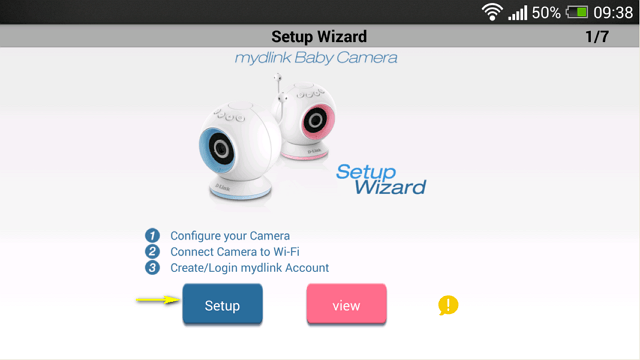
Step 4: Tap Setup.
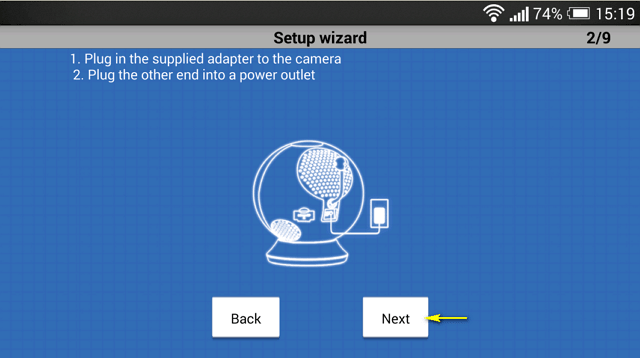
Step 5: If you have not done so already, connect the included power cable (or a USB power source) to the camera. Tap Next.
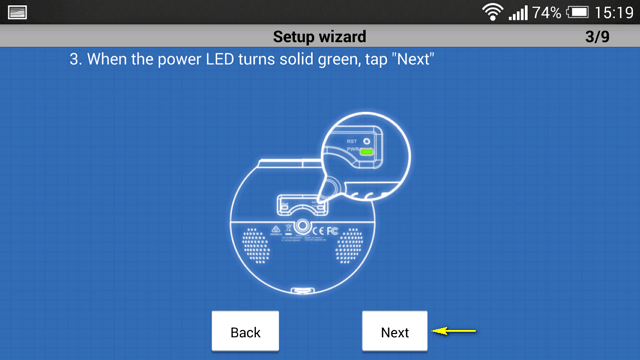
Step 6: Confirm that the Power LED on the base of the unit is lit solid green. Tap Next.
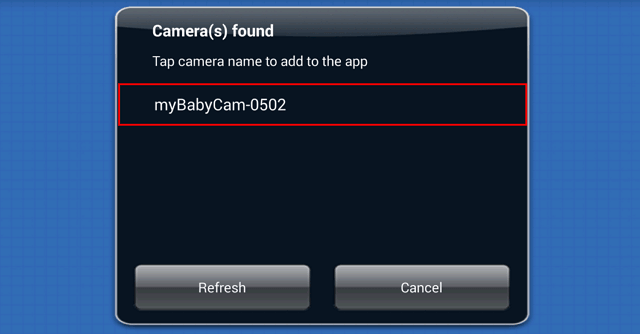
Step 7: Tap the name of the mydlink Baby Camera which you want to set up.
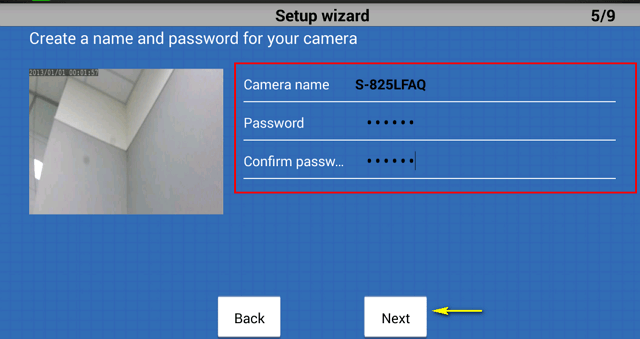
Step 8: Create a name and password for your camera. If you wish to change the name of your camera, enter the new name in the Camera Name field, otherwise just leave the default name. To specify an administrator password for your camera, enter a password in the Password field, and re-enter it again in the Confirm Password field (this password is for the setup utility of the camera, and is not the same as the password for your Wi-Fi network). Tap Next.
Step 9: Select your home’s Wi-Fi network from the list provided (you can scroll down the list if several networks are available) and enter the password for your wireless network in the Password field. You can also manually enter the name of the network you wish to connect to in the Network Name field. Tap Connect.
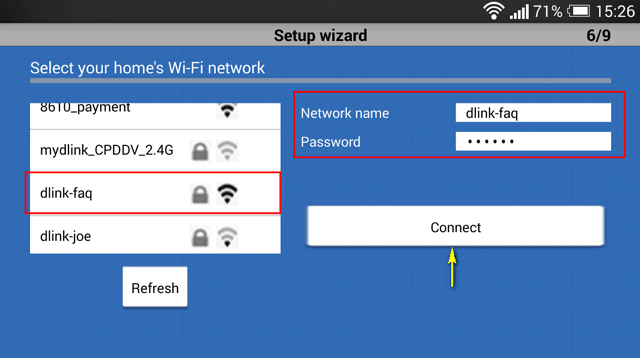
Step 10:
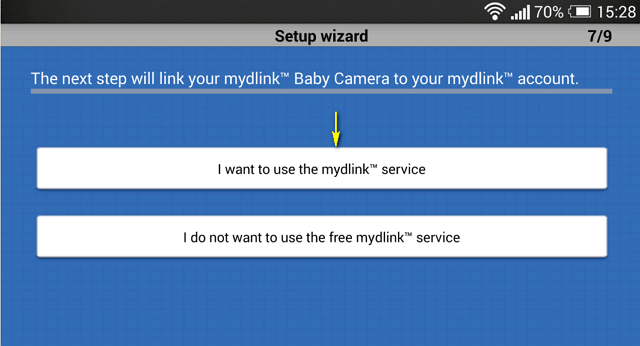
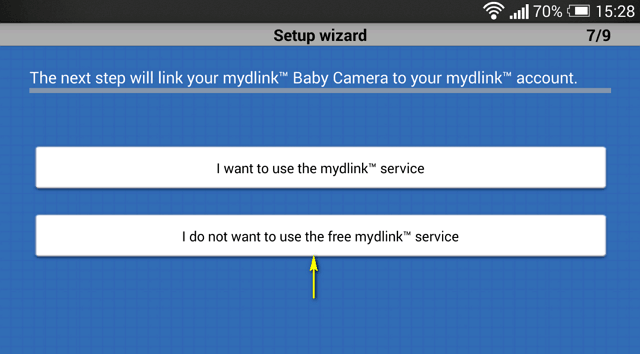
If you want to link your camera to the mydlink sevice, tap I want to use the mydink™ service.
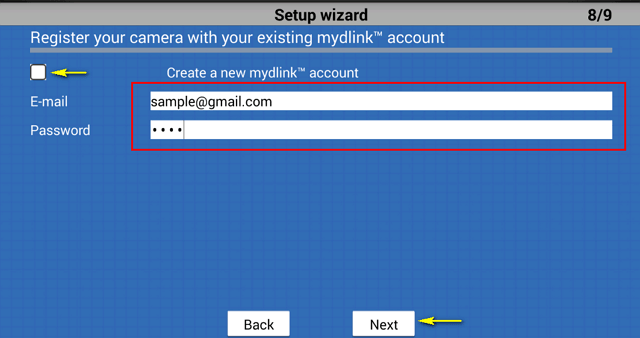
- If you want to register your camera with your existing mydlink account, enter yor email address and password in the fields provided.
- If you don’t have a mydlink account, check the Create a new mydlink™ account box and enter the email address and password you wish to use to create your new account. Tap Next.
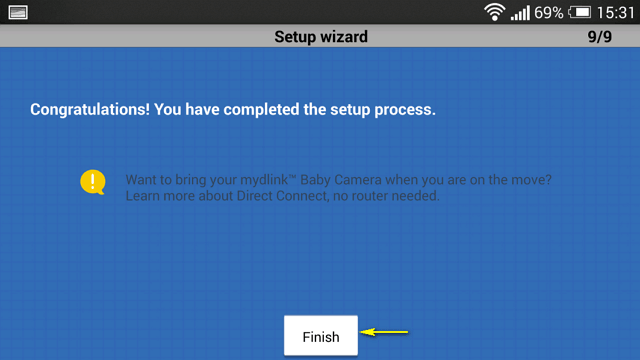
Tap Finish. Please continue to step 12.
B. If you do not wish to register your camera with the mydlink service at this time, tap I do not want to use the free mydlink™ service. Please note that you will not be able to view your camera’s live feed remotely if you have not registered for the mydlink service.
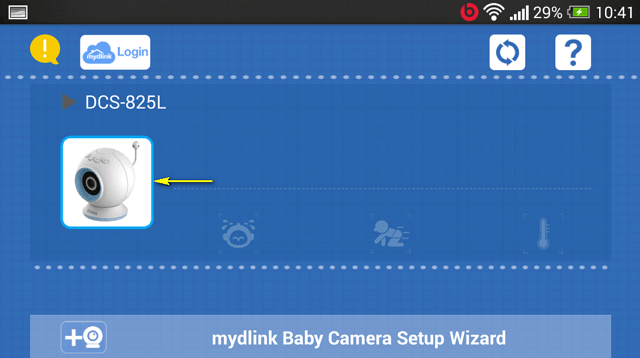
Step 12: Tap the device icon for the DCS-825L.
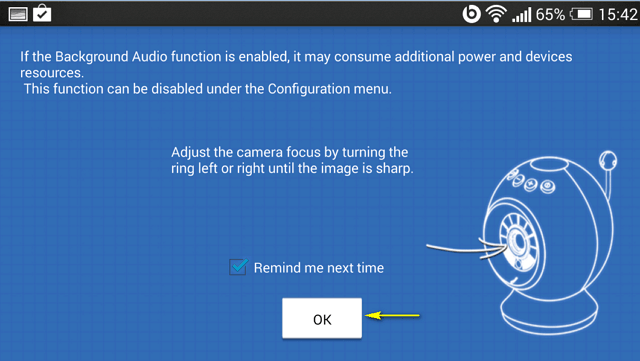
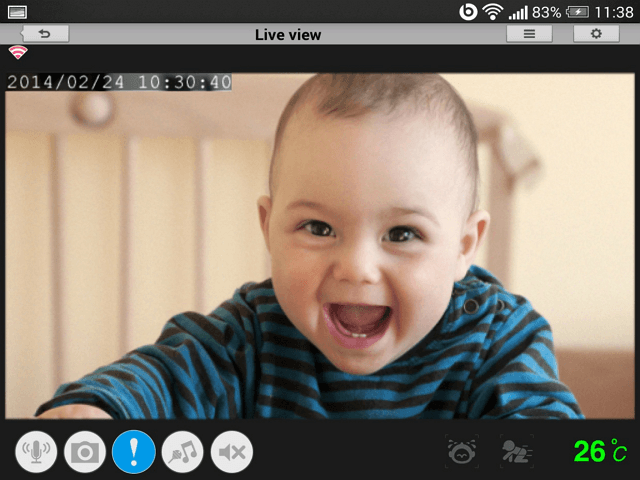
Step 13: Tap OK to continue to the live video page. Your camera’s live video will appear on the following screen.
176 Други потребители намират това за полезно.
Беше ли това полезно за Вас?176 Други потребители намират това за полезно.
Благодарим Ви за обратната връзка.
Съжаляваме, че не успяхме да помогнем! Натиснете тук за повече Въпроси и отговори или за да отидете в секция Поддръжка.
Това също може да Ви помогне:
- How can I change the Wi-Fi network that my mydlink Baby Camera uses? Прочети отговорите
- How do I change the password on my Baby Camera? Прочети отговорите
- How do I configure Motion Detection on my mydlink Baby Camera using the mydlink service? Прочети отговорите
- How do I configure Sound Detection on my mydlink Baby Camera using the mydlink service? Прочети отговорите
- How do I reset my camera to factory default settings? Прочети отговорите
- How do I set up and install my mydlink Baby Camera? Прочети отговорите