How to Setup Dropbox – DNS-340L
Requirements:
• Internet connection
• Dropbox Account
Step 1 – Open a web browser and enter the IP of your device

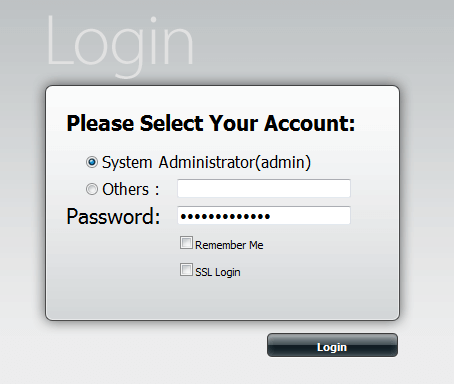
Step 2 – Login into the DNS using your credentials
Step 3 – Click on Applications > Dropbox
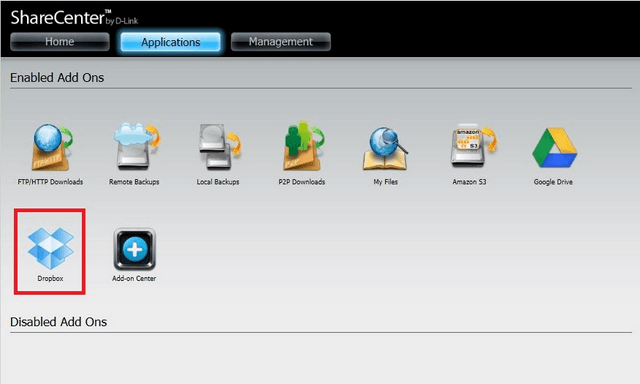
Select “Dropbox”
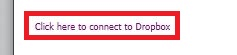
Step 4 – Click on “Click here to connect to Dropbox” at bottom of screen
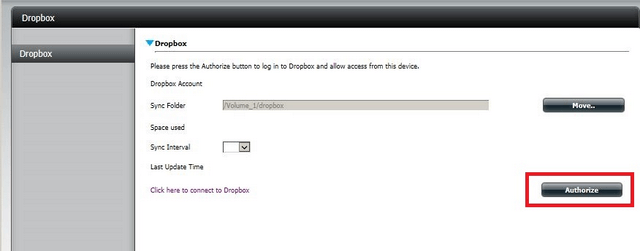
Step 5 – Once signed in click on “Authorize”
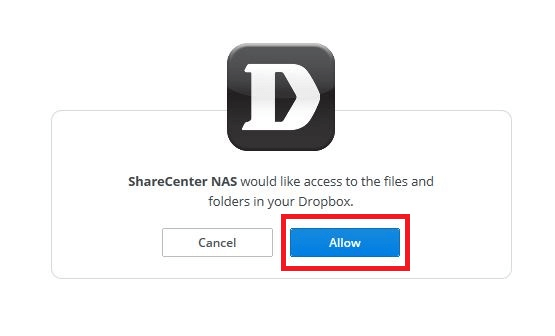
Step 6 – Click “Allow”
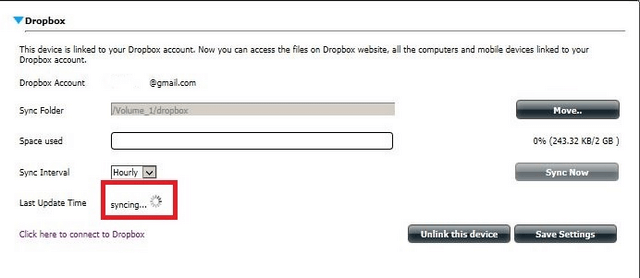
Step 7 – You should notice the NAS will be in the process of synchronisation with Dropbox
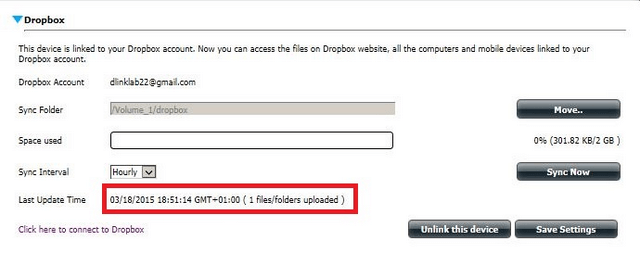
Step 8 – Once complete you should see the following information
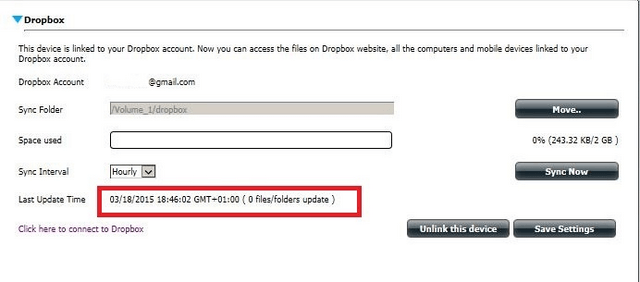
In our example we have a total of 0 files / folders update
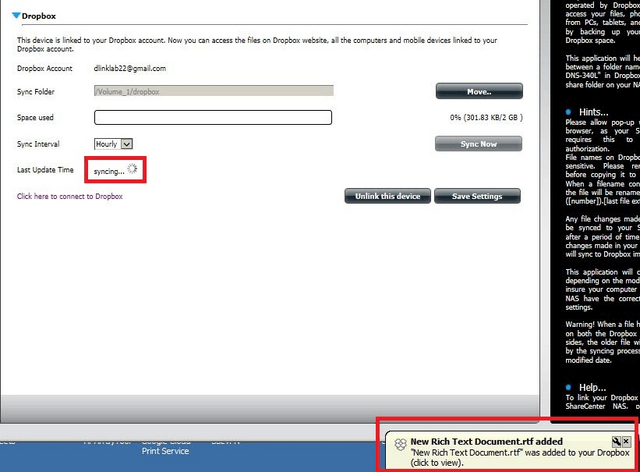
Step 9 – To give you an example, if we add files to \\192.168.1.119\dropbox folder you should notice automatically the files will be synchronised
Step 10 – Final result of files synchronised
These may also help:
- How to Setup Google Drive – DNS-340L Read Answer
- How to Setup iSCSI and Connect – DNS-340L Read Answer
- How to Setup My Surveillance – DNS-340L Read Answer
- How to Use the Setup Wizard – DNS-340L Read Answer
- How to Use the USB Drives and Map them – DNS-340L Read Answer