How to Auto Backup Settings with Email Alert – DCS-250
System Requirements:
• Email Account
• Internet Connection
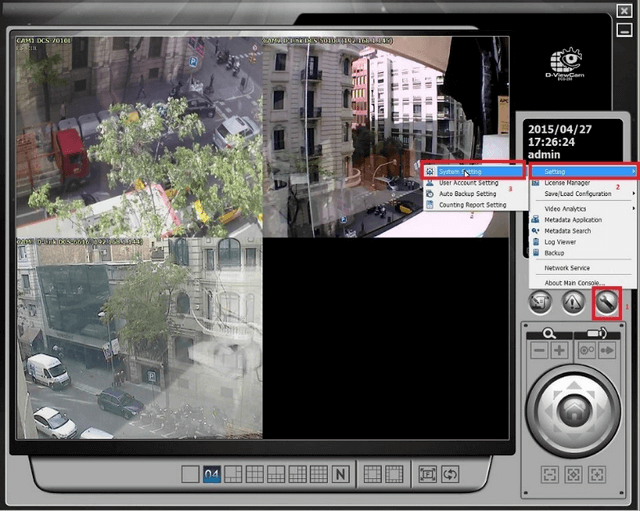
Step 1 – To begin, we need to create a user and associate with an email address to do this, click on the following:
Spanner Icon > Setting > System Setting
Step 2 – Go to “Address Book” and add a username and email address. In our example we have given the“User Name” as “Admin” and “Description Field” as “Backup Failure”. Once completed, click “Add”
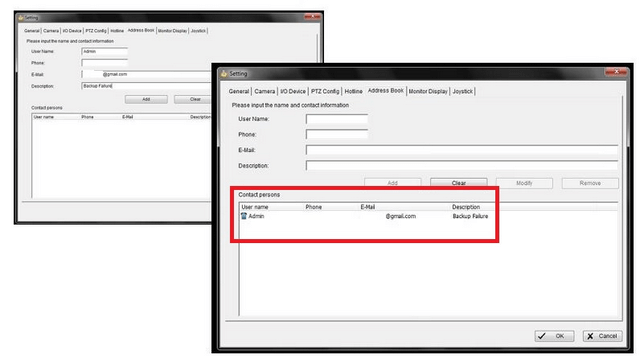
Click “OK”
Step 3 – We now need to configure the smtp server for sending emails via the email address (created in Step 2). For this you will need to know the smtp server details for the email address and whether or not SSL is required. In our example, we are using a gmail account as follows:
*SMTP Server: smtp.gmail.com *Port: 465
E-Mail Sender: [email protected]
E-Mail Subject: Back Failure
Body Content: The backup has failed. Please check system settings
SMTP server needs authentication: We have selected this
Enter the password (the password to enter your email account) then click “Send Test Mail”
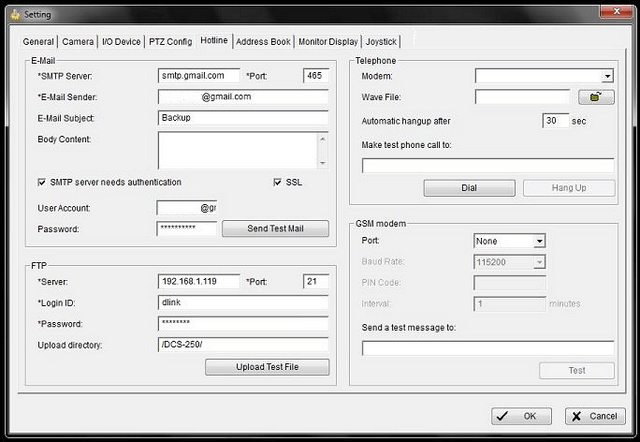
You should receive the following message confirming the test file has been sent successfully
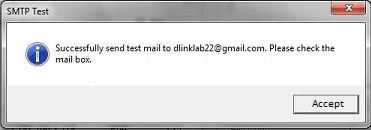
Click “Accept”
Inbox Checked as Below (Test file sent and received correctly):

Step 4 – The next step is to go to “Auto Backup Settings”
Spanner Icon > Setting > Audio Backup Setting
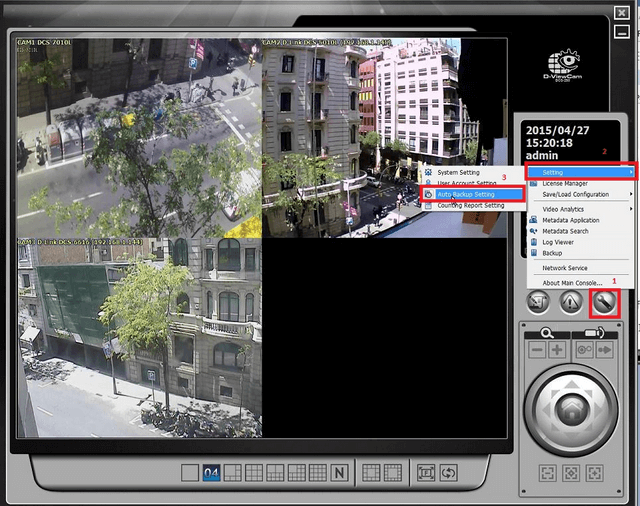
Step 5 – Click box to “Enable Schedule Backup”, then select the cameras you would like to backup. Once done, select where you would like the backup to be stored ![]() . In our example, we have selected a mapped drive on the same PC where we have installed DCS-250. The mapped drive refers to a NAS we have configured and is setup within our network (Please use this as an example)
. In our example, we have selected a mapped drive on the same PC where we have installed DCS-250. The mapped drive refers to a NAS we have configured and is setup within our network (Please use this as an example)
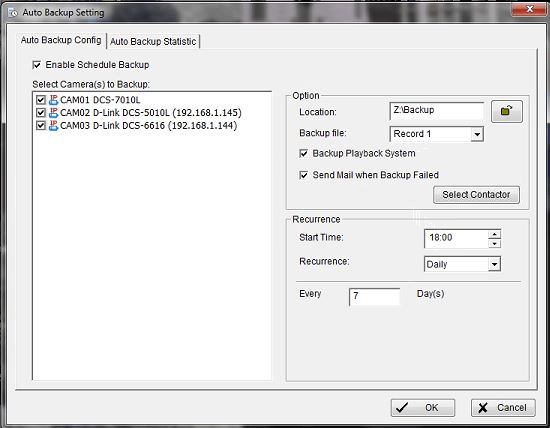
Location: Z:\Backup
Backup file: Record 1 (If you are using record 1 or both records, then you must select the option that suits)
Backup Playback System: Enabled
Send Mail when Backup Failed: Enabled
Start Time: 18:00
Recurrence: Daily (or Weekly) – We have selected “Daily”
Every: 7 Day(s)
Don’t Click “OK” go to Step 6
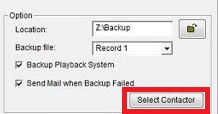
Step 6 – Click Select “Select Contactor”
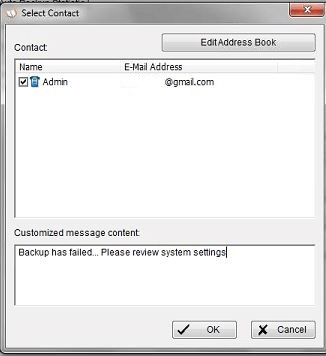
Select the “Contact” (Created in Step 1) then (Optional) give a “Customized message content”. In our example we have entered; “Backup has failed… Please review system settings”
Click “OK”
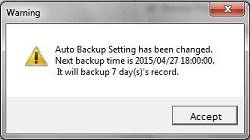
Click “Accept”
Step 7 – Once the above has been confirmed you will return to “Auto Backup Settings”. If you are happy with the settings

Click on “OK”
If there is an issue with the backup not commencing or taking place at the time stated, you should receive an alert via email giving you warning. This way you are able to act quickly to resolve the issue and have important information backed up correctly. To give an example, we will now force the backup to fail and sent an email alert
Step 8 – We have forced the fail and received the following email alert:

Dit kan ook interessant zijn:
- $name Lees antwoord