How to set fixed channels in APs - DWS-3160

If you have two or more APs installed close to one another note that is not the best choice for location. Therefore, it is highly advisable to use fixed channels in these APs and select the channels as far apart as possible to generate the least amount of interference between them.
DWS_3160_Actualizar_firmware_a_puntos_de_acceso
 
Step 1
-To begin configuring we need to know the IP address of the switch, the switch de-fault has the IP 10.90.90.90, if the IP has been modified and no longer remember you need to perform a reset to factory default and re-add the APs.

Step 2 -Use your web browser to access the web interface, in our example the IP of the DWS-3160 is the IP 192.168.1.60 (http://192.168.1.60 ), The default user is admin and the password blank (no password).

D-Link

Click “OK” to enter setup.

Step 3 - Enter the configuration of the Wireless Switch, and click the “WLAN” tab then   select the Administration > Basic Setup option. Click the “Radio” tab, here you’ll deactivate the channels that come by default.
D-Link

It is recommended disabling “Load Balancing” as the APs are closely located thus balancing clients may not work properly. Another tip is to reduce the maximum clients depending on the model of AP and client density between 25 and 35.

Initial Power also has to be modified because if we leave it as is the default 100% the system cannot increase because the power will be running maximum. We recommend setting the Initial Power 40% and 30% Minimum Power.

D-Link
Remember that we are working with systems that are dual band so we will need to perform the same configuration for both Option 1 (802.11a / n) to Option 2 (802.11b / g / n). D-Link

Step 4 - Enter in the menu, Administration > Basic Setup and click the “Valid AP” tab.

D-Link

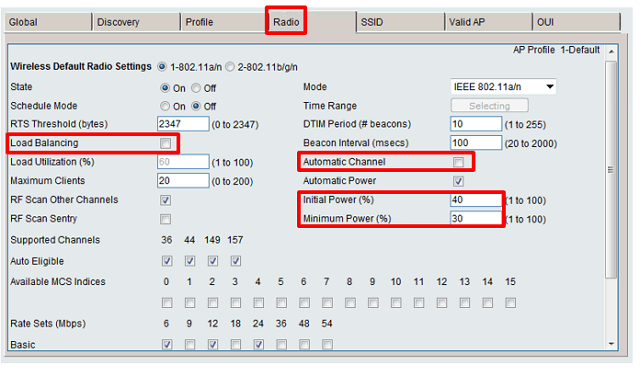
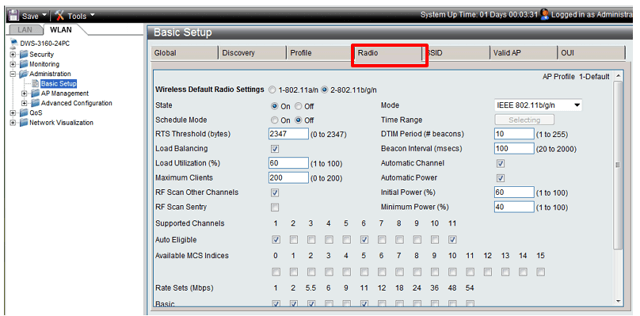
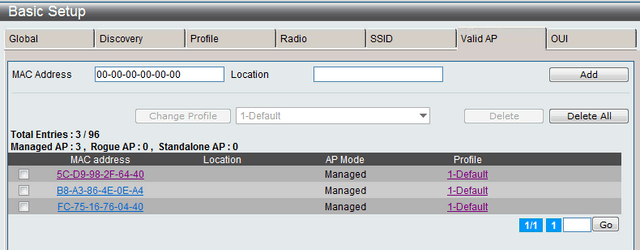
Here you can view the APs are managed by the controller.

D-Link

 
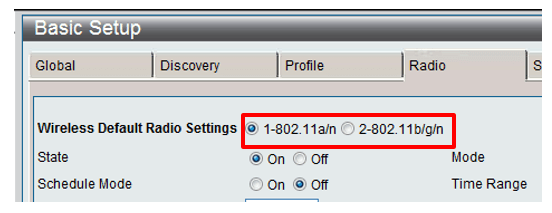
Step 5 - Within the Basic Setup menu click on the AP Mac Address you want to modify, change the Channel option to the desired channel, if the AP is Dual Band (issued on two fre-quencies simultaneously) modify both Radio 1 option (5Ghz) and the Radio 2 (2.4Ghz) option (remember to separate the different APS channels in as many as possible).

D-Link

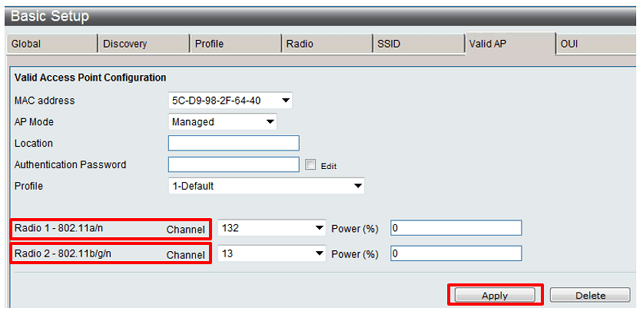
After changing channels click “Apply” to apply the changes.

Step 6 - After applying these changes to the channels within the Basic Setup menu select

Administration > Management AP > AP Reboot option and restart all APs, this is necessary for the changes to take effect at the time, but the changes do not apply until the next reboot of the equipment.


D-Link

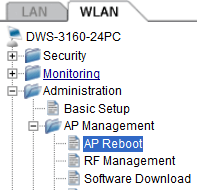
 Click “Reboot ALL” to reset all APs together or select each reboot and click to select to manually restart one by one.


D-Link

Step 7 - To apply other modifications to click settings 

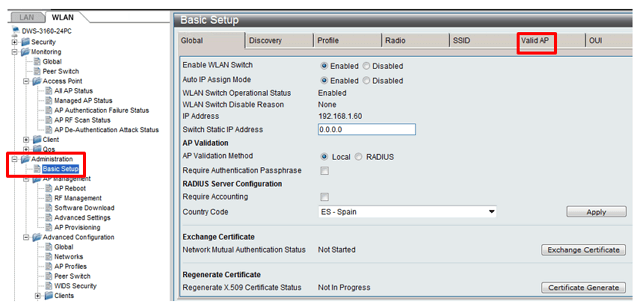
Administration > Advanced configuration > AP Profiles menu option left.

D-Link

Once inside AP Profiles select the check box of the profile to set (in our case we worked on the default profile called Default) and click the Apply button to send the changes to the ac-cess points (APs).

D-Link

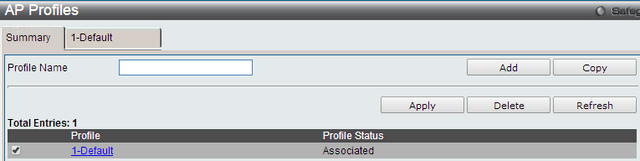
The system will tell you that to apply the new settings to the wireless network APs and will reboot so connected clients are disassociated momentarily and asked to confirm clicking “OK”.  
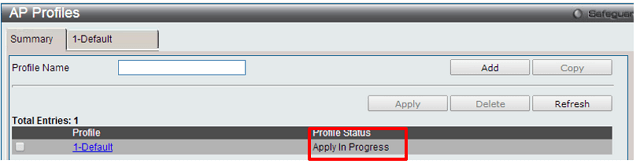
Upon acceptance of this option the following will be shown in the column “Status Profile” that implementation of the new parameters being applied to the Aps.


DWS_3160_Actualizar_firmware_a_puntos_de_acceso
 
D-Link

Once the setup is complete to apply can be seen in the “Associated” profile status.


D-Link

Step 8 - To check the status of the channels - Enter on the left menu 

Administration > AP Management > Advanced Settings option, here you can view the channels configured on each Ap.

D-Link


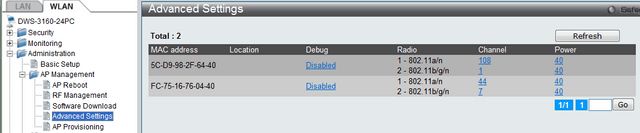
Step 9
- Finally we will keep the setting in the controller from the top menu, click 

Save > Save Configuration > Log Type and select Apply “All” and click “Apply”.
D-Link


Rank: 1.5

These may also help:

  • How to Configure RADIUS server – DWS-3160-Series Read Answer
  • How to Upgrade Access-point Firmware – DWS-3160-Series Read Answer
  • DWS 3160 Series Configure Captive Portal Read Answer
  • How to Configure Multiple SSIDs and VLANs - DWS-3160-Series Read Answer