How to Keep Central WiFiManger Server Running without User Login - CWM-100
System Used:
Microsoft Windows Server 2012
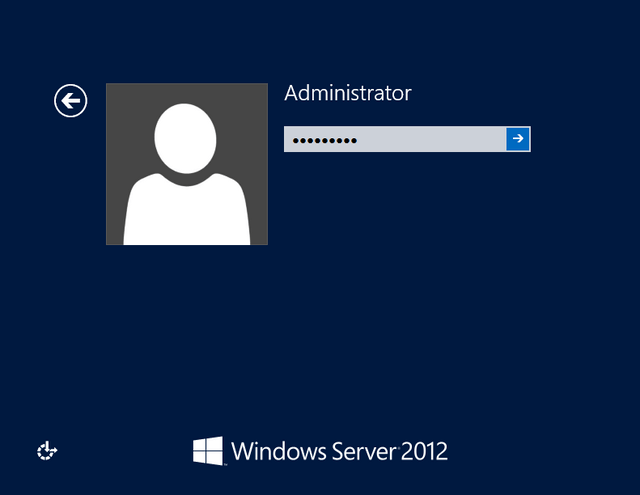
Step 1 – Login to your system – In our example we have used Windows Server 2012
Step 2 – Open Task Scheduler
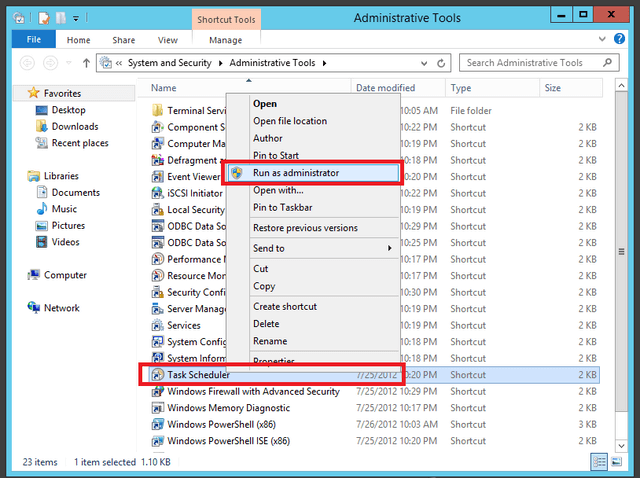
System and Security > Administrative Tools > Task Scheduler
Right-click “Task Scheduler” then “Run as administrator”
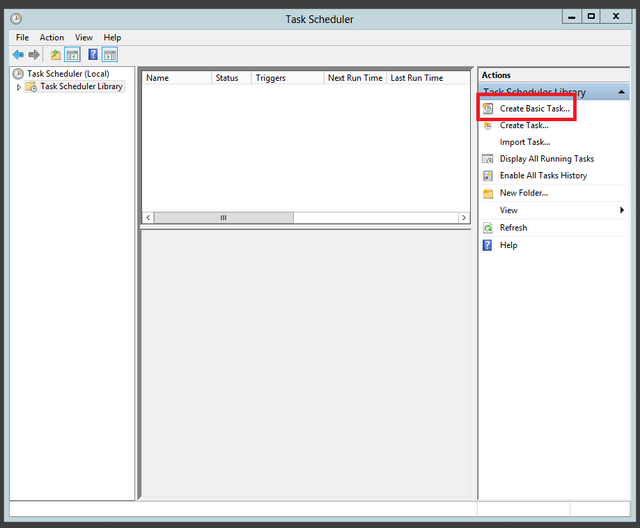
Step 3 – Create Basic Task
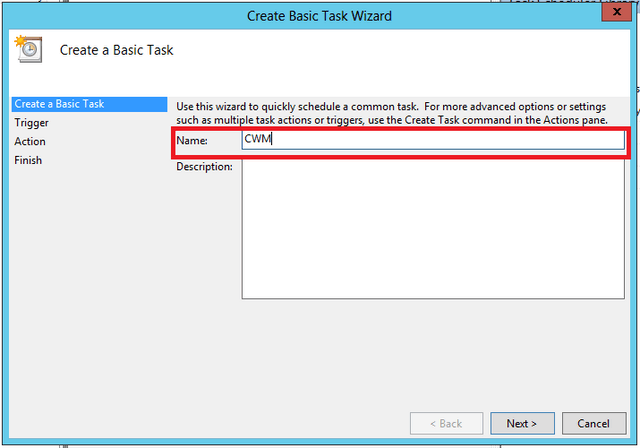
Step 4 – Enter a name – In our example we have named “CWM”
Click “Next”
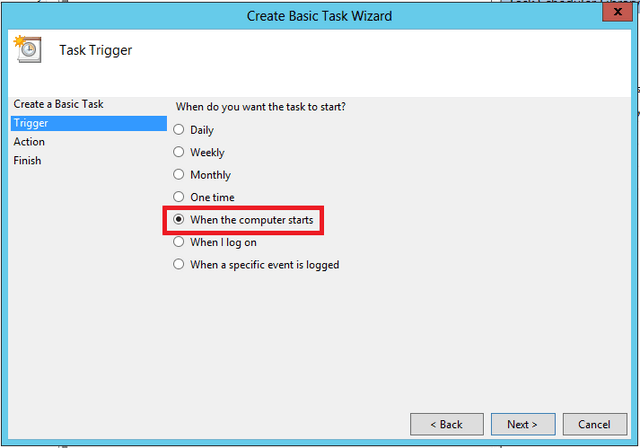
Step 5 – Set the “Trigger” – In our example we want to use “When the computer starts”
Click “Next”
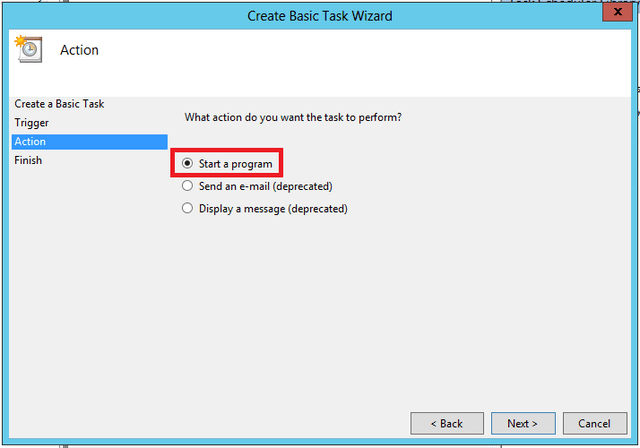
Step 6 – Select the “Action” – In this example we have used “Start a program”
Click “Next”
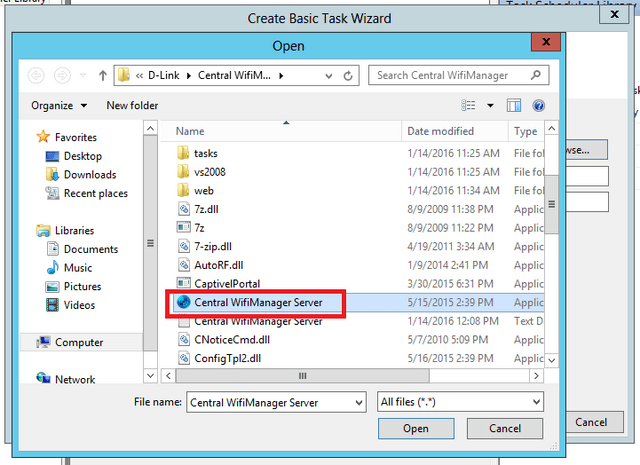
Step 7 – Add the program .exe – In our example CWM-100 is located in the following:
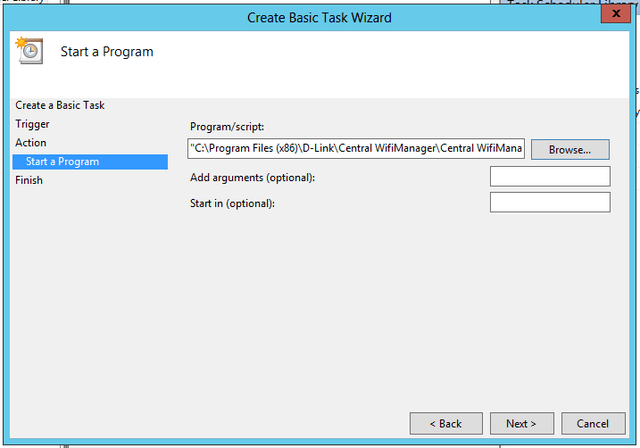
C:\Program Files (x86)\D-Link\Central WifiManager\Central WifiManager Server.exe
Select the “Central WiFiManager Server.exe” then click “Open”
Click “Next”
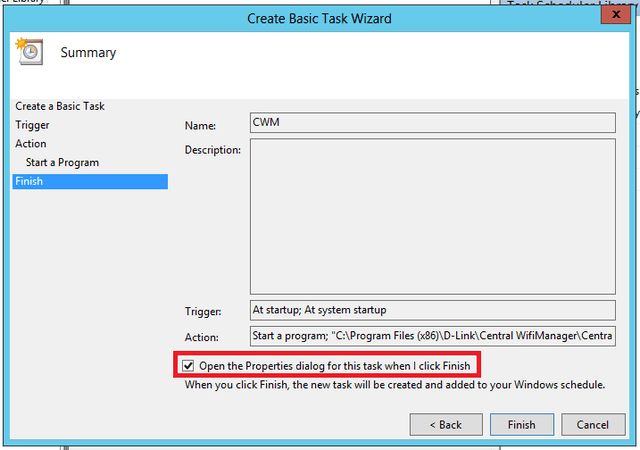
Step 8 – Before you click “Finish” click the box “Open the properties dialog for this task when I click Finish”
Click “Finish”
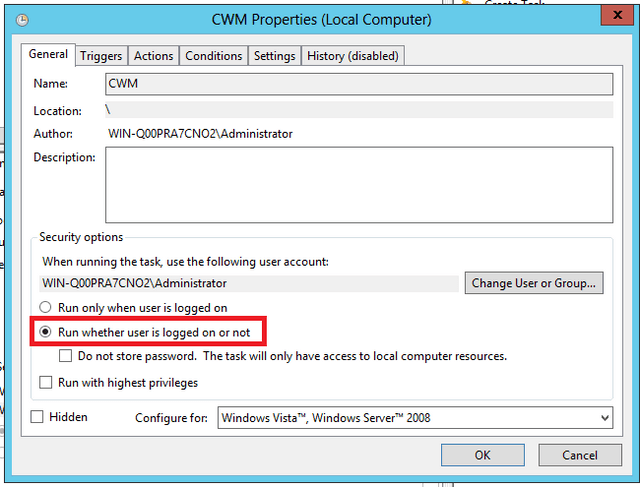
Step 9 – Ensure the program runs without login required – Select “Run whether user is logged on or not”
Click “OK”
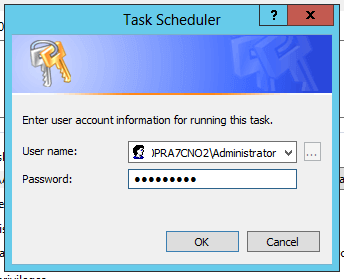
Step 10 – You will need to authenticate with administrative password
Click “OK”
Step 11 – You should have the following screen illustrating the task has been created
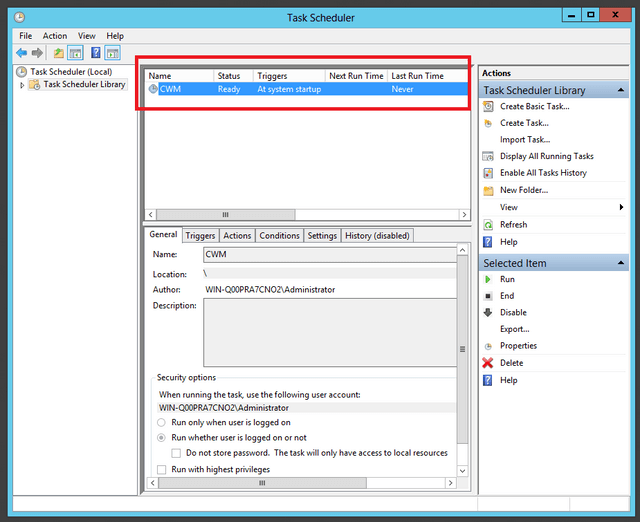
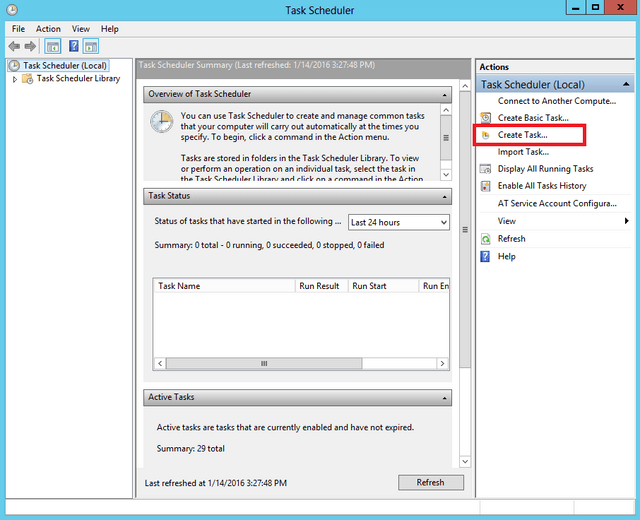
Step 12 – You will need to create a second schedule for when you log off
Click “Create Task”
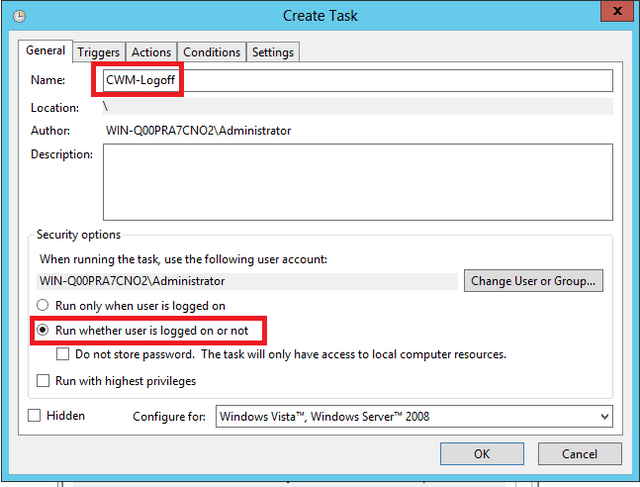
Step 13 – On “General” tab give a name – Our example was “CWM-Logoff”
Select “Run whether user is logged on or not” and click the “Triggers” tab
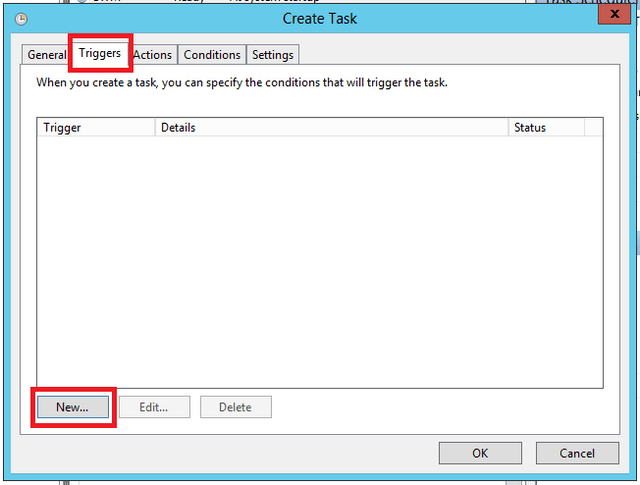
Step 14 – You will need to add a new “Trigger”
Click “New…”
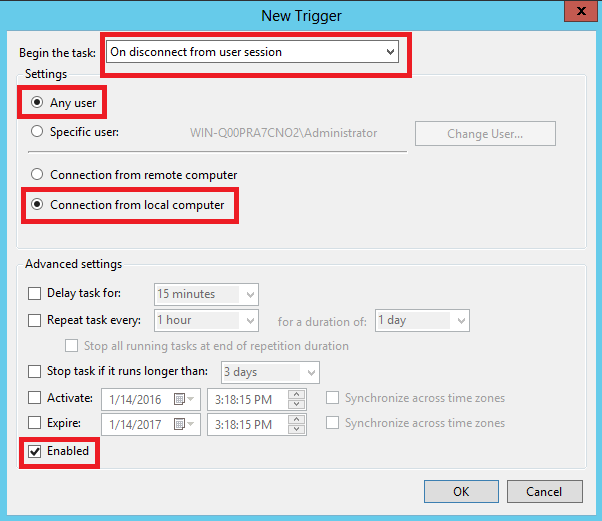
Step 15 – You will need to select “On disconnect from user session” and may use our example for the remaining options (which you may change if required)
Click “OK”
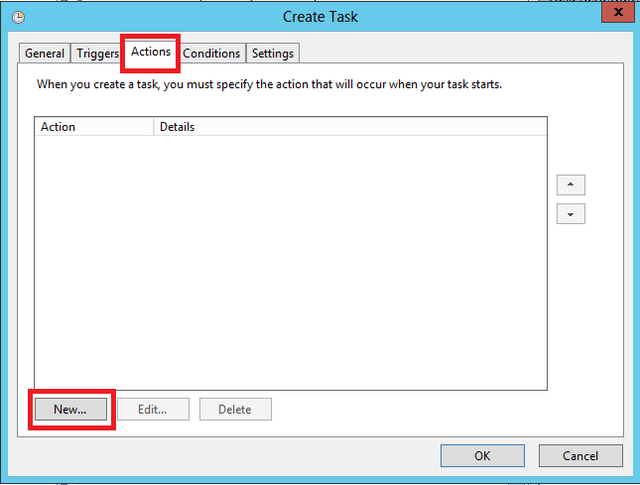
Step 16 – The next task is to create the type of action – Click “Actions” tab
Click “New…”
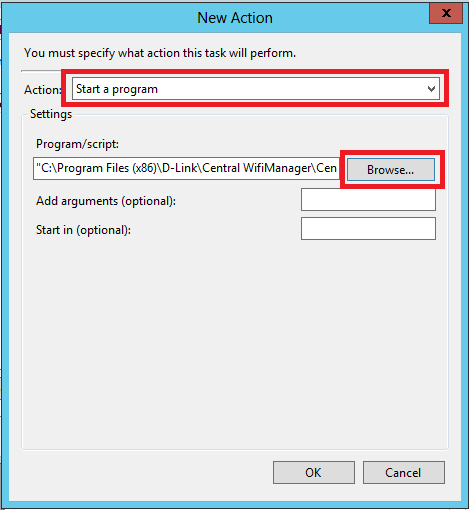
Step 17 – For actions you will need to select “Start a program” then click browse the program .exe – In our example CWM-100 is located in the following:
C:\Program Files (x86)\D-Link\Central WifiManager\Central WifiManager Server.exe
Once selected, click “OK”
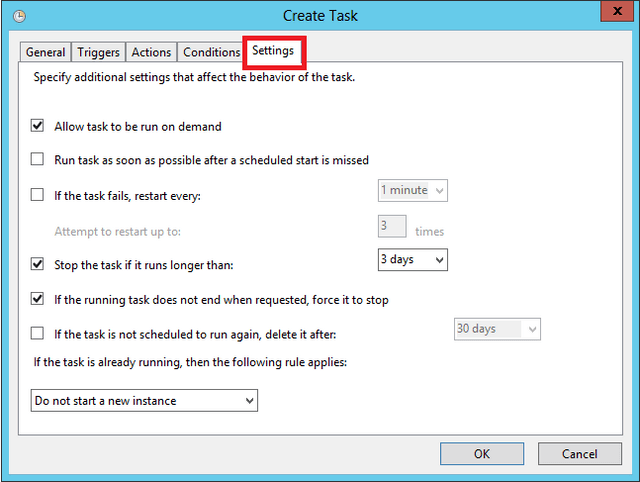
Step 18 – You may leave “Conditions” and “Settings” as default
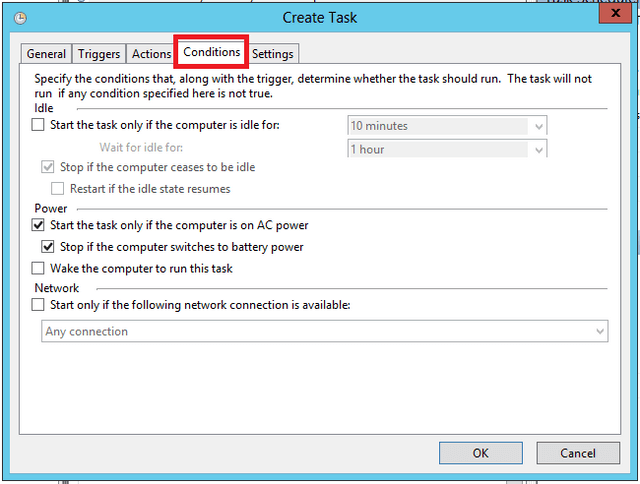
Click “OK”
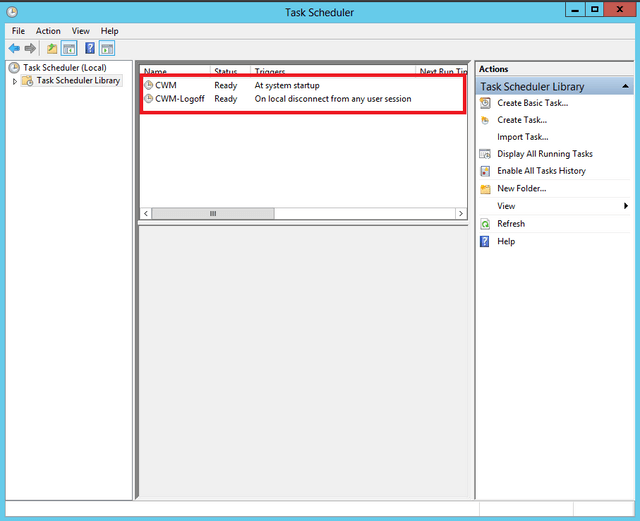
Step 19 – You will see the two schedules created as below
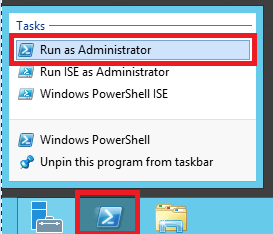
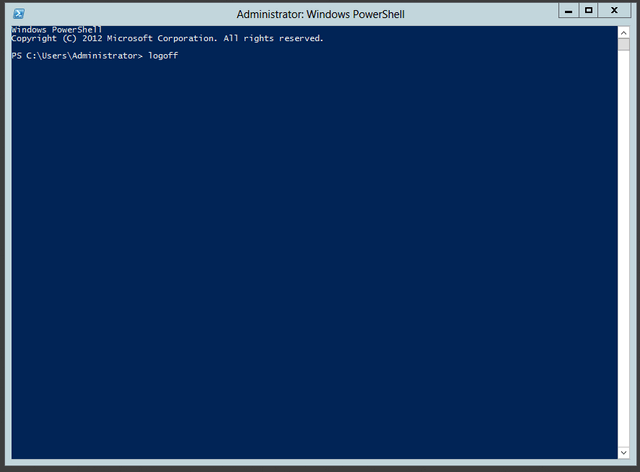
Step 20 – To test this you may conclude the following by logging off – To do this open Power Shell
Right-click and select “Run as Administrator”
Enter the following command:
PS C:\Users\Administrator> logoff
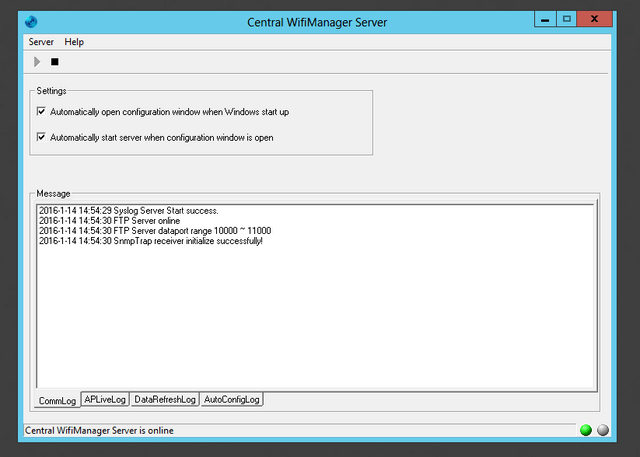
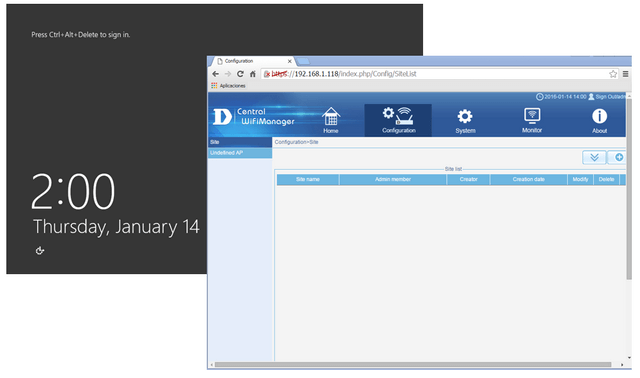
Step 21 – You can see from below that Central WiFiManager is still running and able to access the Web interface from another machine. For example:
https://192.168.1.118
Trouble shooting:
• If you reboot PC/Server and login to user and receive the following message:
Click “Ok”
If you double click the following icon:
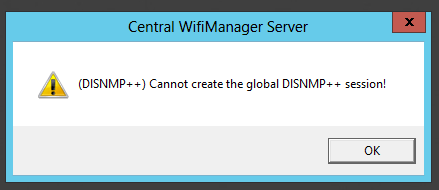
Click “Ok”
NOTE: This is no problem due to the server is running in the background.
However if you would like to either; amend settings on CWM-100 Server or Stop it then please refer to the following:
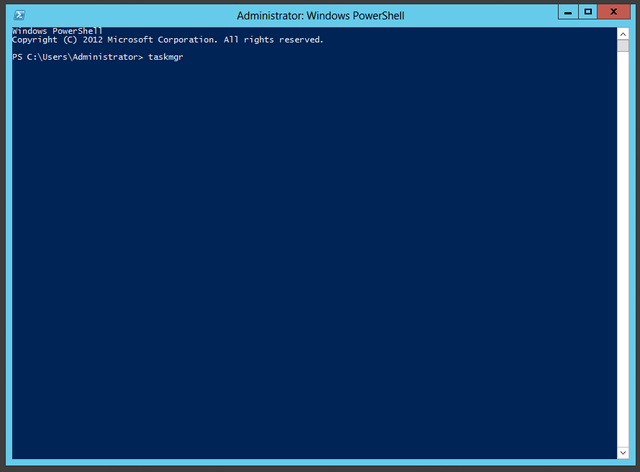
Right-click and select “Run as Administrator”
Enter the following command:
PS C:\Users\Administrator> taskmgr
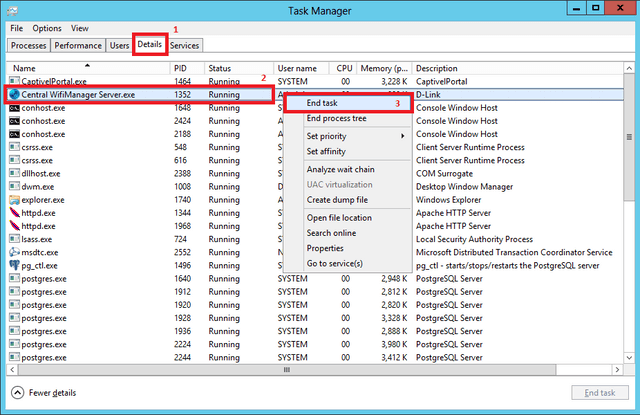
This will open “Task Manager”.
Click “Details” tab and click “Central WifiManager.exe”
Right-click and select “End task”
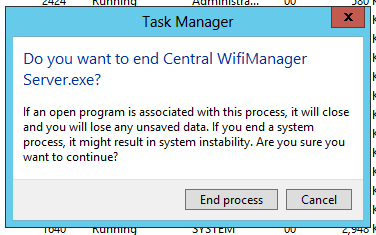
Click “End process”
You will now be able to open “Central WiFiManager Server”
Now you may log off from the user session and Central WiFiManager will still be running in the background.
These may also help:
- How to solve SQL error with CWM-100 Read Answer
- How to Setup Captive Portal and Passcodes CWM-100 Read Answer
- CWM-100 Installation Troubleshooting Read Answer
- How to Setup Multiple SSIDs and VLANs - CWM-100 Read Answer
- How to Setup Bandwidth Optimization - CWM-100 Read Answer
