How to Setup VLANS - Scenario Configuration DGS-1510-Series
Scenario Example (DGS-1510 Stack Core Switch):
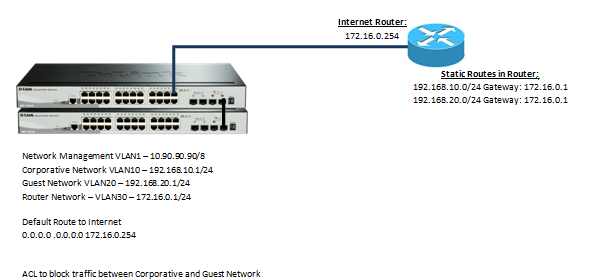
Step 1 – Create VLANS.
L2 Features > VLAN > 802.1Q VLAN
Enter the VIDs into the “VID List” then click “Apply” to each
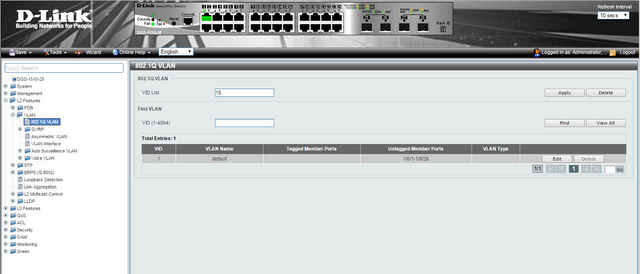
Once you have add all VIDs to the list, you should see the following

Step 2 – Edit “VLAN Name”

VLAN Name: Coporative
Click on “Edit” then modify the name of the VLAN in the corresponding column. Once done and modified, click “Apply”. Repeat this for ALL remaining VLAN Names

Step 3 – Port Configuration
L2 Features > VLAN > VLAN Interface
There are 3 types available and they are as follows:
• Hybrid
• Access
• Trunk
Example of Hybrid:
-One VLAN Untagged (Native)
-Mutiple VLANS Tagged
(VID 2 Untagged, ID 1 y 3 Tagged)

Example of Access:
VLAN2 is in mode Access (Untagged)

Example of Trunk:
Only allow “Tagged” VLANS

Step 3:1 – Port Configuration – VLAN “Coporative”
L2 Features > VLAN > VLAN Interface
On ports 5 to 16 (for each unit) here is where all coporative users will connect to these port in mode “Access”

Step 3.2- Port Configuration – VLAN “Guests”
L2 Features > VLAN > VLAN Interface
On ports 17 to 22 (for each unit) here is where all guest users will connect to these port in mode “Access”

Step 3.3- Port Configuration – VLAN “Router”
L2 Features > VLAN > VLAN Interface
On port 24 where we will be connecting the router

Step 4 – We now need to configure the IP interfaces for each VLAN
L3 Features > IPv4 > Interface
Enter each “Interface VLAN” into the box and click “Apply”
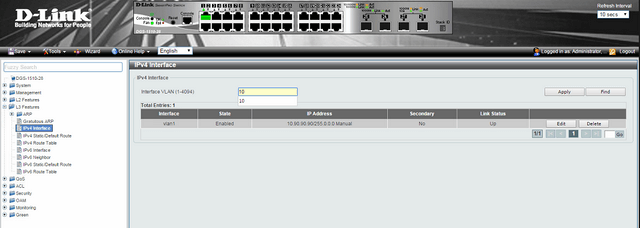
Once added you should have something simular to below

On each corresponding “Interface” click on “Edit” and configure the IP interface per VLAN
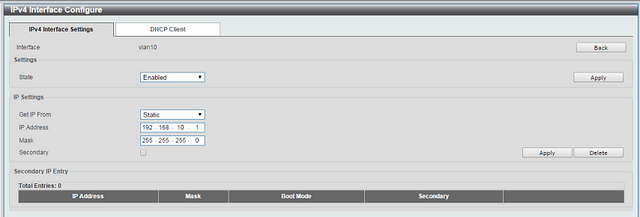
Click “Apply”
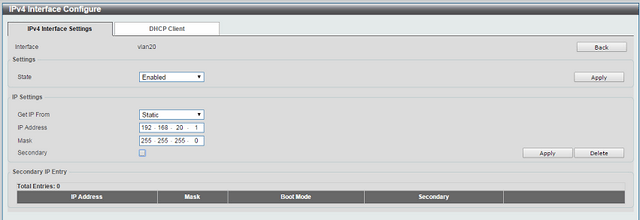
Click “Apply”
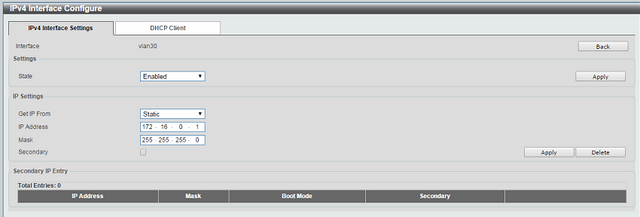
Click “Apply”

Step 5 – Create a static route – Here we need to create a default route to the router which will allow connection to the internet via VLAN30
L3 Features > IPv4 > StaticDefault Route
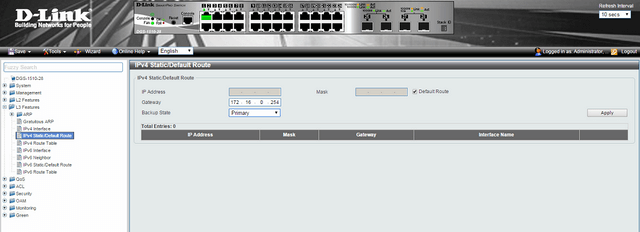
Click “Apply”

Step 6 – Create ACLs to block access from “Guests” network to getting access to “Coporative” network.
ACL > ACL Access List

Select “All” from “ACL Type” then click “Add ACL”
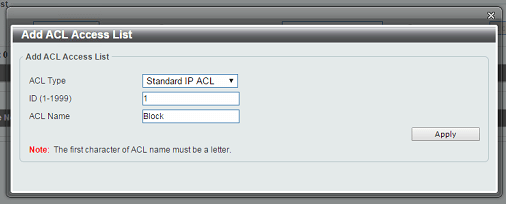
ACL Type: Standard IP ACL
ID: 1
ACL Name: Block
We are denying access from network: 192.168.20.0/24 to 192.168.10.0/24
*Remember that rules are executed sequentially
Click “Apply”
Step 7 – Once created, close the window then click on “Edit”

Once inside, we need to add two rules to the ACL

Click “Apply” then add the inverse rule.
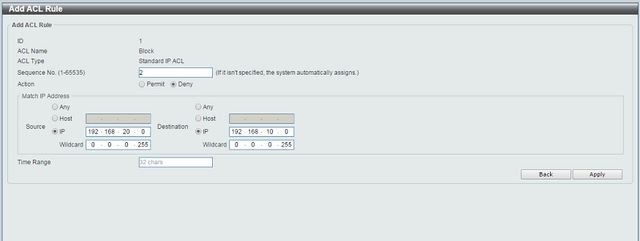
Click “Apply”
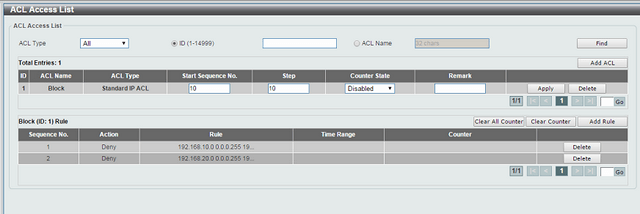
Step 8 – Assign ACLs to the ports involved
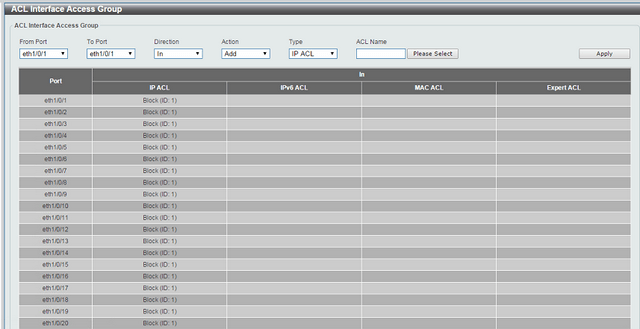
Enter ACL / ACL Interface Access Group and associate the name of the ACL created to the appropriate port
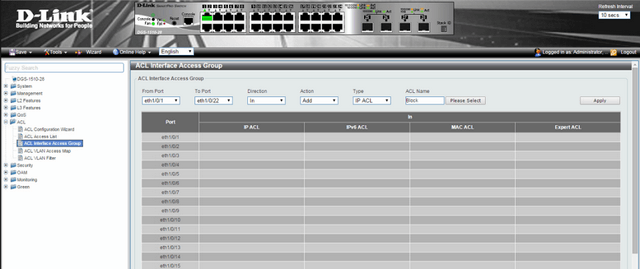
From Port: eth1/01
To Port: eth1/0/22
Direction: In
Action: Add
Type: IP ACL
ACL Name: Block (Name given in Step 6)
Click “Apply”
Dit kan ook interessant zijn:
- How to Configure Link Aggregation LACP - DGS-1510-28 Series? Lees antwoord
- How to Setup VLANS - Scenario Configuration DGS-1510-Series Lees antwoord