How to protect and manage your files with Network Attached Storage
How to protect and manage your files with Network Attached Storage

A hard drive can hold many filing cabinets worth of documents, shelves full of books, and innumerable CDs and DVDs, all in a well-organised and searchable format. However, hard drives aren’t infallible. As any PC technician worth their salt will tell you, the question is not whether a drive will fail, but when.
Enter Network Attached Storage — your protection against the disaster of a fried hard drive. With advanced features like automated backups, remote file access, and the ability to mirror data on two drives for ultimate protection, NAS offers advanced protection and flexibility not found in standard external hard drives.
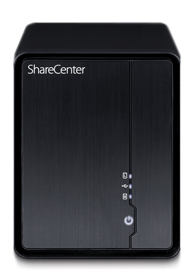
D-Link offers two new NAS devices designed with easy file preservation in mind: the ShareCenter™ 2-Bay Network Storage (DNS-320), which is ideal for file backup, and ShareCenter™ 2-Bay Network Storage which is ideal for media streaming (DNS-325), which offers faster processing and streaming apps so you can easily enjoy videos and music on network-connected devices. These units can be purchased with pre-installed Hard Drives, or you can install your own hard drives of virtually any brand.. So the place to start is to install a pair of identical-capacity drives — a simple, tool-free operation. Then you’re ready to start protecting your files. Here’s how:
1. Set up a RAID 1 volume.
Formatting hard drives for RAID — a Redundant Array of Independent Drives — is a great way to protect digital files. RAID 1 duplicates stored data across a pair of drives, protecting your files should one drive fail.
With ShareCenter™ devices, setting up RAID 1 is easy. D-Link’s ShareCenter™ Setup Wizard walks you through the necessary steps. You’ll choose your drives, specify the RAID level, and wait for the NAS device to configure itself. Once RAID 1 is set up, should one of the drives die, you can simply swap the bad drive for a new one. The array can automatically restore itself using the new drive.
2. Schedule automated backups.
Another great feature of NAS devices is the ability to schedule automated backups so you don’t have to remember to do it manually. Tools included with the DNS-320 and DNS-325 let you back up a shared folder on a networked PC. With ShareCenter™, scheduling automated backups only takes a minute. Just view the Applications tab (Local Backups link), then enable a recurring schedule. You’ll never miss a backup again.
Mac users take note: D-Link ShareCenter™ NAS devices support Apple Time Machine-based snapshot backups. You can enable this feature through the Time Machine link in the Local Backups menu. The Mac will record the state of your system to the NAS and at any given moment restore it to that state when necessary.

3. Access files over the Internet.
Remote access doesn’t protect files, but it does ensure that you’ll always have them when you need them. NAS lets you view, copy, update, and share files from any Internet-connected computer. That’s because every NAS device has its own network address. Assuming your home network is connected to the Internet, you’ll be able to reach your NAS box from virtually anywhere in the world.
D-Link’s ShareCenter™ NAS solutions make it simple to access files remotely. The DNS-320 and DNS-325 have a built-in Web server that lets you view files using a Web browser and a built-in FTP server that lets you download, upload, and modify files from an Internet-connected PC with an FTP app installed.
All told, Network Attached Storage is the simplest way to keep your documents, photos, videos, music, and other files safe. NAS makes a sensible — and powerful — addition to any home network.