Cómo actualizar el firmware DGS-1510-Series - CLI
Requisitos:
Firmware: DGS-1510 Run_1_20_B013 (0417145727) .had (utilizado en este ejemplo)
PuTTY: http://www.chiark.greenend.org.uk/~sgtatham/putty/download.html
Tftp Server: http://tftpd32.jounin.net/tftpd32_download.html
Elija la opción "Standard Edition", ya sea para 32 o 64 bits del sistema operativo
Nota: Por favor, recuerde comprobar si hay nuevas actualizaciones de firmware, vaya a nuestro sitio web:
http://www.dlink.com/es
Una vez que haya descargado el firmware correcto e instalar el software mencionado anteriormente, por favor continúe con el Paso 1
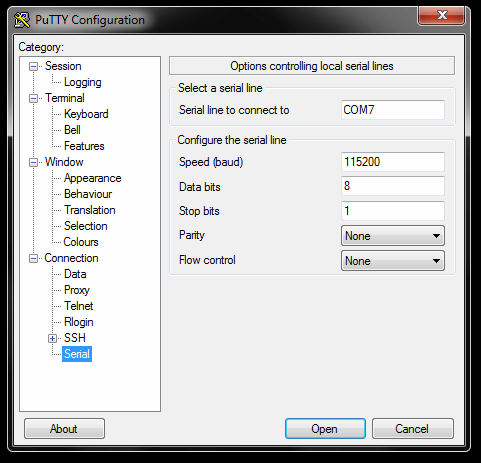
Paso 1 - conectarse a la consola puerto de DGS-1510-Series y configurar PuTTy de la siguiente manera:
Nota: COM7 se utiliza en nuestro ejemplo, sin embargo, puede ser diferente en su PC / ordenador portátil. (Para comprobar esto, se tendrá que ir al administrador de dispositivos)
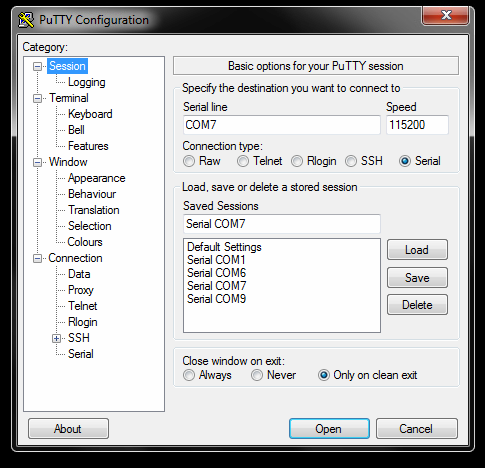
Paso 2 - Una vez configurado, haga clic en "Session" e introduzca un nombre en "Saved Sessions". Haga clic en "Save" y luego "Load"
Paso 3 - Una vez cargado, pulse la tecla enter y crear un usuario
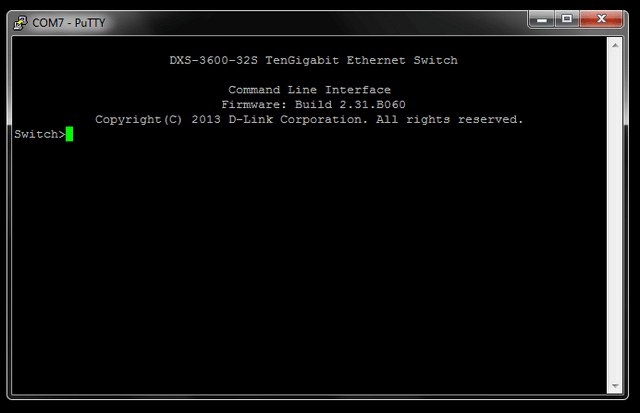
Switch>enable
Switch#configure terminal
Paso 4 - Crear usuario con privilegios correctos
(Si ya ha hecho esto, por favor continúe con el paso 5)
Switch(config)#username admin password admin
Switch(config)#username admin privilege 15
Switch#copy running-config startup-config
Destination filename startup-config? [y/n]: y
Saving all configurations to NV-RAM.......... Done.
Switch#end
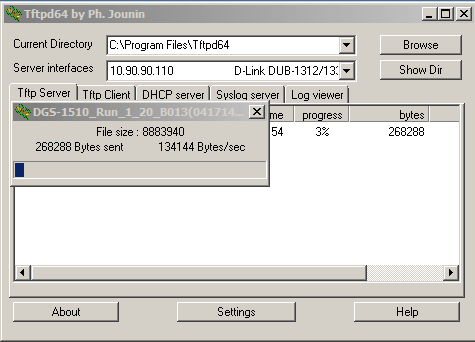
Paso 5 - Abrir servidor TFTP y copie los archivos en el directorio raíz:
Current Directory: C:\Program Files\Tftp64
Server interfaces: 10.90.90.110 (esta es la dirección del servidor TFTP)

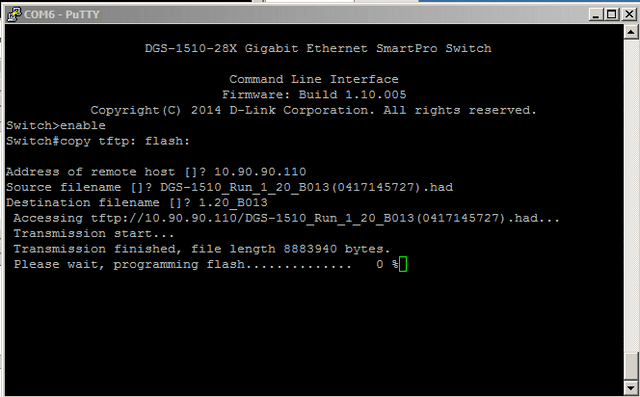
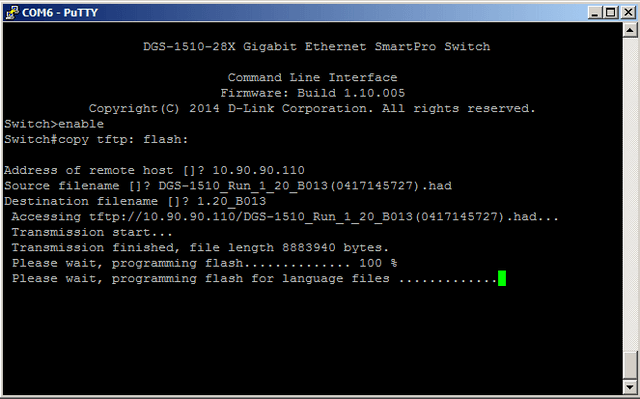
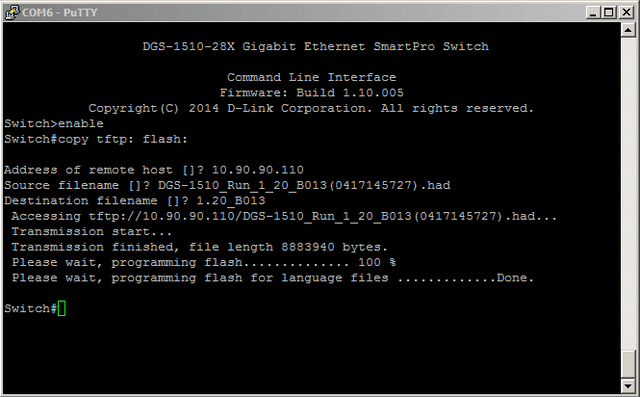
Paso 6 - Procedimiento de actualización del firmware
Switch#copy tftp: flash:
Address of remote host []? 10.90.90.110 (this is the address of the tftp server)
Source filename []? DGS-1510_Run_1_20_B013(0417145727).had
Destination filename []? 1.20_B013
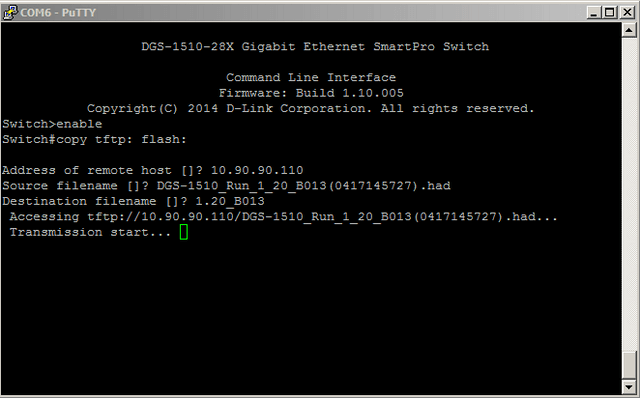
También se dará cuenta que el servidor TFTP se iniciará el proceso de transferencia (como la imagen de abajo)
Paso 7 - Guardar configuración en la NVRAM
Switch#copy running-config startup-config
Destination filename startup-config? [y/n]: y
Saving all configurations to NV-RAM.......... Done.
Paso 8 - Comprobar el firmware que se utiliza para el arranque
Switch#dir
Directory of /c:
1 -rw 8419464 Jan 01 2000 0001 2000 00:05:25 1.20_B013 In this example we are changing to this firmware
2 -rw 8071740 Jan 01 2000 0001 2000 00:08:35 runtime.had
3 -rw 34486 Jan 01 2000 0001 2000 00:15:57 config.cfg
4 d-- 0 Jan 01 2000 0001 2000 00:00:02 system
30656000 bytes total (13521408 bytes free)
Paso 9 - Cambiar el archivo de inicio
Switch(config)#boot image 1.20_B013
Switch(config)#end
Switch#reboot
Are you sure you want to proceed with the system reboot?(y/n) y
Paso 10 - Verificar el firmware se ha utilizado en el arranque
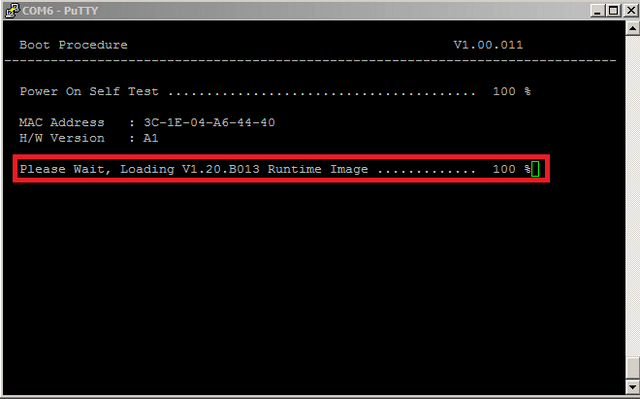
Si se le pasa por encima de la pantalla a continuación, introduzca el siguiente comando:
Switch# show boot
Unit 1
Boot image: /c:/1.20_B013
Boot config: /c:/config.cfg