How to Setup Event and Action with PTZ Camera – DCS-250
System Setup Requirements and Devices Used:
• DCS-7010L – Fixed Mini Bullet
• DCS-6616 - Speed Dome + Pre-set Positons Setup
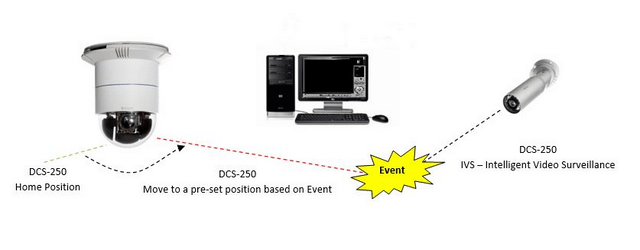
Note: Before continuing, this manual assumes you have completed and understood the setup of IVS. If not, we have a document which explains this setup
Step 1 – If the above have been completed all we need is to associate an event with an event type
Spanner Icon > Video Analytics > IVS – Intelligent Video Surveillance
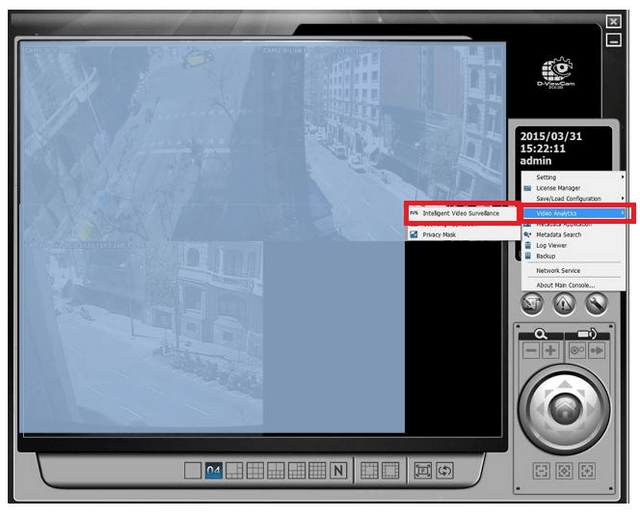
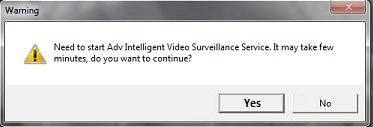
Click “Yes”

Step 2 – We need to add a new line to an existing IVS and add a new line
In our example, we have given the following details:
Name: Movement
Colour: Yellow
Counting Line: (Direction A) (this is the direction which will trigger event)
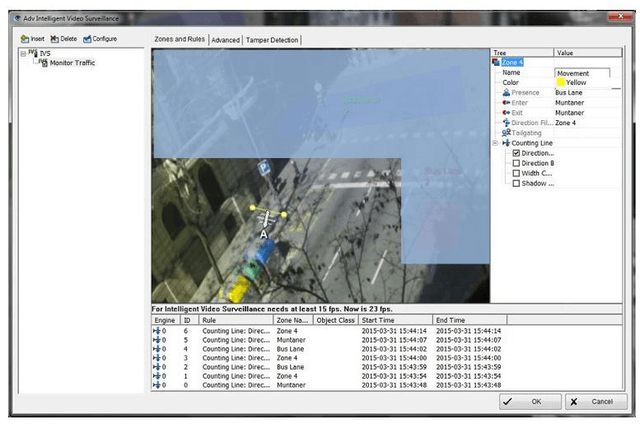
Click “OK”
You will see the following “Confirmation Prompt”
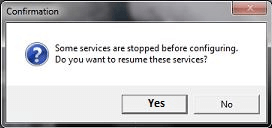
Click “Yes”
Step 3 – Once the above has been completed, you will now need to setup and event and action – To do this, click on “Smart Guard Configuration”, click on the (+) for “Intelligent Video Surveillance” then select you’re IVS. In our example our IVS is “Monitor Traffic”, then click “Insert”
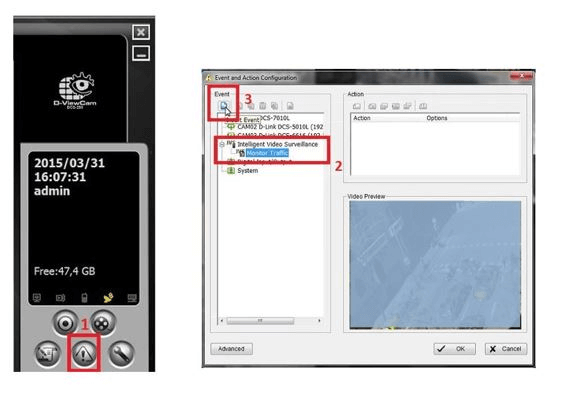
Step 4 – Select the event created in Step 2, in our example it was:
“Movement: Zone 4-Cnt Line – Dr A”
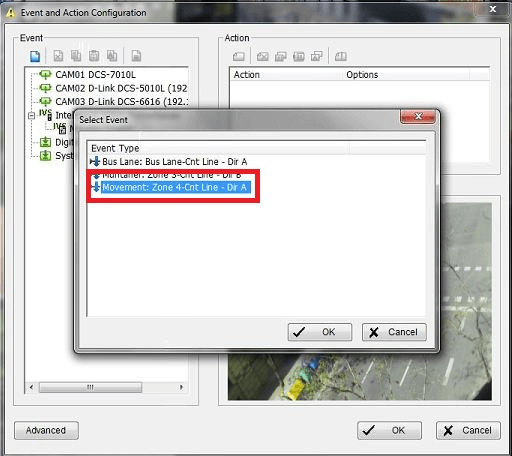
Click “OK”
Step 5 – You will now need to configure the alarm event. In our example we have given as per default
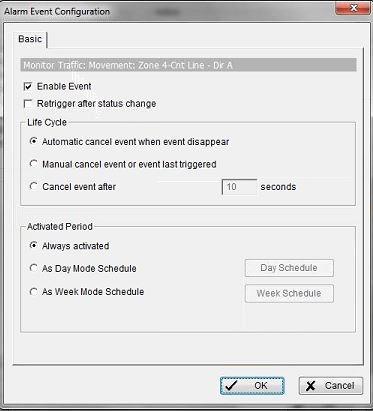
Click “OK”
Step 6 – Once you have completed the “Event” you need to configure an action for the event. To do this, click on “Insert Action”
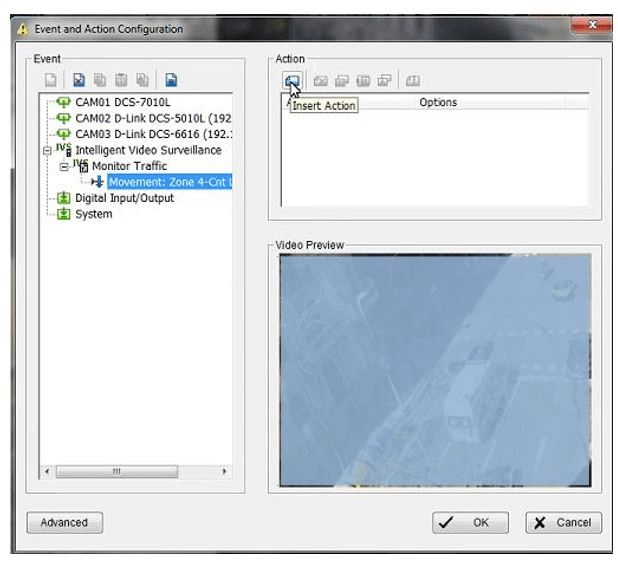
You may choose from 11 options available. However, we have chosen “PTZ Preset Go”.
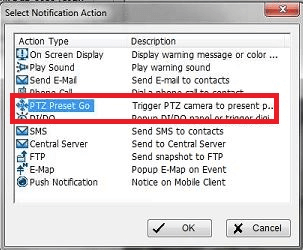
Click “OK”
Step 7 - Configure the “PTZ Camera Preset Go” and select the camera from the drop-down box
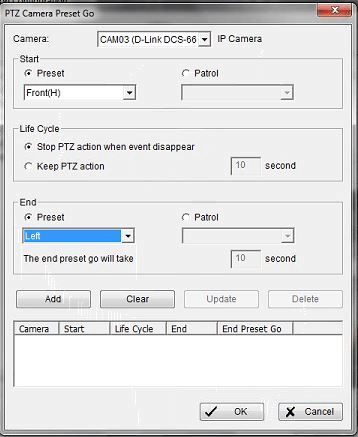
Camera: CAM03 (D-Link DCS-6616)
Start: Select Preset (Front(H) – this refers to a pre-set position set on the camera
Life Cycle: Stop PTZ action when event disappear
End: Left – this refers to a pre-set position set on the camera
Click on “Add”
Step 8 – Once done, you should see the settings have been added
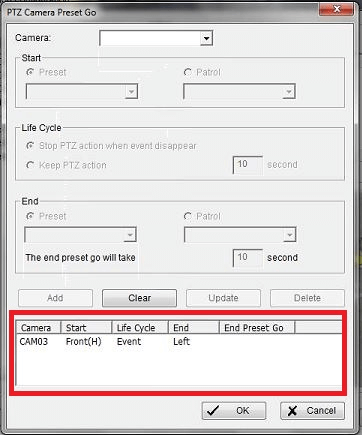
Click “OK”
Step 9 – At this stage all the necessary components should have been configured and you should see the following:
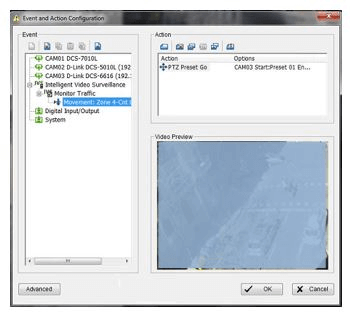
To finalize, click on “OK”
Step 10 – To make sure this setup will take affect when DCS-250 open, you must add “Smart Guard System” service to the “Startup”
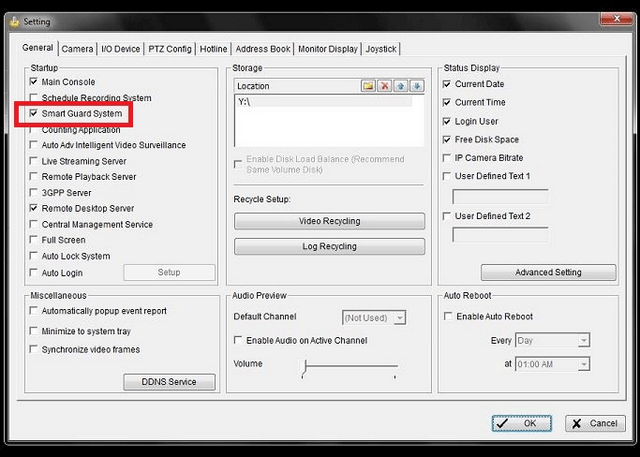
Click “OK”
Result:
The overall result of this example is that any object that passes over the line we created in Step 2, will trigger an event and send a signal to the DCS-6613 camera to move to a pre-set positon. Once the event has finished the DCS-6613 will return to its default position.
These may also help:
- How to Activate Licenses via Off-Line Activation – DCS-250 Read Answer
- How to Auto Backup Settings with Email Alert – DCS-250 Read Answer
- How to Change the Default Folder and Record to a Mapped Drive – DCS-250 Read Answer
- How to Install Remote Desktop and Run Service – DCS-250 Read Answer
- How to Playback Recordings and Export – DCS-250 Read Answer
- How to Setup Event and Action – Tamper or Obscured View – DCS-250 Read Answer
- How to Setup Motion Detection – DCS-250 Read Answer
- How to Setup Privacy Mask – DCS-250 Read Answer