How do I setup a scheduled recording in my DNR-312L?
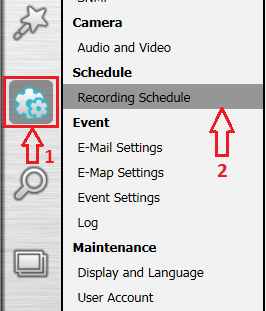
Step 1 – Click the settings icon (marked as 1 in the image below). Then click “Recording Schedule”-
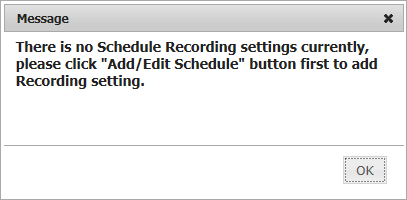
Step 2 – The first time you go to the Recording Schedule page, you will see the message below.
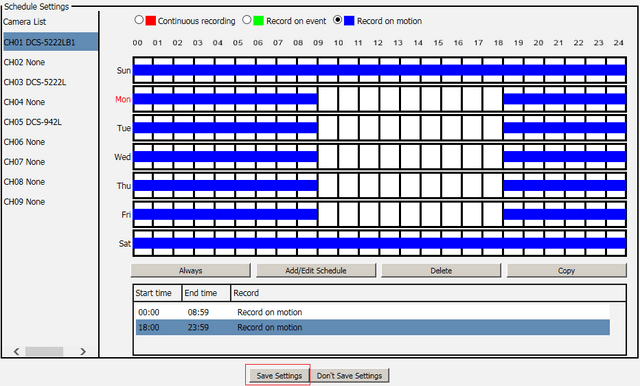
Step 3 – To setup a schedule for the first camera, simply click “Add/Edit Schedule”. Here you can select the type of recording you want (constant, only record on a specific event, or only record on motion). You can set the start time and end time, and day of the week. Click “OK” to add the schedule.

Step 4 – You can add multiple schedules per day, for instance if you want to set your camera only to record motion outside or business hours, or only overnight, then you can click “Add/Edit Schedule” again and add a second schedule.

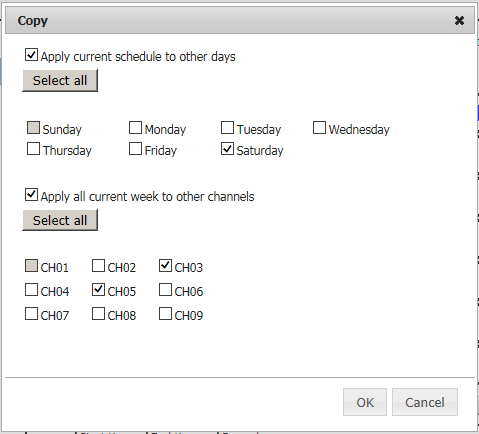
Step 5 – If you want to copy the same schedule to different days or different cameras, ensure you have the schedule highlighted and click “Copy”. Here, you can select which other day(s) top copy the schedule to. If you only want to copy to other cameras, deselect the “Apply current schedule to other days” option. Select the option “Apply all current week to other channels” to apply all of the current camera’s schedule to other cameras.
Step 6 – Once all schedules are in place, click “Save Settings” in order to save the schedules.
These may also help:
- How do I add a camera to my DNR-312L? Read Answer
- How do I playback and export video on my DNR-312L Read Answer
- How do I remove a camera from my DNR-312L? Read Answer
- How do I setup motion detection in my cameras using my DNR-312L? Read Answer
- How do I backup video data from my DNR-312L? Read Answer