How to Configure Multiple SSIDs and VLANs - DWS-3160-Series
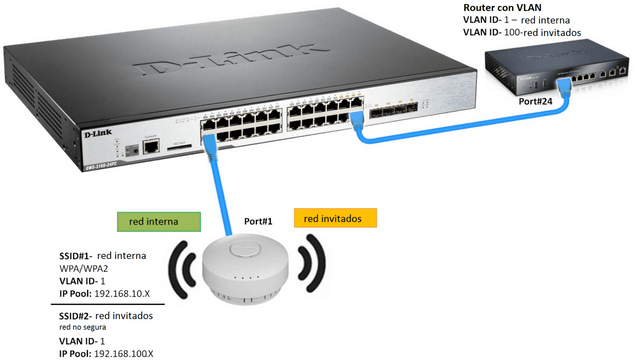
In this example we will demonstrate how to configure the DWS-3160 with two separated by VLAN, one for the internal network of the company SSIDs and other guest users
Note: To provide internet to different VLAN, you need the router / firewall can be configured VLAN.
In this example we will use the following VLAN:
VLAN 1: Internal company network
VLAN 100: Guest users
Physical connections:
DWL-6600 connected to the Port 1
Router with access to Internet, VLAN and DHCP server for each VLAN connected to Port 24
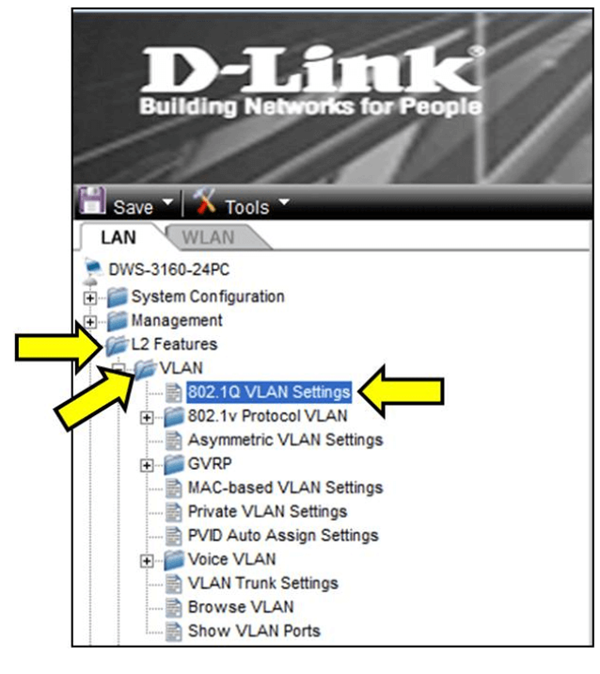
Step 1 - On the web configuration of the DWS-3160, click the “LAN” tab and then L2 Features > VLAN > 802.1Q VLAN Settings
Note: By default all ports belong to VLAN 1 (default)
Step 2 - Click on “Edit” to edit the VLAN 1

Step 3 - In each port having an access point connected, the port must be configured as Tagged. This is to allow the access point to understand traffic from VLAN 1 (in this example, the access point is on Port 1)
In the port where you connected the router must be configured as Tagged for the traffic of VLAN 1 to pass from router to the DWS-3160
Note: If you have a switch that needs to send traffic on this VLAN, the port will also have to be Tagged. If a port connects a computer and that computer belongs to VLAN, that port will have to be Untagged. If a port does not belong to the VLAN, you have to configure as Not Member
Once completed, then click “Apply"

Step 4 - Click on the “Add/Edit VLAN” tab to create VLAN 100

Step 5 – Configure an ID for the VLAN VID (in this example 100)
In each port having an access point connected, the port must be configured as Tagged. This is to allow the access point to understand traffic from VLAN 100 (in this example, the access point is on Port 1)
In the port where you connected the router must be configured as Tagged for the traffic of VLAN 100 to pass from router to the DWS-3160
Note: If you have a switch that needs to send traffic on this VLAN, the port will also have to be Tagged. If a port connects a computer and that computer belongs to VLAN, that port will have to be Untagged. If a port does not belong to the VLAN, you have to configure as Not Member
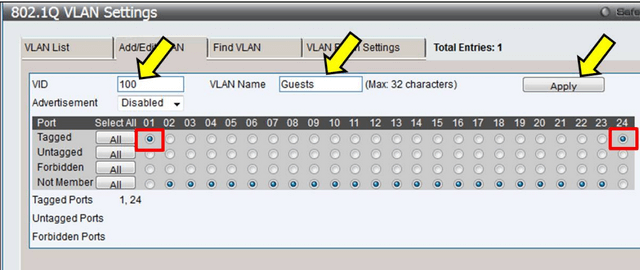
Once completed, then click “Apply”
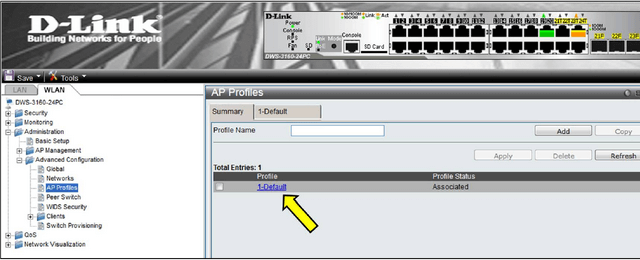
Step 6 - Click on the “WLAN” tab then go to
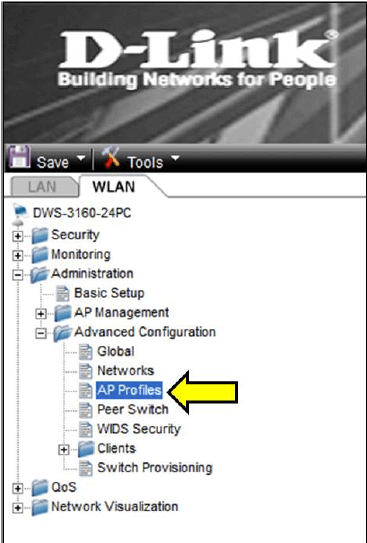
Administration > Advanced Configuration > AP Profiles

Step 7 - Click the “1-Default” profile
Step 8 - Click on the “VAP” tab, select the band you want to set the SSID, then click on the “Edit” button of the first SSID to configure
Note: If you have an access point Dual Band, as the DWL-6600, DWL8600 or DWL-8610 remember to configure both bands. If you don’t the access point will continue broadcasting the SSID of the band with the default name (for example; dlink1)
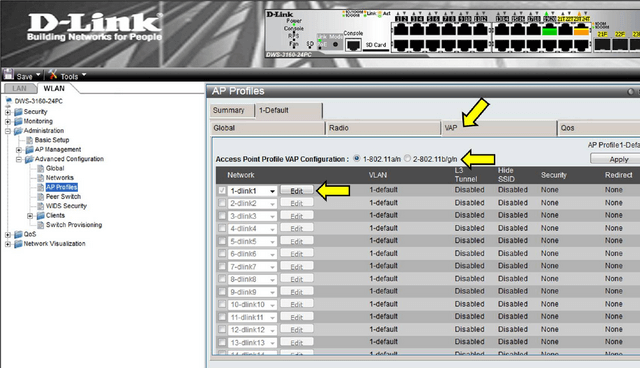
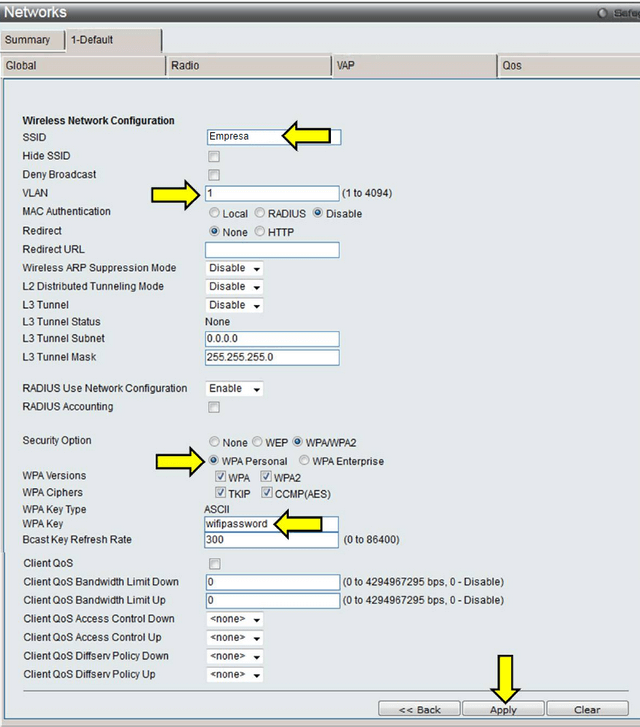
Step 9 - Set the SSID 1 (internal network)
SSID: Set a name for the (eg, company) network
VLAN: Specify the VLAN to which the SSID belongs (ie, VID 1)
Security Option: Set the type of network security
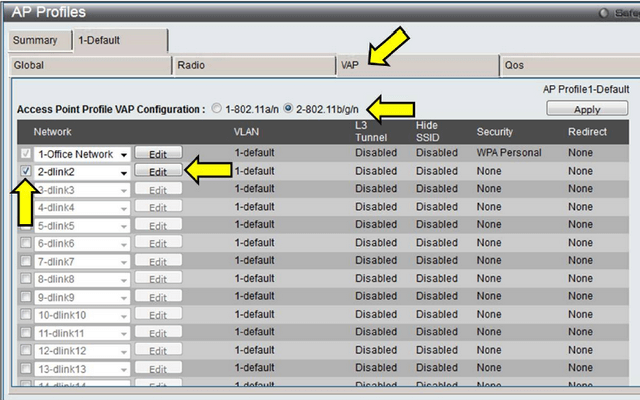
Step 10 - Click again on the “VAP” tab, select the band and click “Edit” for the second SSID
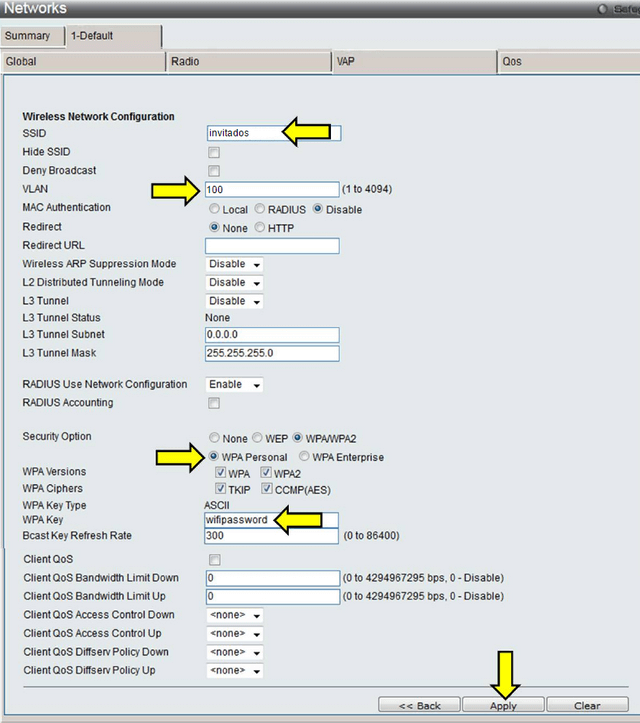
Step 11 – Configure SSID 2 (guest network)
SSID: Set a name for the network (eg, guests)
VLAN: Specify the VLAN to which the SSID belongs (ie, VID 100)
Security Option: Set the type of network security
Step 12 - Go to Administration > Advanced Configuration > AP Profiles
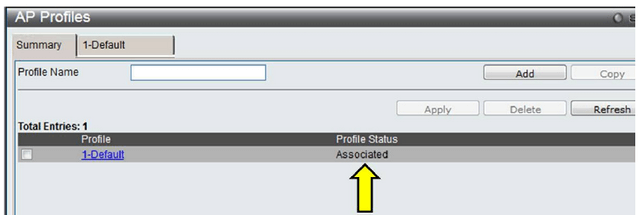
Step 13 – You will notice after changes have been made, the “Profile Status” will show “Associated – Modified”.
Click on the tick-box next to the profile name and then click “Apply” button to apply the changes to the DWS-3160 on access points

When the status changes to “Associated”, all access points will be emitting a wireless signal with the configured SSIDs
Step 14 -To save your settings click Save > Save Configuration/Log
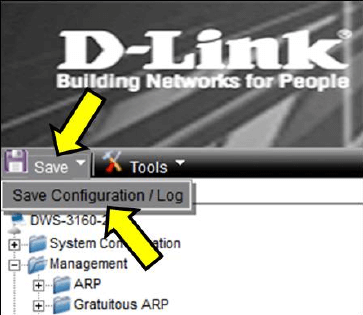
Click “Apply” – When you see the message “Success” this will mean all changes will retain on boot.
Ceci peut également aider.
- How to Upgrade a Managed Access-Point via tftp and SSH - DWS-3160-Series Lire la réponse