
How to recover my DSR 250V2 from tftp
Topology:port DSR-250V2 LAN-------PC
Setup Steps:
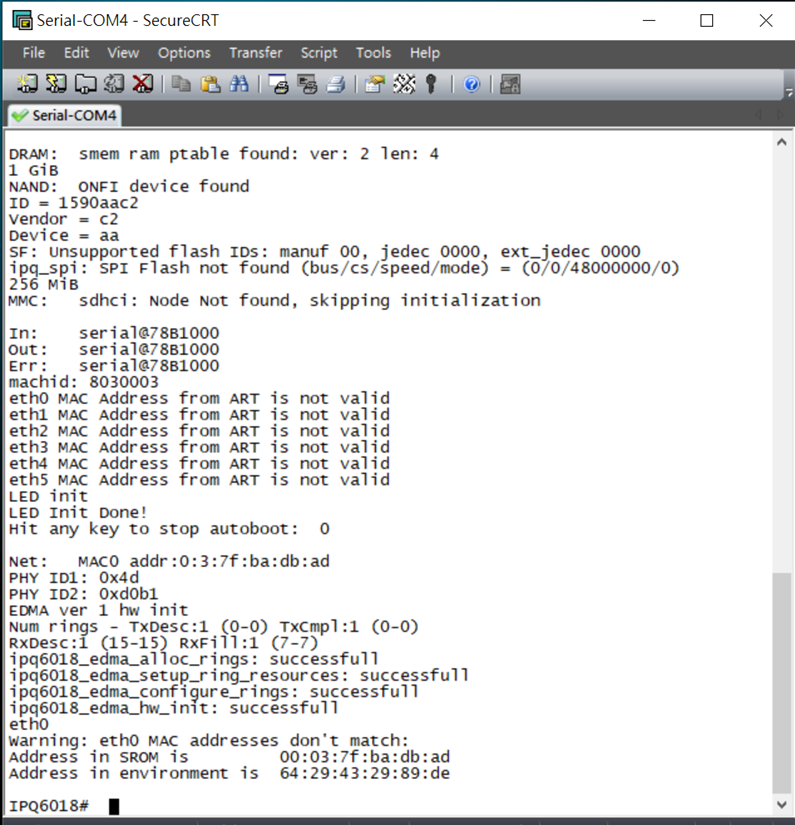
1. DSR250V2 Upgrade Procedure from Bootloader first.
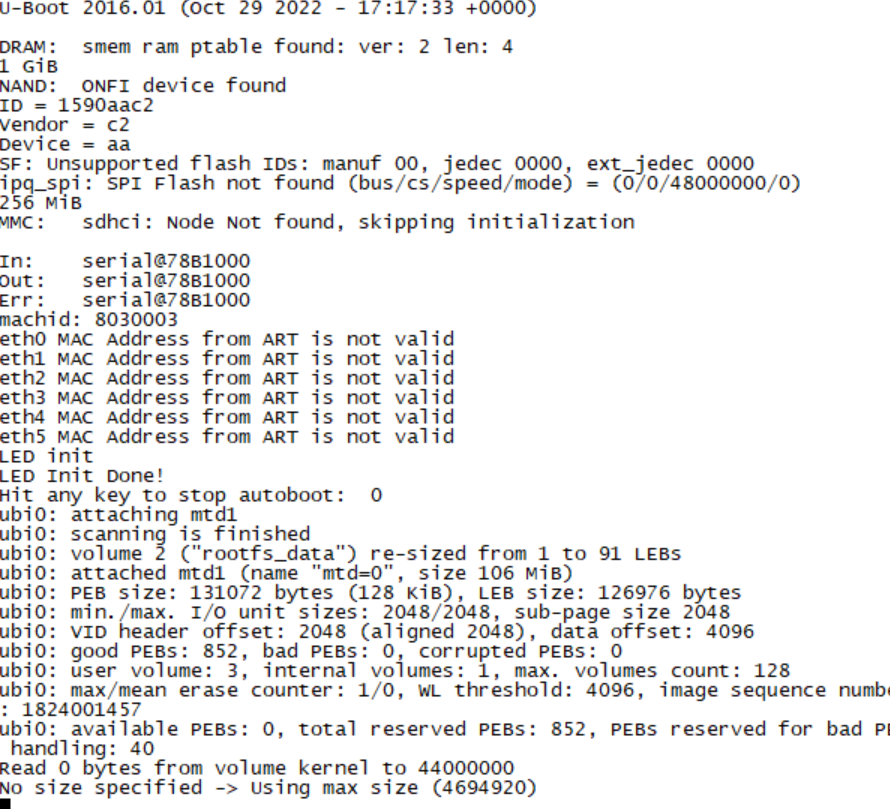
1.1 PC use SecureCRT to connect to DSR-250V2 LAN1 and Power on into Bootloader via LAN. (press “space” when turn on device)
2. Tftp server: use tftp64 to setup for connection
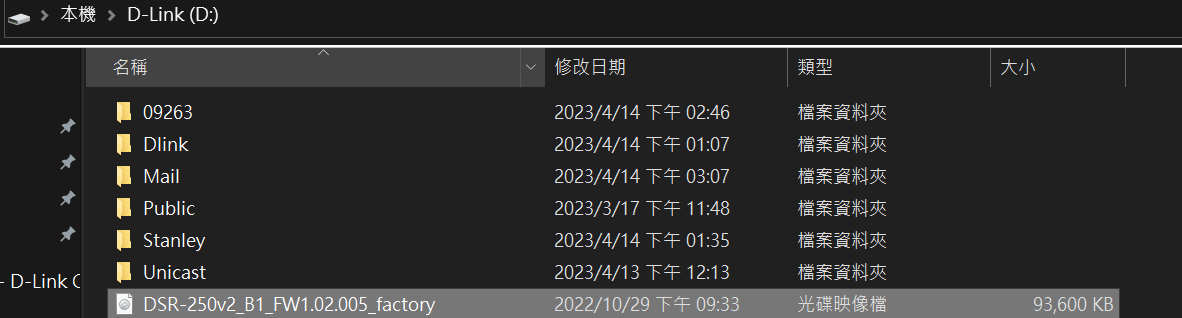
2.1 Put the file: “DSR-250v2_B1_FW1.02.005_factory” in D:\ in your PC
2.2 Below is by used Tftpd64 which can be downloaded from Internet first.
Select Current Directory in D:\ to match your file in PC local location.
Select for LAN interface, and record this tftp IP address

3. Router update procedure for DSR-250V2 HW:B1 FW: 1.02.B005
Note: upload version: HW:B1 FW: DSR-250v2_B1_FW1.02.005_factory
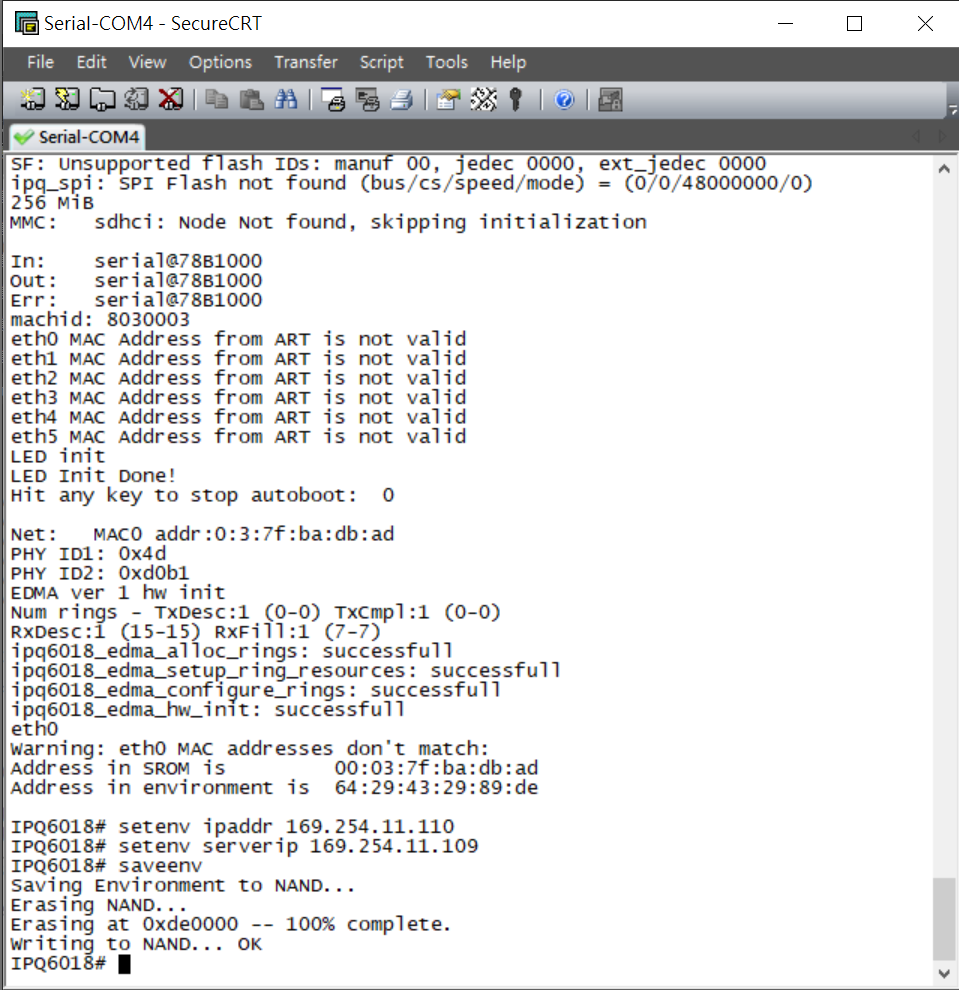
3.1 Execute the following commands to set server and device IP in LAN,
before starting the upgrade:
- setenv ipaddr <<device-ip-address>>
(ex: set up 169.254.11.110 due to tftp IP is 169.254.11.109)
- setenv serverip <<server-ip-address>>
(ex: for this case: 169.254.11.109)
- saveenv
Please refer to the screenshot below.
3.2 Ping the Server IP from Bootloader to test the server reachability.
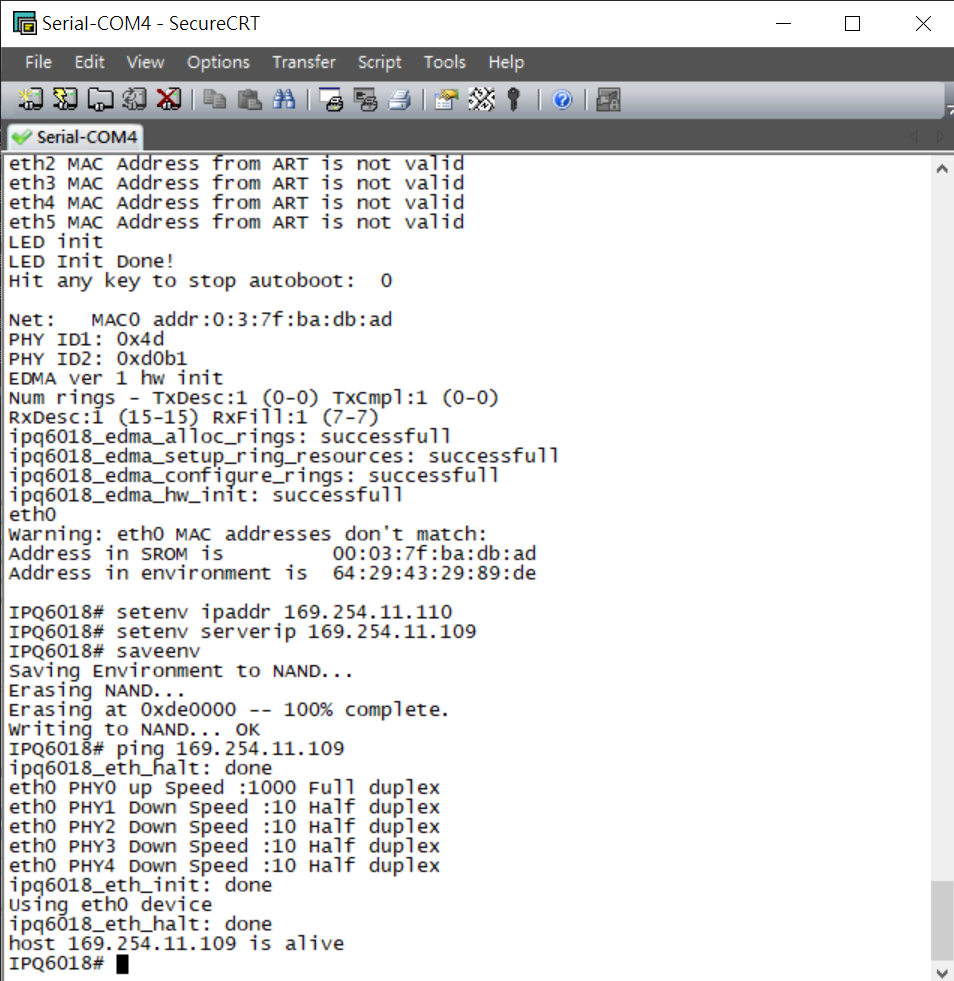
Note: If Ping can not access, please disable the firewall first.
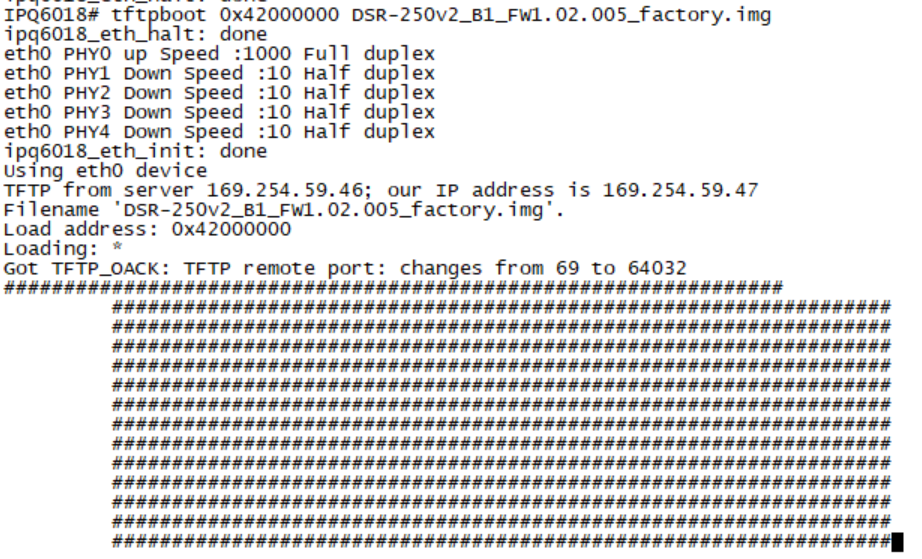
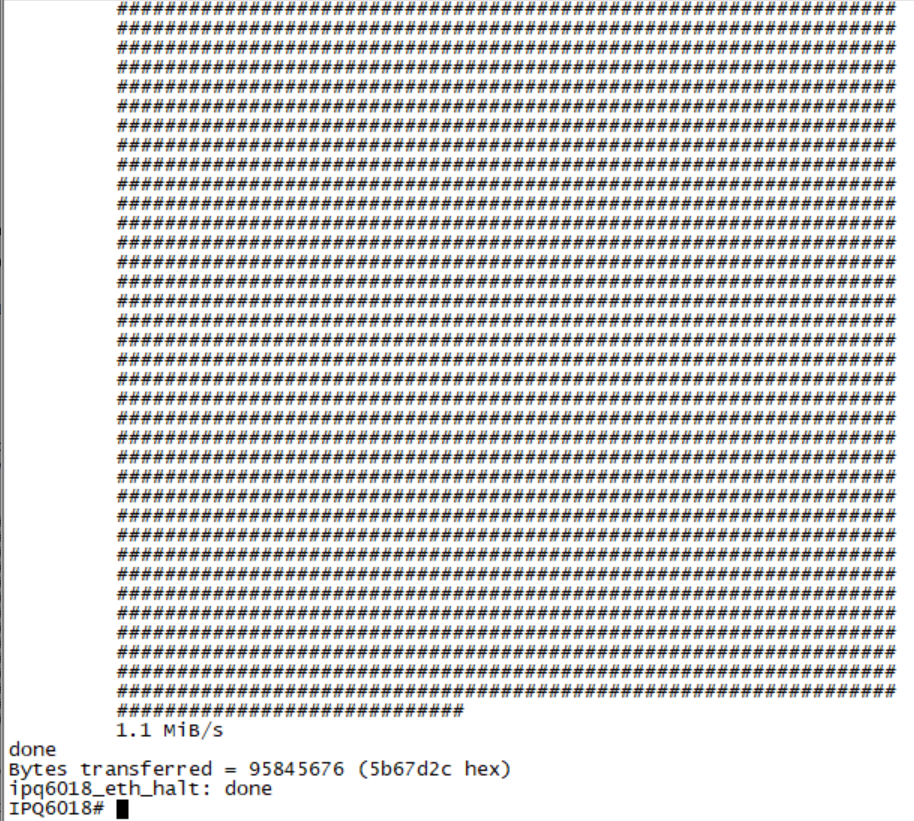
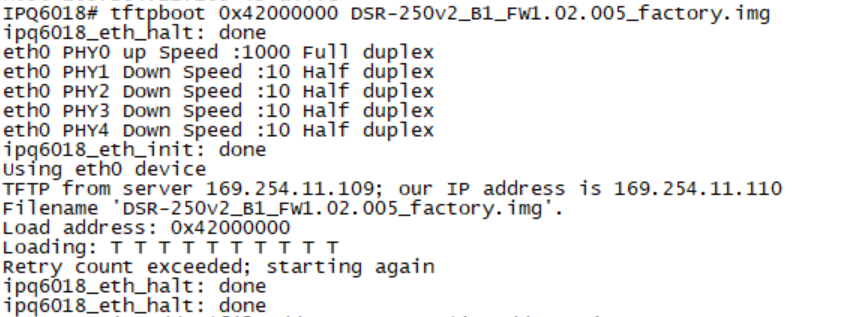
3.3 Now execute the below commands to upgrade the device to new firmware:
-tftpboot 0x42000000 DSR-250v2_B1_FW1.02.005_factory.img
If encounter below timeout situation, please disable the firewall first,
- imgaddr=$fileaddr && source $imgaddr:script
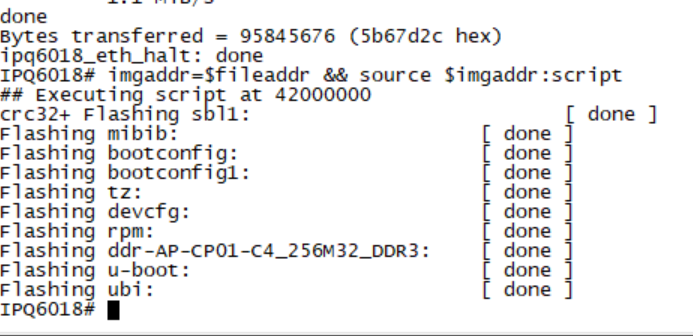
- reset
3.4 After reset command, Firmware will boot 'DSR-250V2' will be prompt.
You may need to set your PC IP to 192.168.10.2 with Gateway 192.168.10.1 when connecting to DSR-250V2 192.168.10.1 after reset.
Then you can access to DSR-250V2 WebGUI successfully then updating FW to MP version as normal process.
0 Други потребители намират това за полезно.
Беше ли това полезно за Вас?0 Други потребители намират това за полезно.
Благодарим Ви за обратната връзка.
Съжаляваме, че не успяхме да помогнем! Натиснете тук за повече Въпроси и отговори или за да отидете в секция Поддръжка.