How to Configure Captive Portal with a Personal Account - DWC-1000?
If you have a captive portal with temporary accounts must be taken into account that, on the contrary, the account entered manually into the local database can share the Portal but can not share the same wireless SSID; Therefore, you must create an SSID for users with temporary accounts and another SSID for users created manually.
Step 1 – Create a New Group – ADVANCED - Users – Group - Add
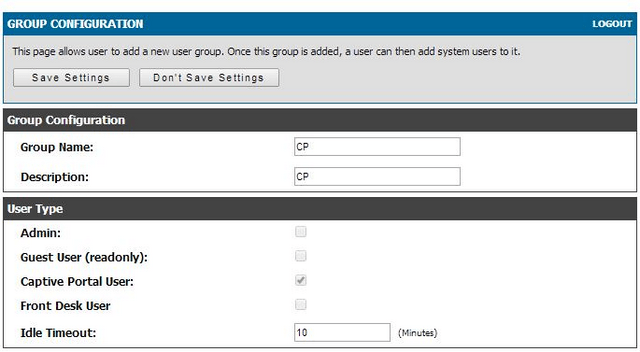
In this example, we have used the following as follows:
Group Name: CP
Description: CP
Captive Portal User: Enable this option
Save Settings
Step 2 – Create a User - ADVANCED - Users – Users – Add
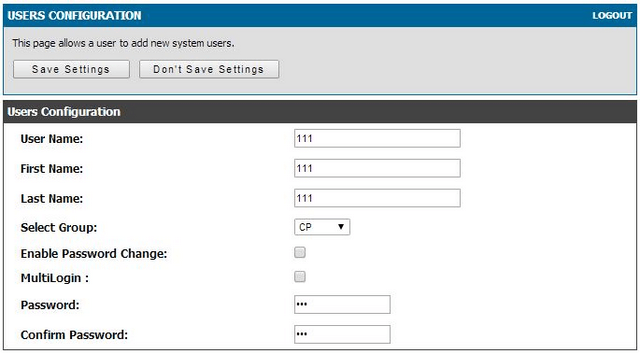
In this example, we have used the following as follows:
User Name: 111
First Name: 111
Last Name: 111
Select Group: CP
Password: Enter a password
Confirm Password: Re-enter the password
Save Settings
Step 3 – Create or Modify the “Landing Page” for the Captive Portal
– SETUP – Captive Portal – Captrive Portal Setup - Add /Edit
Here you can either create a new “Landing Page” or Edit an existing
*default cannot be edited

To add a new “Landing Page” – Click on “Add”

Profile Name: CP
Browser Title: Captive Portal

Step 4 – Associate the Captive Portal to the wireless network SSID
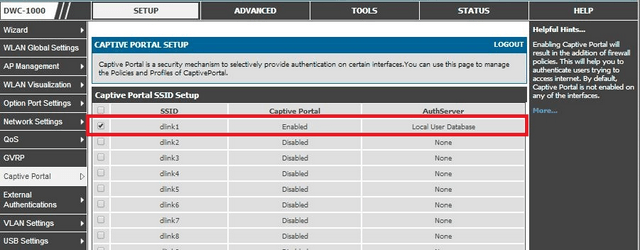
Select the SSID and Click on “Edit”
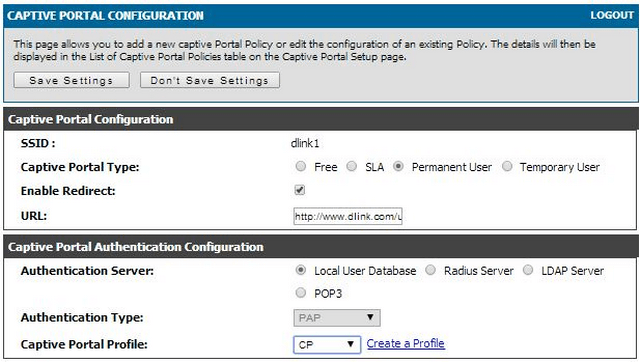
SSID: dlink1
Captive Portal Type: Permanent User
Enable Redirect: Optional
URL: http://www.dlink.com/uk/en/
Authentication Server: Local User Database
Authentication Type: PAP
Captive Portal Profile: CP
Save Settings