How to Complete the Recovery Process for the DWC-1000?
NOTE – The recovery process will need the following:
• Console Cable
• tftp server
• Firmware - You can use any firmware to recover the DWC-1000
• PuTTy
Step 1 – Connect the serial port of the DWC-1000 with your PC
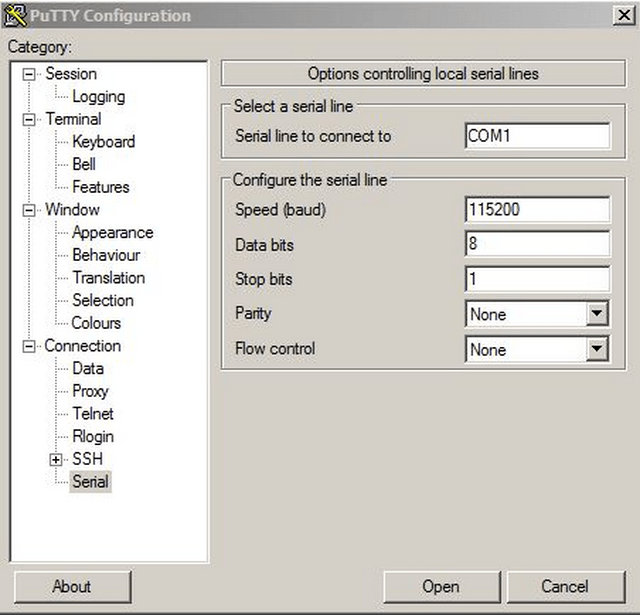
Step 2 – Open PuTTy and setup a COM port with the following settings:
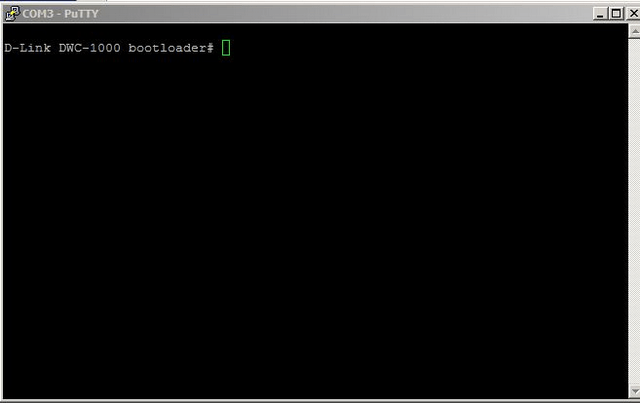
Step 3 – Once configured, click on “Open” to show the following:
D-Link DWC-1000bootloader# prompt
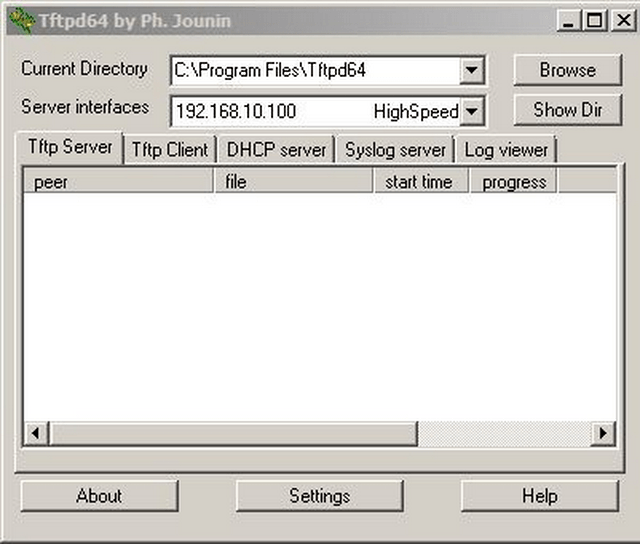
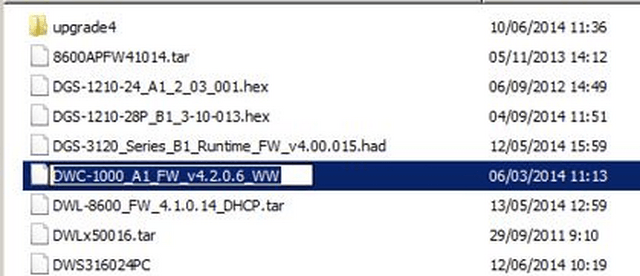
Step 4 – Open the tftp server on your host machine and put the above firm (DWC-1000_A1_FW_v4.2.0.6_WW) into the root folder of the tftp server
For example: C:\Program Files\Tftpd64
C\Program Files\Tftpd64, you must also select the IP of where the tftp Server resides on. In this example it is 192.168.10.100
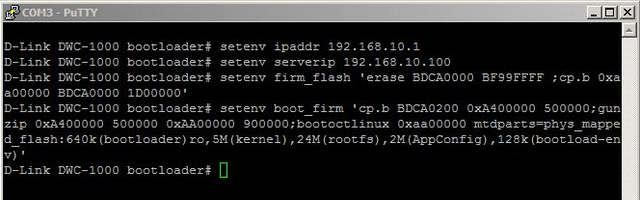
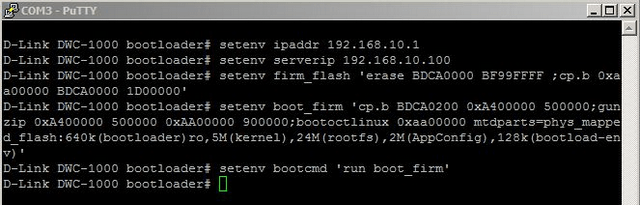
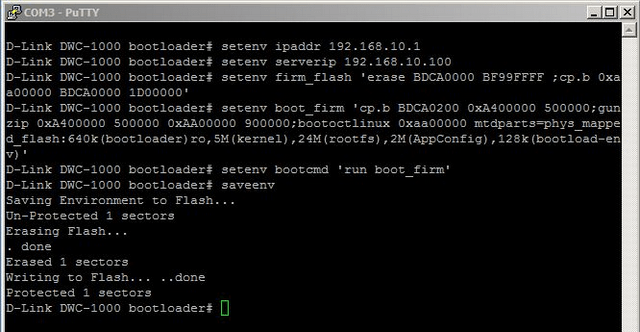
Step 5 – Set the environment variables: (Copy and paste into CLI)
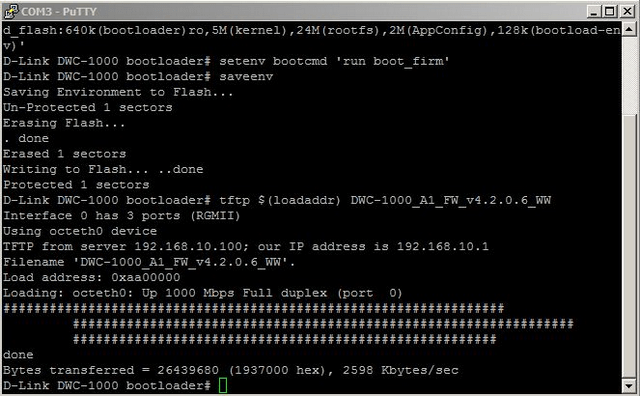
D-Link DWC-1000 bootloader# setenv ipaddr 192.168.10.1 <DWC-1000's IP in the subnet of Host>

D-Link DWC-1000 bootloader# setenv serverip 192.168.10.100 <Host IP where tftp server is running>

D-Link DWC-1000 bootloader# setenv firm_flash 'erase BDCA0000 BF99FFFF ;cp.b 0xaa00000 BDCA0000 1D00000'

D-Link DWC-1000 bootloader# setenv boot_firm 'cp.b BDCA0200 0xA400000 500000;gunzip 0xA400000 500000 0xAA00000 900000;bootoctlinux 0xaa00000 mtdparts=phys_mapped_flash:640k(bootloader)ro,5M(kernel),24M(rootfs),2M(AppConfig),128k(bootload-env)'
D-Link DWC-1000 bootloader# setenv bootcmd 'run boot_firm'
D-Link DWC-1000 bootloader# saveenv
D-Link DWC-1000 bootloader# tftp $(loadaddr) DWC-1000_A1_FW_v4.2.0.6_WW
Copy the full name of firmware (as above) and paste it at the end of the command.
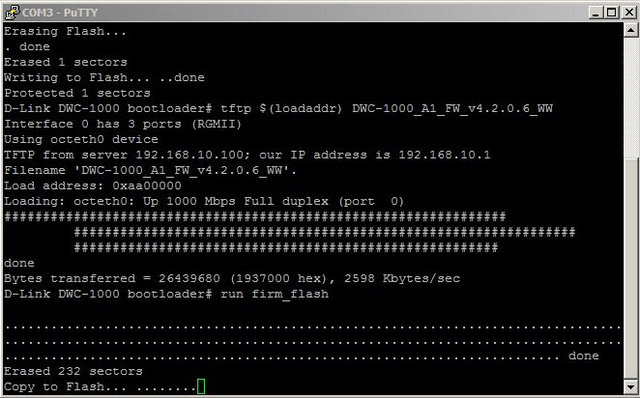
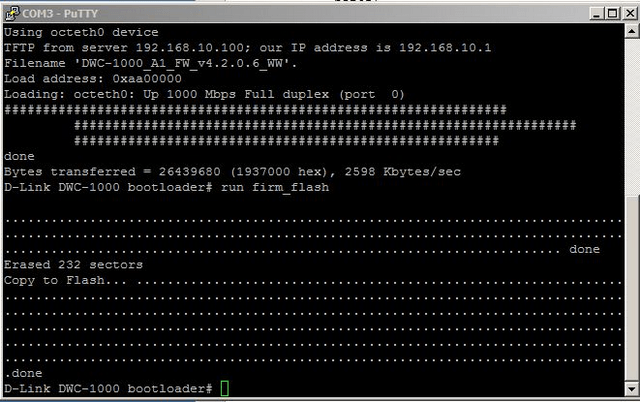
D-Link DWC-1000 bootloader# run firm_flash

This will begin flash the DWC-1000 with the firmware…
D-Link DWC-1000 bootloader# run boot_firm
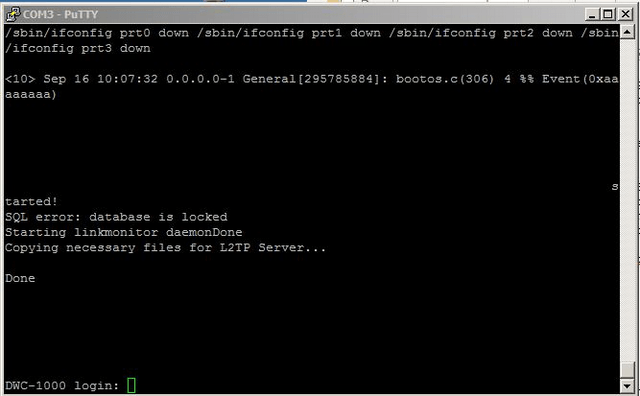
Step 6 – Login (CLI)

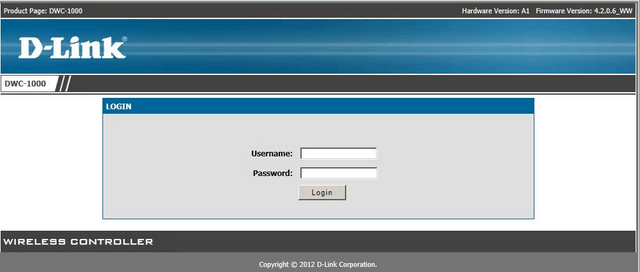
Step 7 – Login (GUI)