HOW to Setup Two VLANS - DSR-Series
Network Configuration:
This setup consists of separating two networks by the creating two VLANS on the DSR Series Service Router. This example will use the following setup:
Network 1 – 192.168.10.0 /24 - Default
Network 2 – 192.168.20.0 /24 – VLAN20
Step 1 – Enter the web GUI interface of the DSR using its IP address in a web browser. In our example we have used the IP address of 192.168.10.1

Accept any certificate warnings you may see, this is perfectly normal and safe
Step 2 – You should then be presented with the login page
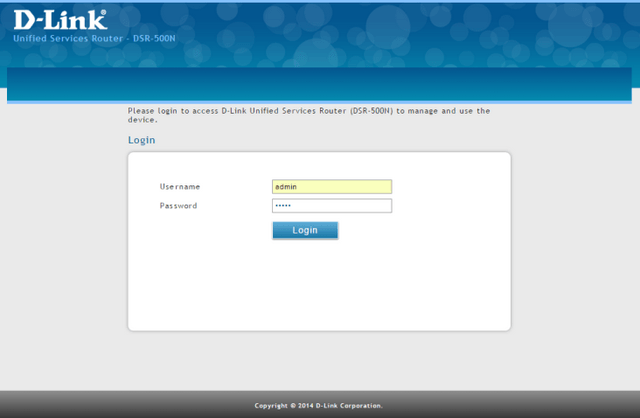
Username: admin
Password: admin
Click “Login”
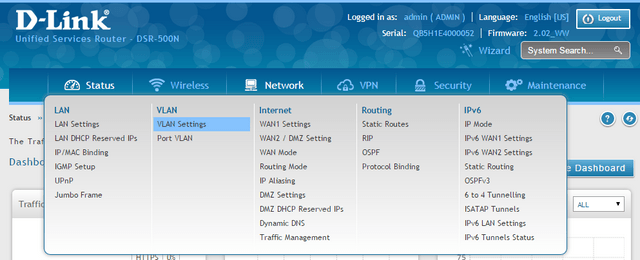
Step 3 – Click on the following options to setup VLANS
Network > VLAN > VLAN Settings
Step 4 – Here you must firstly enable VLAN then click “Save”
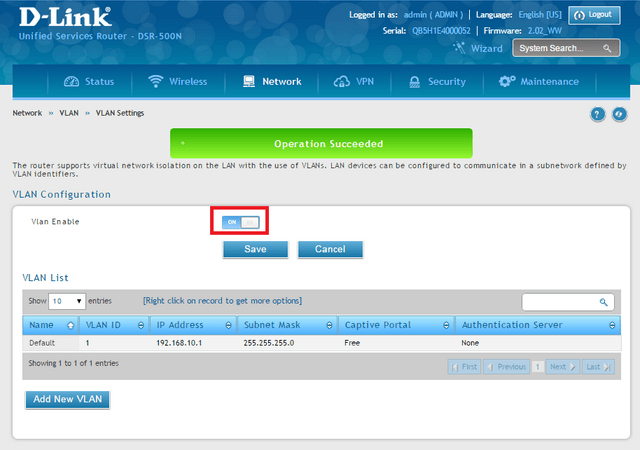
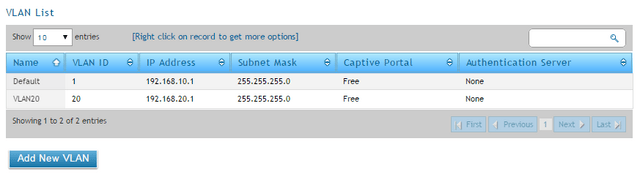
Step 5 – Once saved, click “Add New VLAN”
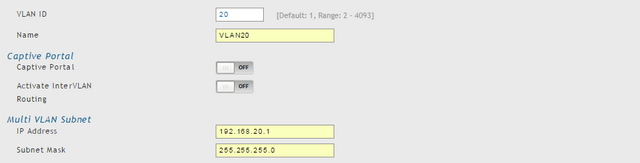
VLAN IP: 20
Name: VLAN20
Capital Portal: Off
Activate InterVLAN Routing: Off
(InterVLAN Routing can stay “Off” this way there is no way that both networks will see each other
Multi VLAN Subnet: 192.168.20.1
Subnet Mask: 255.255.255.0
Step 5 – Click on the option “DHCP Server”
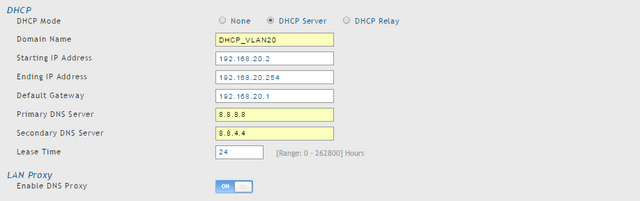
Domain Name: DHCP_VLAN20
Starting IP Address: 192.168.20.2
Ending IP Address: 192.168.20.254
Default Gateway: 192.168.20.1
Primary DNS Server: 8.8.8.8
Secondary DNS Server: 8.8.4.4.
Lease Time: 24
LAN Proxy: On (Default)
If you have a DHCP available for this new subnet, then click “DHCP Relay” and configure according to this network requirements. Once done, click “Save”
Within our example, we have used VLANID 20 for network 192.168.20.0/24. After clicking on “Save” our second VLAN will have been created
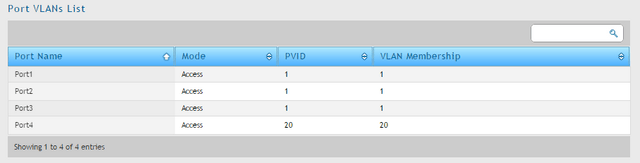
Step 6 – The next step is to associate the VLAN with a port or certain ports. We will associate with Port 4
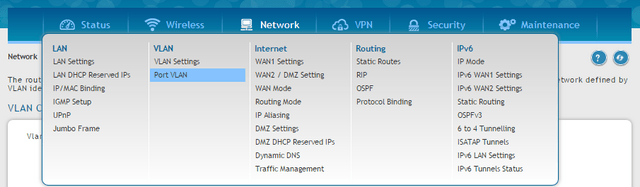
Network > VLAN > Port VLAN
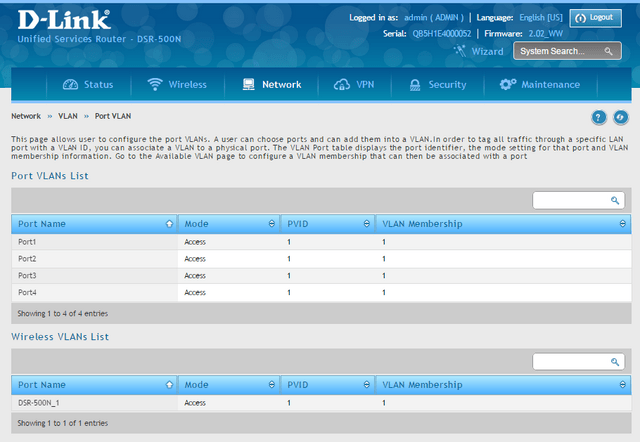
Step 7 – In our example we are going to associate VLAN20 to Port 4. To do this, place the mouse over Port 4 and Right-Click then click on “Edit”

Step 8 – Once clicked on “Edit”, we will need to select “Mode” as “Access” with a PVID 20 (Step 5)

Once done, click on “Save”
NOTE: If you intend to connect a non-manageable switch to port 4 which doesn’t support VLANS then the mode “Access” is correct.
However, if you are planning to connect a manageable switch that does understand VLANS then you will need to select “Trunk” and VLAN Membership 20
