How do I export video from my DNR-326?
Step 1 – If you have not already done so, you should install the D-ViewCam NVR software, which is on CD that came with your DNR.
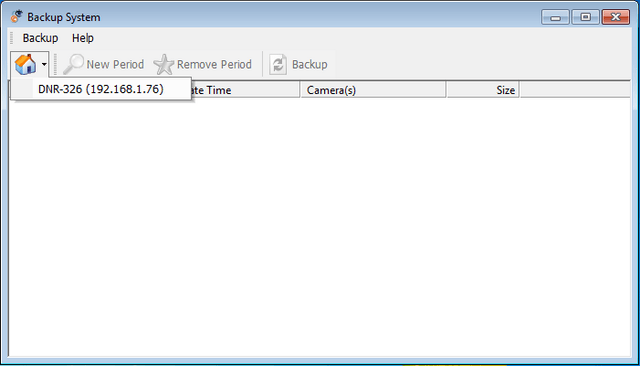
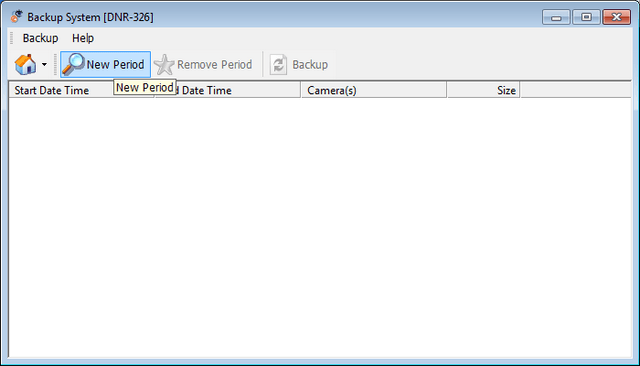
Step 2 – Once installed, run the “Backup System”. If this is the first time you have run this software, you will see the screen as below.
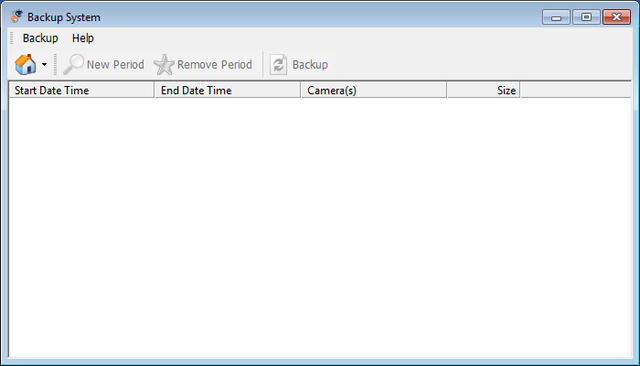
Step 3 – Click the House icon, in order to add a connection to your NVR.
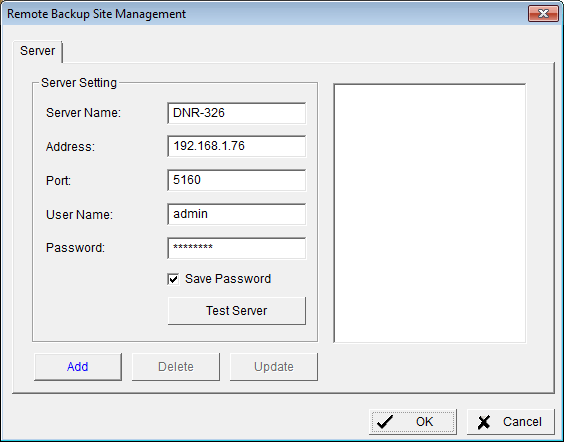
Step 4 – In “Server Name” give the connection a name (this is how you will identify the device). The “Address” should be the IP address of your DNR. Unless you have changed the remote playback port of your DNR, you should leave “Port” as default. “Username” should be a username that has playback privileges. Once all the fields are filled in, click “Save Password”, in order to save the password. Click “Test Server” to confirm the details are correct.
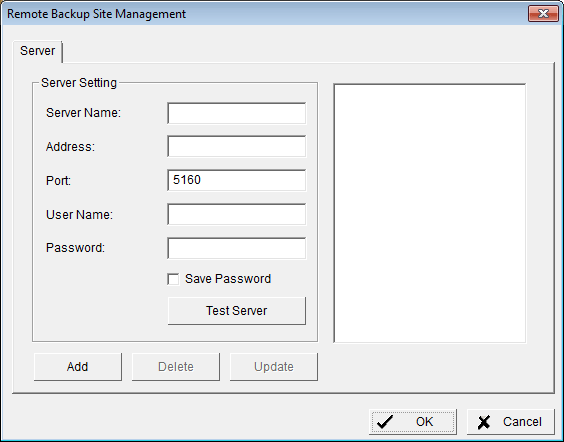
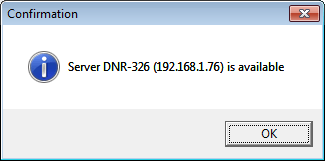
Step 5 – Dismiss the popup box by clicking “OK”, then click “Add” to add the DNR to the list of available devices.
Step 6 – Click “OK” to close window.
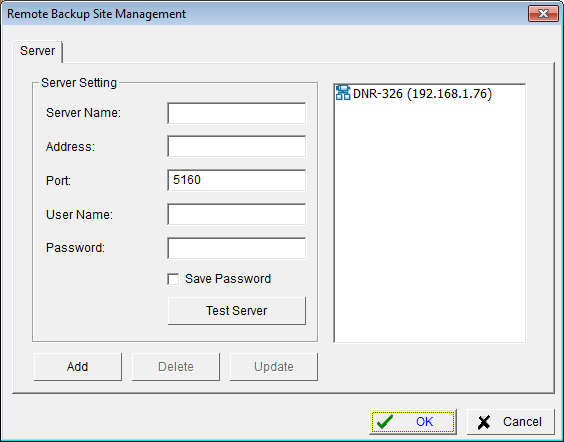
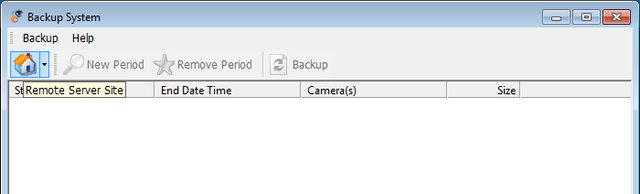
Step 7 – Click the little arrow next to the Home icon, to see a list of available connections. Select the DNR you wish to export video from.
Step 8 – Once connected, click “New Period”.
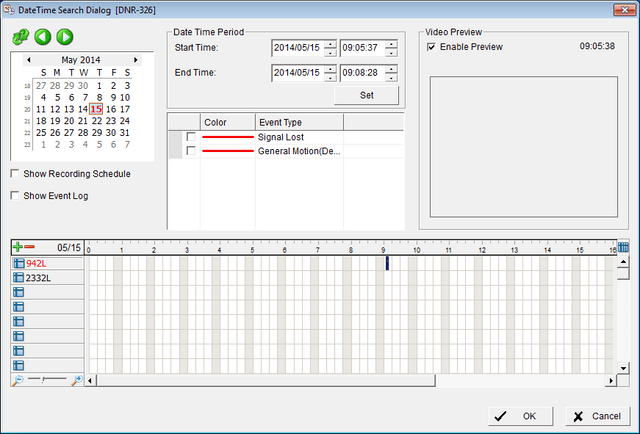
Step 9 – On this screen you will see a list of all cameras available on the DNR, as well as a calendar, from which you can select the date you wish to export. Once you have selected the date from which you wish to export video, you can then select the time you want to export. Click “OK”.
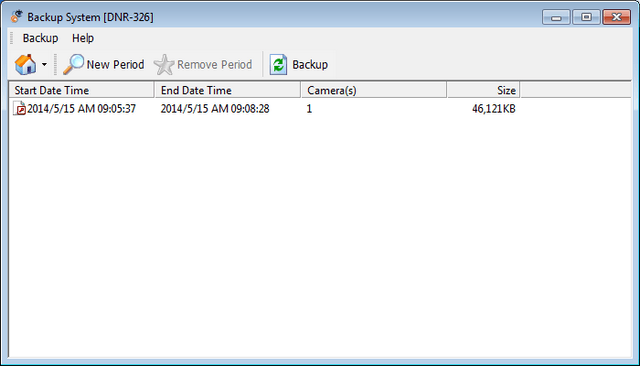
Step 10 – You can repeat steps 8 and 9 to select as many time periods and cameras as necessary. Once you have all the required time periods, click “Backup”
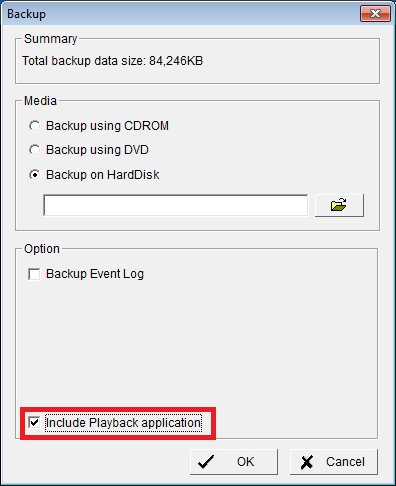
Step 11 – Here you can select to backup to a CD, DVD or to a folder on your hard drive. It is also advisable to select “Include Playback application”. This will then include a standalone player to view the exported video. Click “OK” to start the transfer.