How to Setup WDS with DAP-3310?
Requirements:
- Minimum 2 x DAP-3310 (Check firmware are using the latest)
- 4 x RJ45 Ethernet Cables
- 2 PoE Injectors (Supplied with DAP-3310)
- 2 Power Adapters
Cable Configuration:
Step 1 – Insert a RJ45 cable into LAN1 (PoE) on the DAP-3310 >> P+DATA OUT
Step 2 – Insert a RJ45 cable into P+DATA OUT >> PC
Step 3 – Enter the IP of the DAP-3310 into a web browser
Login into GUI:


In our example, we have used 192.168.1.187 for AP1 and 192.168.188 for AP2. If you are setting up from zero, then the default IP will be 192.168.0.50
You will need to make sure your LAN settings match your situation:
Our example is 192.168.1.187 and 192.168.1.188 therefore the LAN setting of the PC / Laptop will be of follows:
IP: 192.168.1.100
Subnet Mask: 255.255.255.0
Gateway: 192.168.1.1
If your setup is from zero, then the LAN setting should follow this example:
IP: 192.168.0.100
Subnet Mask: 255.255.255.0
Gateway: 192.168.0.50
Configuration LAN of AP1:
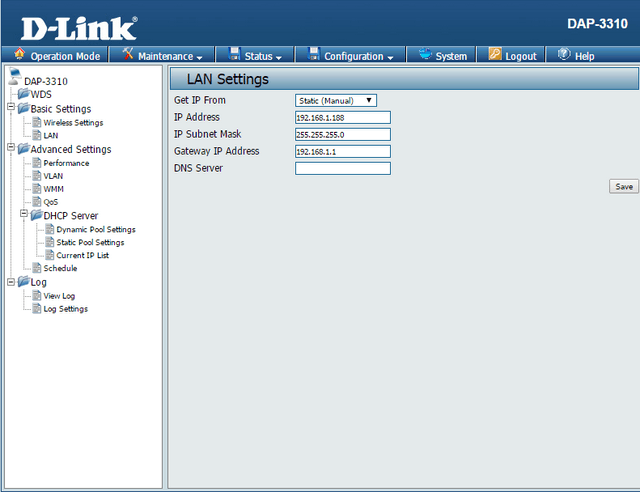
IP: 192.168.1.187
Subnet: 255.255.255.0
Gateway IP Address: 192.168.1.1
DNS Server: 8.8.8.8 (Google DNS Servers)
Configuration LAN of AP2:
IP: 192.168.1.188
Subnet: 255.255.255.0
Gateway IP Address: 192.168.1.1
DNS Server: 8.8.8.8 (Google DNS Servers)
Step 4 – You should now be presented with the login prompt(s)
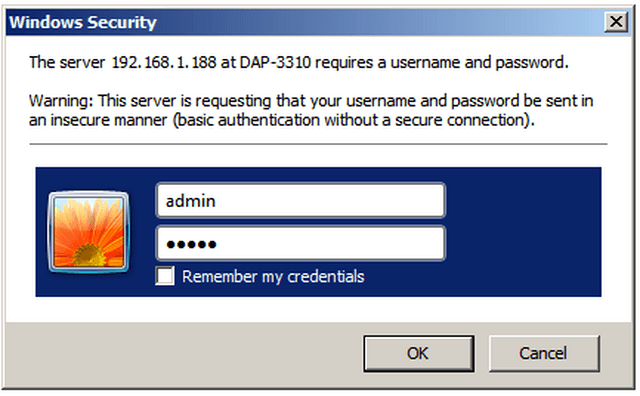
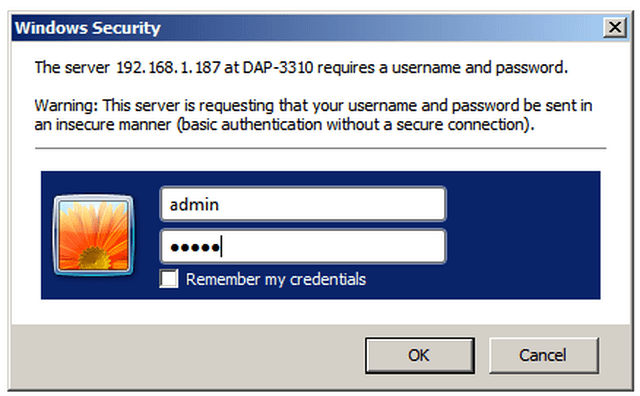
User: admin
Password: {blank} if you are setting the device from zero
Click “OK”
Step 5 – Set the LAN Settings to AP1 to “Static (Manual)”
LAN Settings AP1
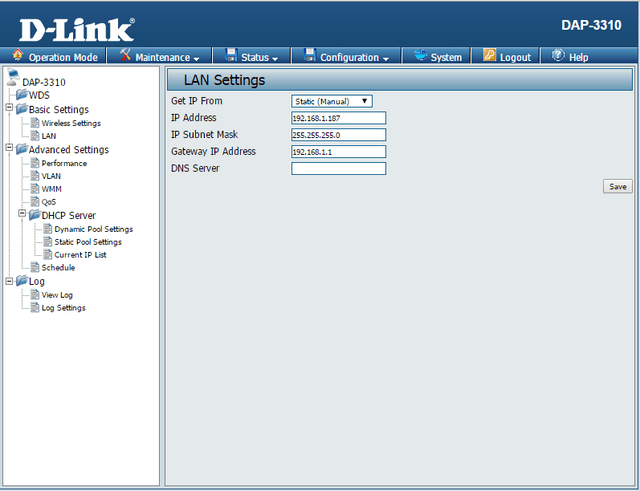
Click “Save” then Configuration > Save and Active and click “Active”
LAN Settings AP2
Click “Save” then Configuration > Save and Active and click “Active”
Device Information:
Step 6 – Check and write down Wireless MAC address
AP1:
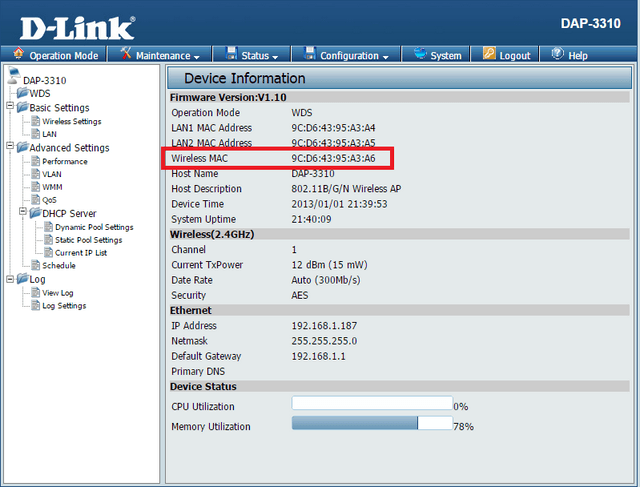
Click Status > Device Information
AP2:
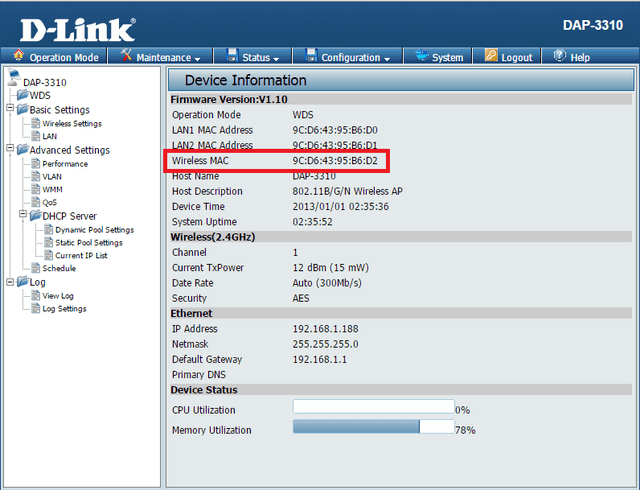
Click Status > Device Information
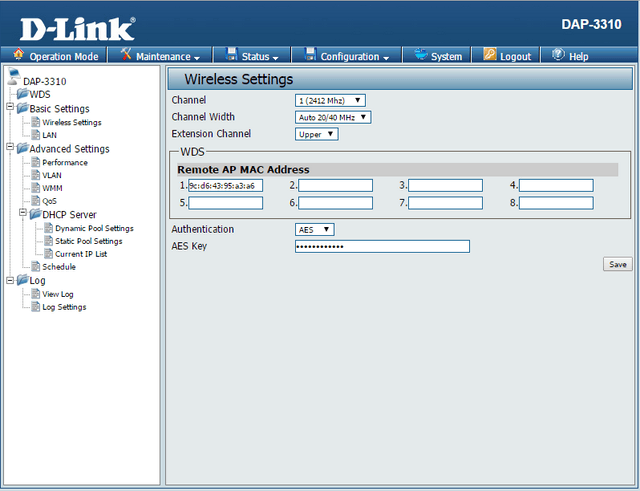
Step 7 – Configure the Wireless Settings for WDS
AP1:
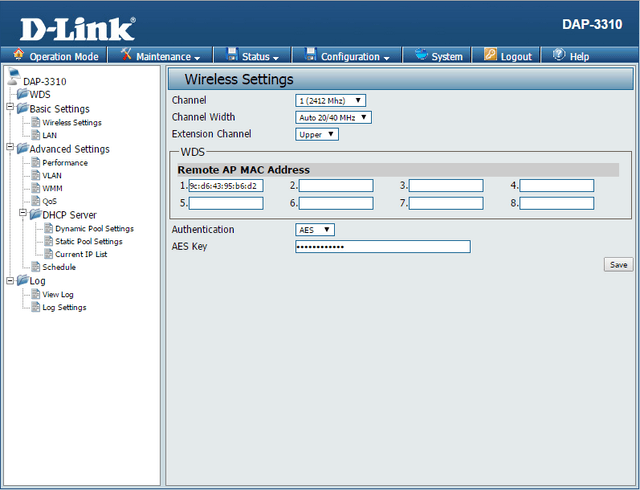
Channel: 1(2412 Mhz)
Channel Width: Auto 20/40 MHz
Extension Channel: Upper
Remote AP MAC Address: 9c:d6:43:95:b6:d2
Authentication: AES
AES Key: 100200300400500600
Click “Save” then Configuration > Save and Active and click “Active”
AP2:
Channel: 1(2412 Mhz)
Channel Width: Auto 20/40 MHz
Extension Channel: Upper
Remote AP MAC Address: 9c:d6:43:95:a3:a6
Authentication: AES
AES Key: 100200300400500600
Click “Save” then Configuration > Save and Active and click “Active”
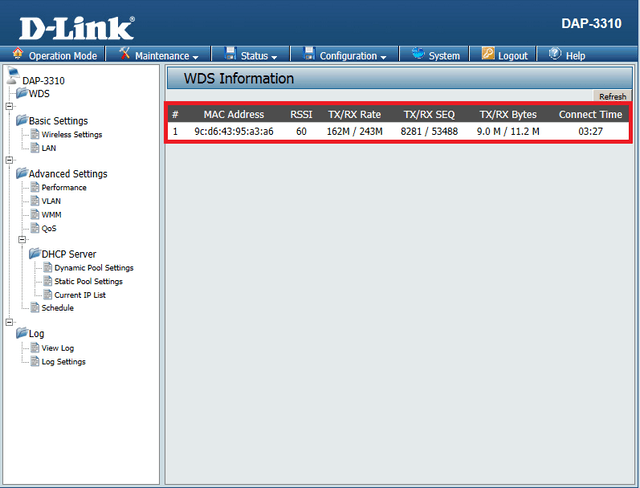
Step 8 – To confirm the WDS connection has been established
AP1: Status > WDS Information
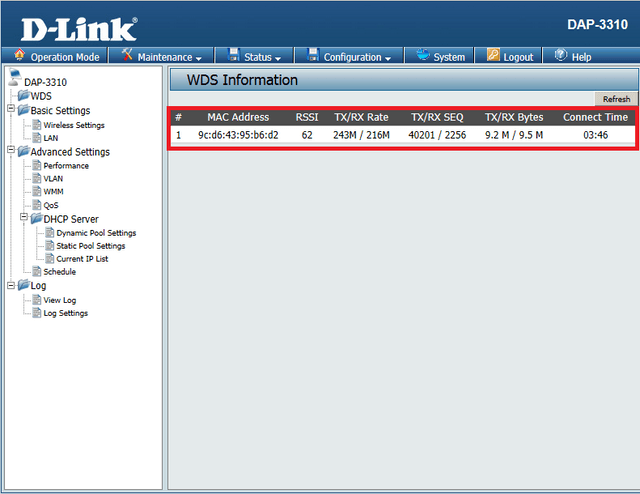
AP2: Status > WDS Information