
DWS 3160 Series Configure Captive Portal
Step 1 - Enter the configuration of the DWS-3160 and then click “WLAN” tab then go to Security > Captive Portal (CP)> Global Configuration

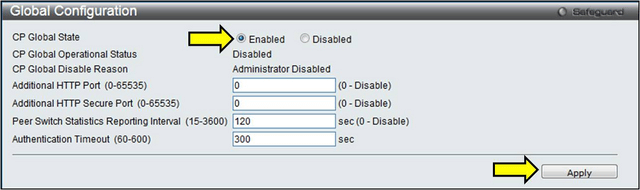
Step 2 –On “CP Global State” click “Enabled” option and then click the “Apply” button
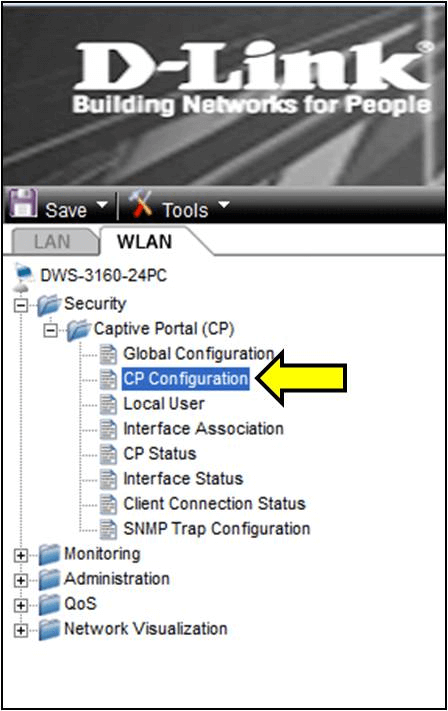
Step 3 –Once done above, go to CP Configuration
Security > Captive Portal (CP) > CP Configuration
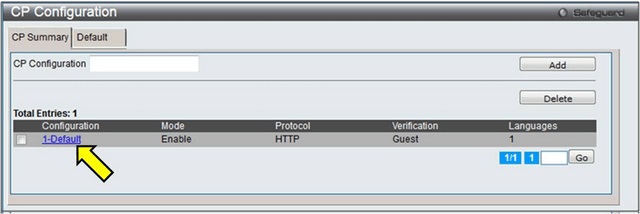
Step 4 -Within the CP Summary tab click on “1-Default”
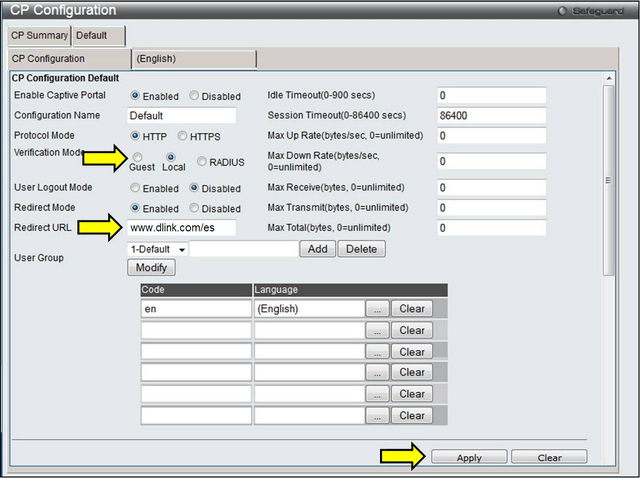
Step 5 - In the CP Configuration, you may rename the captive portal under “Configuration Name profile”.
In Verification Mode select “Local” to use the database users DWS-3160.
In Redirect URL you can set up a website to redirect the user once logs in to the captive portal.
Then click the “Apply” button to save the changes
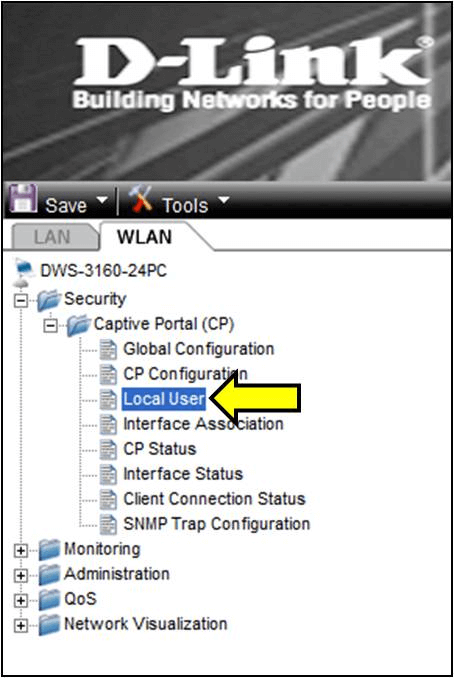
Step 6 –The next step is to create users, go to Local User
WLAN > Security > Captive Portal (CP) > Local User
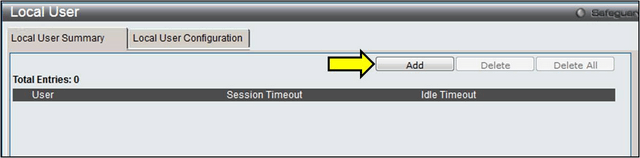
Step 7 - Local User Summary then click the “Add” button
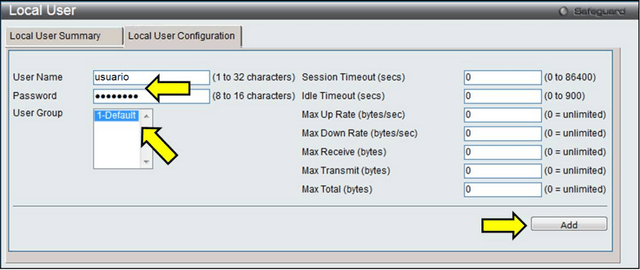
Step 8 -Configure a “Username” and “Password” then select the profile Captive Portal (previously set to 1-Default). Once done, click “Add” to finish adding the user
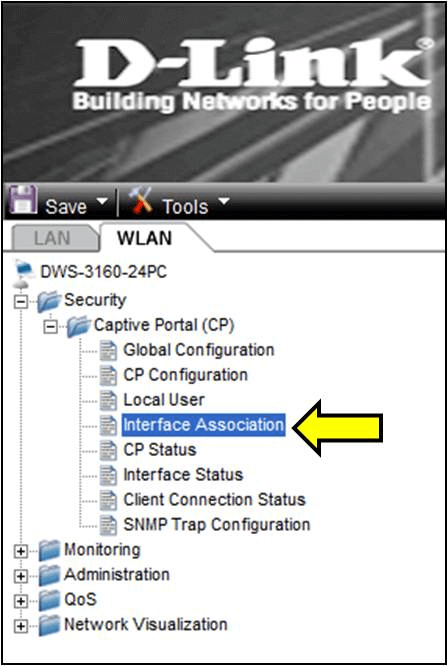
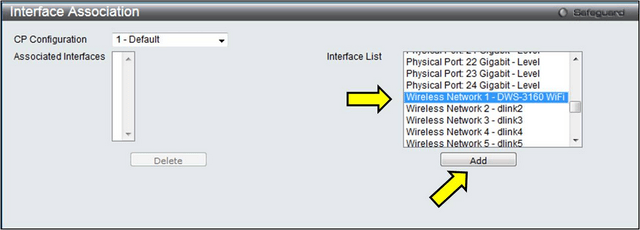
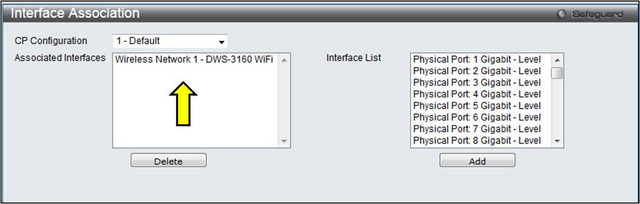
Step 9 -To associate the profile captive portal to an SSID or physical port DWS-3160. Go to Interface Association.
WLAN > Security > Captive Portal (CP) > Interface Association
Step 10 - Select the SSID or physical port within the “Interface List” and click “Add” to add the captive portal
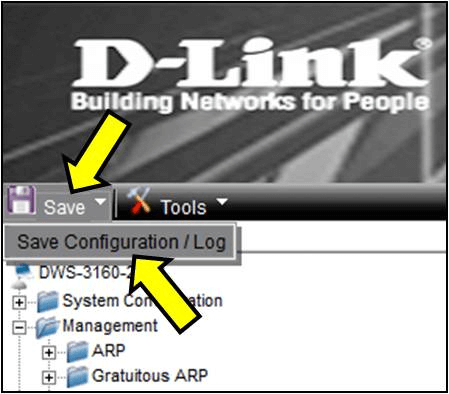
Step 11 – Once completed above, you must save changes
Click Save > Save Configuration / Log
These may also help:
- How to add access points and configuring profiles with your DWS-3160? Read Answer
- How to Configure Cluster – DWS-3160 Read Answer