
How to Setup Captive Portal - DSR-Series – FW.2.x
Network Configuration:
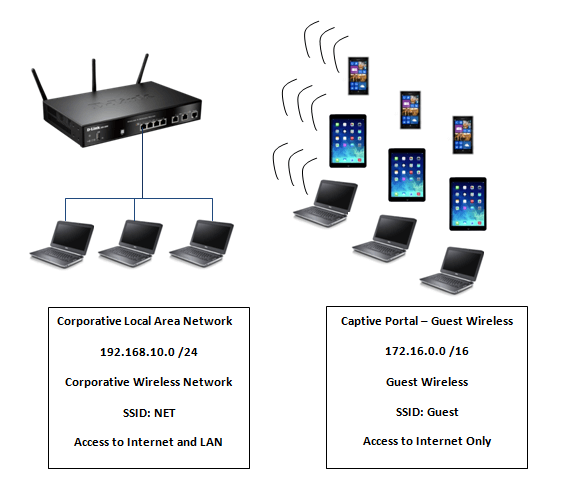
This setup consists of two networks separated by two VLANS. This example will use the following setup:
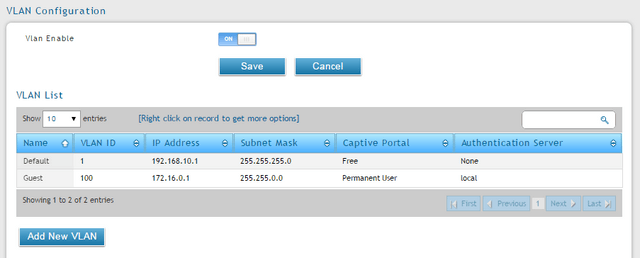
Network 1 – 192.168.10.0 /24 – SSID: NET - Corporate Wireless Network
Network 2 – 172.16.0.0 /16 – SSID: Guest – Wireless Guest Network
Step 1 – Enter the web GUI interface of the DSR using its IP address in a web browser. In our example we have used the IP address of 192.168.10.1

Accept any certificate warnings you may see, this is perfectly normal and safe
Step 2 – We first now need to create VLANs to separate the traffic
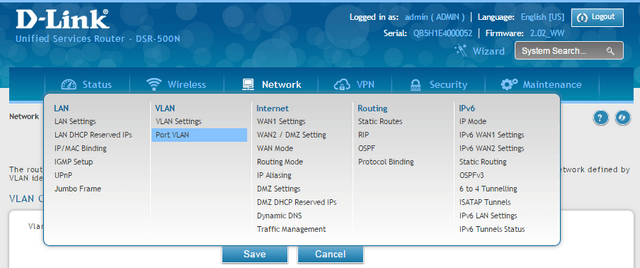
Network > VLAN Settings
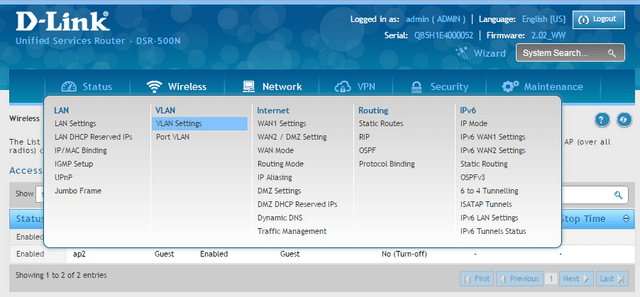
Step 3 – Click on “Add New VLAN”
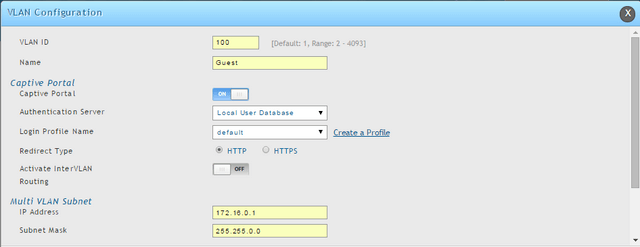
VLAN ID: 100
Name: Guest
Captive Portal: ON
Multi VLAN Subnet
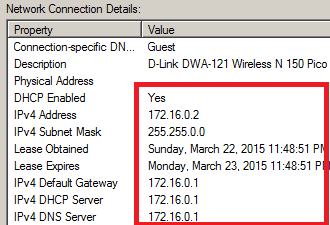
IP Address: 172.16.0.1
Subnet: 255.255.0.0
Use the scroll bar to the left to scroll down…
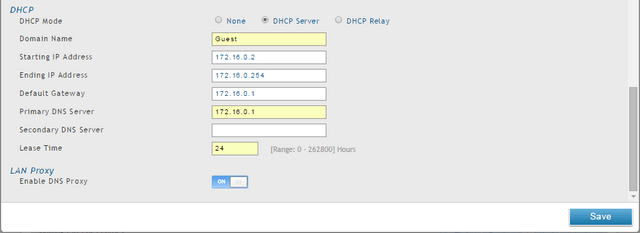
DHCP Mode: DHCP
Domain Name: Guest
Starting IP Address: 172.16.0.2
Ending IP Address: 172.16.0.1
Primary DNS Server: 172.16.0.1
Lease Time: 24
Click “Save”
Step 4 – We should see the following summary for our VLANS
Step 5 – We need to create our two profiles, “NET” and “Guest”
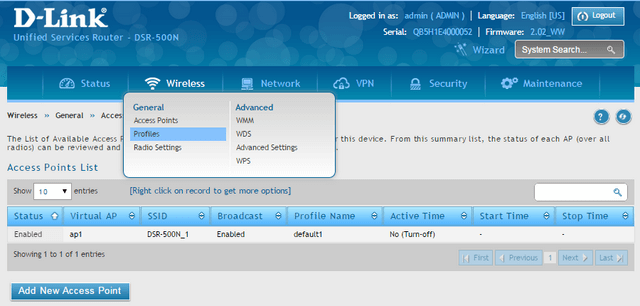
Wireless > Profiles
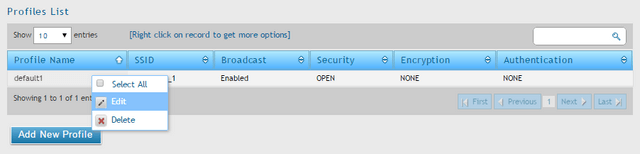
Step 6 – Right-click on “default1” and click “Edit”
Step 7 – Change the default values to your SSID. In our example we are using “NET” as our corporative wireless SSID
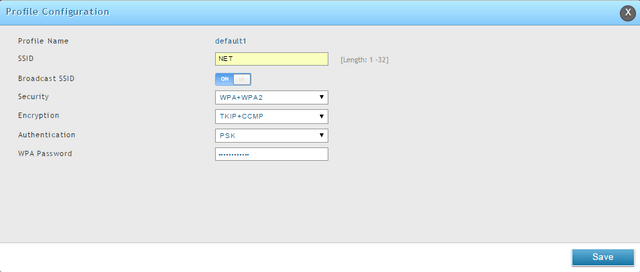
SSID: NET
Broadcast SSID: ON
Security: WPA+WPA2
Encryption: TKIP+CCMP
Authentication: PSK
WPA Password: (enter a password for this SSID)
Click “Save”
Step 8 – Click on “Add New Profile” to create a profile for our Guest SSID
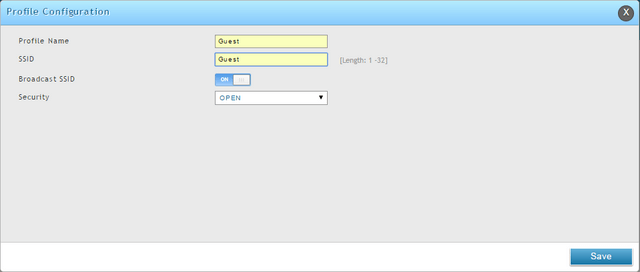
Profile Name: Guest
SSID: Guest
Broadcast SSID: ON
Security: OPEN (Due to our Guest users will need to authenticate with a user and password we will define later)
Click “Save”
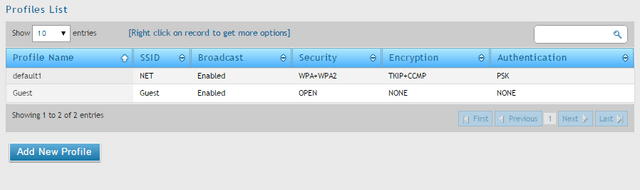
Step 9 – You should have two Wireless Profiles (as per our example)
Step 10 – We now need to add an extra access-point to our configuration to deal with the profile “Guest”
Wireless > Access Points
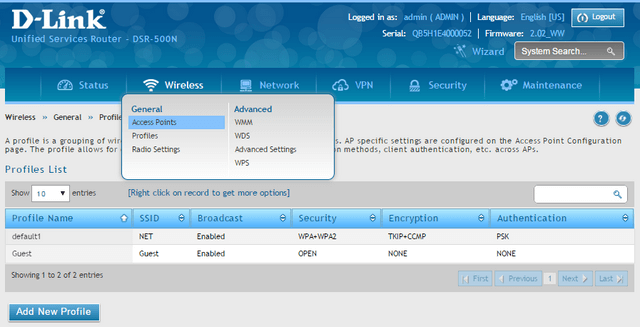
Step 11 – Click on “Add New Access Point”
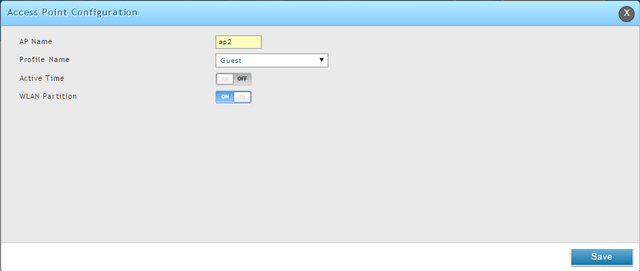
AP Name: ap2
Profile Name: Guest (Drop down box to display profiles available)
WLAN Partition: ON
*Active Time: Here you can set a time for from and to you would like the access-point to be available.

In our example, we have chosen not to use this feature
Click “Save”
Step 12 – We now need to associate the Guest SSID to VLAN100
Network > Port VLAN
Step 13 – Right-click on “Guest” and enter for PVID 100 (The VLAN we created in step 3)
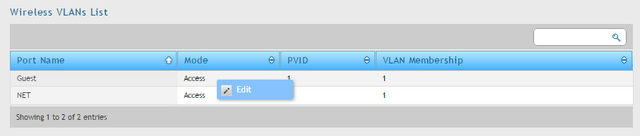
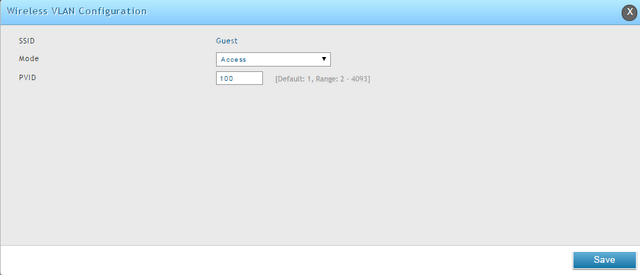
Click “Save”
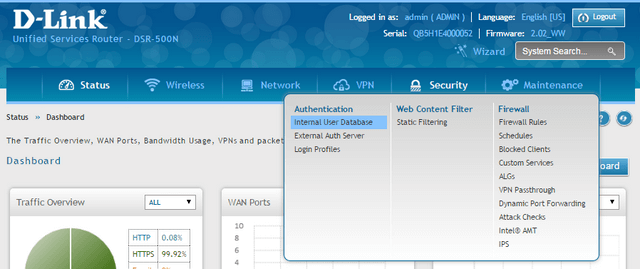
Step 14 – So that our guest users are able to login and authenticate against the local database, we need to add a new Group - Security > Internal User Database > Groups
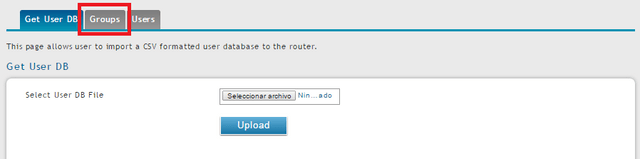
Step 15 – Click on “Add New Group”
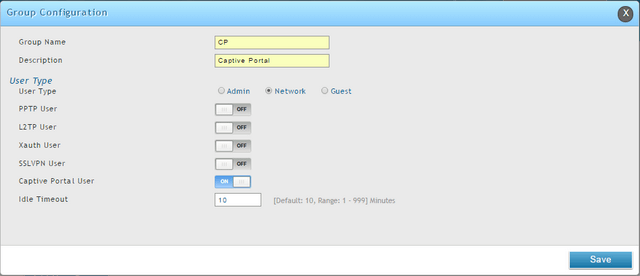
Group Name: CP
Description: Captive Portal
User Type: Network Captive Portal User: ON
Idle Timeout: 10
Click “Save”
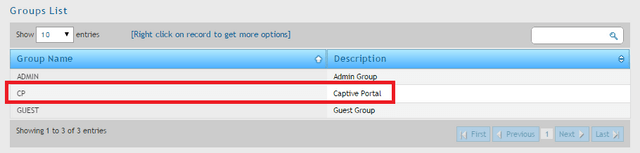
Group List Summary:
Step 16 – We now need to a associate a User to our new Group - Security > Internal User Database > Users
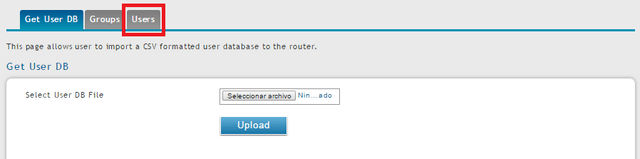
Step 17 – Click on “Add New User”
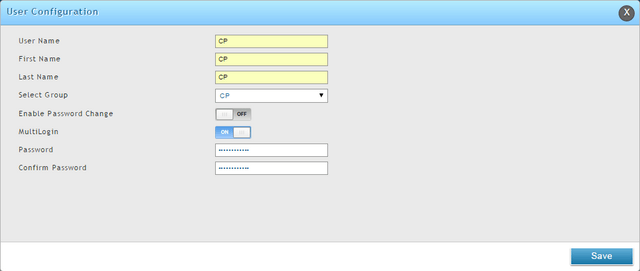
User Name: CP
First Name: CP
Last Name: CP
Select Group: CP
MultiLogin: ON
Password: (Enter the password the guest will need to use for authentication)
Click “Save”
Users List Summary:

Login from a Laptop with Window 7:
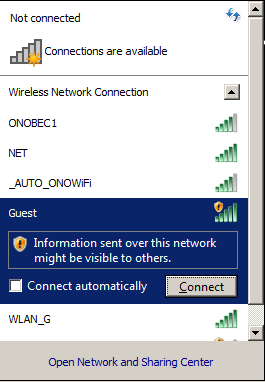
Step 18 – Open your wireless card adapter and now search for SSID “Guest”
Step 19 – Once connected, open a web browser and try to go to a web site, for example dlink.com
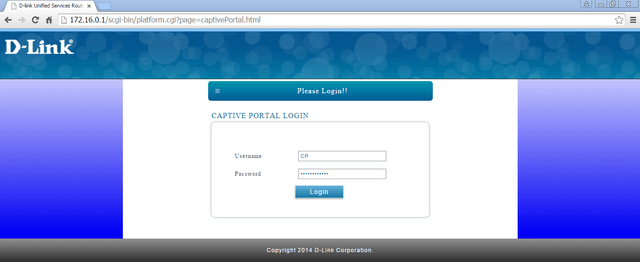
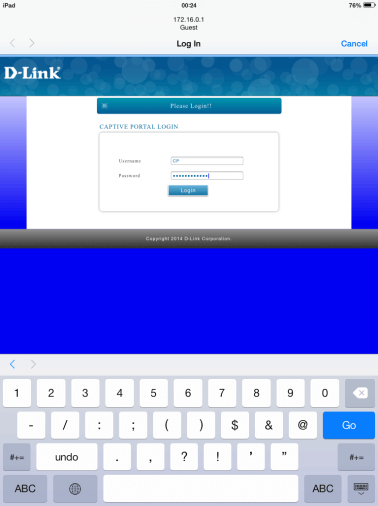
Username: CP (User created in Step 17)
Password: (Password created in Step 17)
Click “Login”
Login from a Windows Phone:
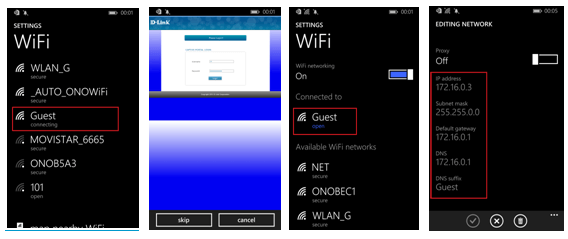
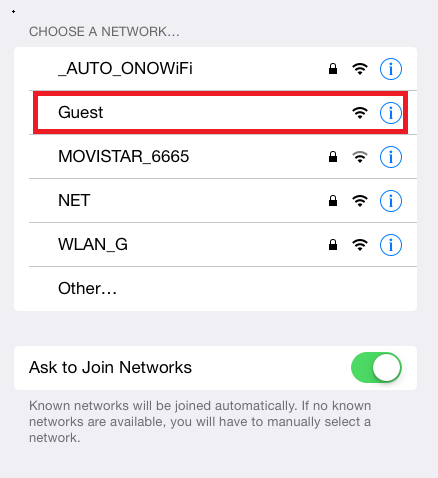
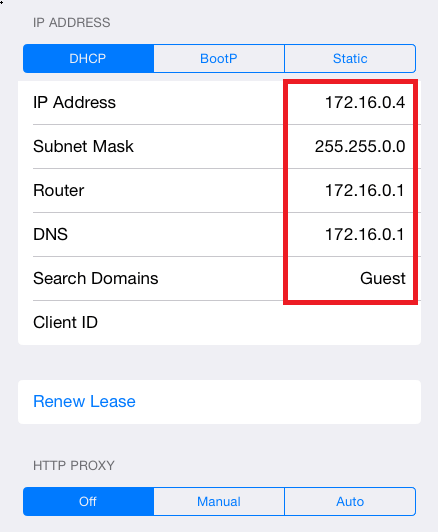
Login from an iPad:
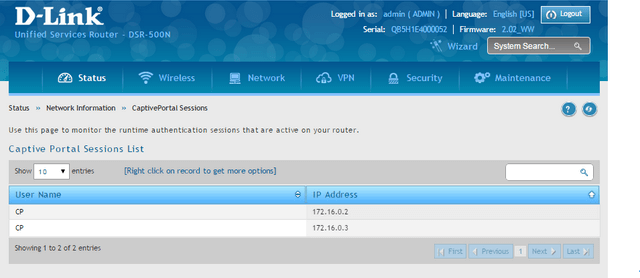
Step 20 – To see the clients connected – Status > Network Information > CaptivePortal Sessions
Step 21 – Within this section you are able to manage ALL connected devices by right-clicking over the session and choose between; “Disconnect” or “Blocking Device”
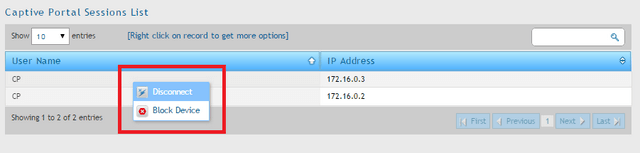
Disconnect – This will simply disconnect the wireless device from the session and will be forced to login via the portal
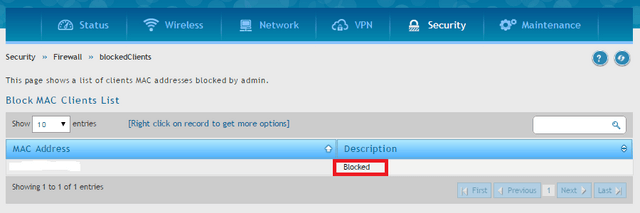
Block Device – This will block the wireless device and will automatically be placed into the Firewall Blocked Client List
These may also help:
- How to Apply an IP Address to DSR-500N and DSR-1000N via CLI? Read Answer
- How to Upgrade the Firmware – DSR-500N and DSR-1000N via CLI? Read Answer
- How to Complete the Recovery Process for the DSR-500N and DSR-1000N Read Answer
- How to Set the Time and Date – DSR-500N and DSR-1000N Read Answer
- How to establish SSL VPN tunnel to DSR Series with Windows 7 64bit. Read Answer
- How do I connect via SSL VPN using Firefox - DSR Series? Read Answer
- HOW to Setup VPN IPsec Between DSR-Series Read Answer
- How to Create Users and Groups - DSR-500N and DSR-1000N? Read Answer
- HOW to Setup VPN IPsec Between DSR-Series FW.2.x Read Answer
- HOW to Setup Two VLANS - DSR-Series Read Answer