How to Configure DCH-M255 and play from an iPad?
Device Required:
• iPad
• D-Link Wi-Fi Configuration Card
• External Speakers or Headphones
Step 1 – Insert the DCH-M225 into a Power Socket and press and hold the reset button for 30 seconds
Step 2 – Once it has been reset you should see a flashing “Orange” LED
Step 3 – Connect to the Wireless Network by searching for the SSID which will be located on the D-Link Wi-Fi Configuration Card, and enter the password which is also located on this card.
Step 4 – Once connected to the Wi-Fi network of the DCH-M225, open a web browser. In this example, we used Sarfari and enter: http://dlinkap.local
Step 5 – You are now at the “WiFi Connection Setup Wizard”, select your language
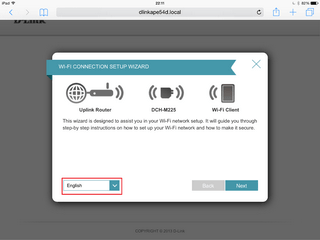
Tap “Next”
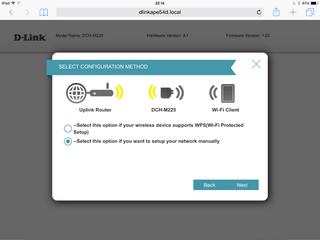
Step 6 – You will now be presented with “Select Configuration Method”. There are two choices:
-- Select this option if your wireless device supports WPS(Wi-Fi Protected Setup)
-- Select this option if you want to setup your network manually
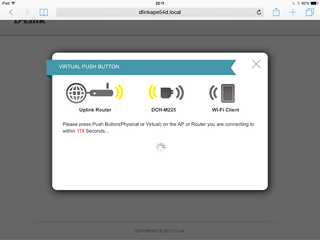
Step 6-1 – If your router supports WPS, select this option.

Tap on “Next”
You must press both WPS buttons on the DCH-M225 and the Router or AP to start the connection, then follow the instructions.
Step 6-2 – If your router doesn’t support WPS, you will need to select the option by “Setup your network manually”.
Tap on “Next”
You should notice the configuration wizard will be scanning for wireless networks as below.

Step 7 – Select the wireless network provided by your router or AP.
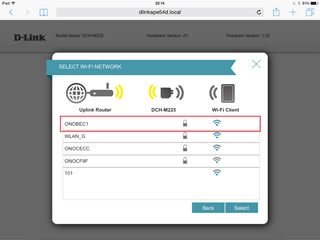
Tap on “Select”
Step 8 – Enter the WiFi Password to connect.
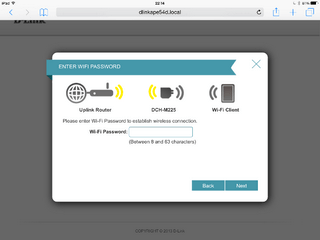
Tap on “Next”
Step 9 – Choose if you would like to give a name for your “Extended Network” or use the existing WiFi Network. In this example, we are using the same Wi-Fi network name:
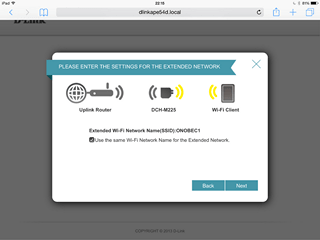
Tap “Next”
Step 10 – Choose a name for the “Device”. In this example we left as default “DCH-M225”.
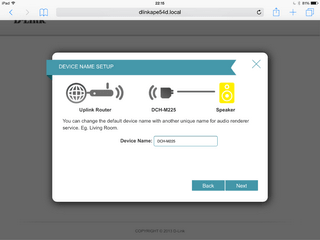
Click “Next”
Step 11 – The setup is complete and you will be presented with a summary of the setup.
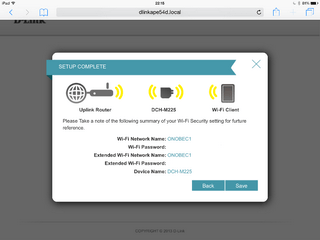
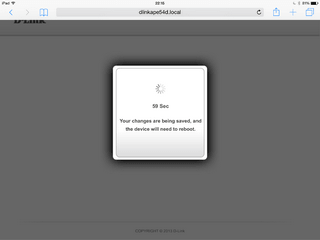
Tap “Save” and you will be presented with a prompt displaying the settings are being saved and device rebooting.
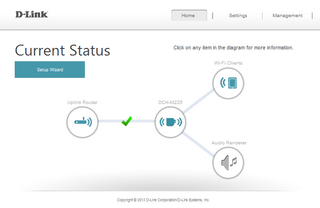
Step 12 – Once rebooted you will be taken to the “Current Status” page.
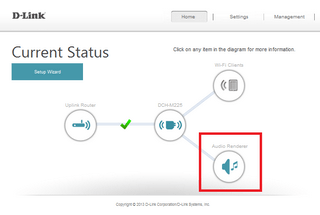
Step 13 – Insert one end of the Audio 3.5mm Jack into the DCH-M225 and the other into the input jack of your speakers. Once this has been accomplished, you will notice a connection to the Audio Render on the “Current Status” page.
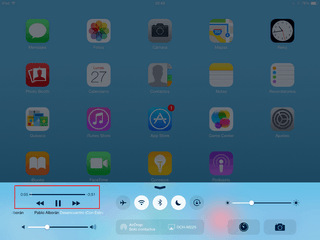
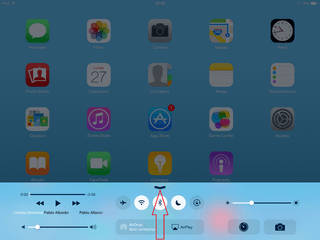
Step 14 – To play music to the speakers you will need to touch from lower part of screen moving upwards to display the multi-tasking screen and tap “AirPlay”.
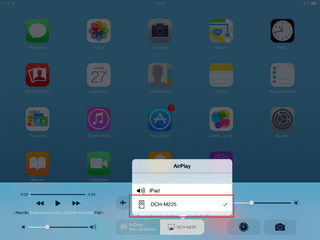
Step 15 – Select device name given in Step 10. In this example it was “DCH-M225”.
Step 16 – Tap on the “Play” icon and you should hear the music playing from the speakers.