
How do I backup video data from my DNR-312L?
Pre-requisites:
- A USB pendrive / hard drive
- Or an FTP server
- Or a file-server (such as a NAS)
Step 1 – Log in to the DNR-312L and click on the “Backup” icon.

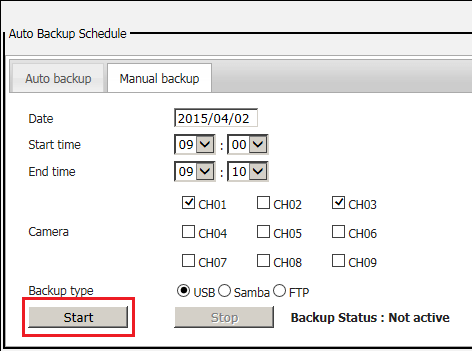
Step 2 – To create a one-off backup, click the “Manual backup” tab.

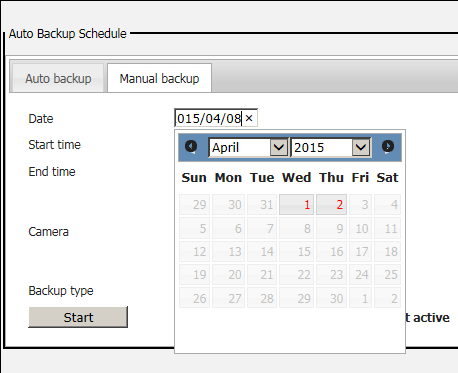
Step 3 – Click in the date box to open the calendar and select the date you wish to backup. Dates with video data are shown in red.
Step 4 – Select the start and end times for the backup.
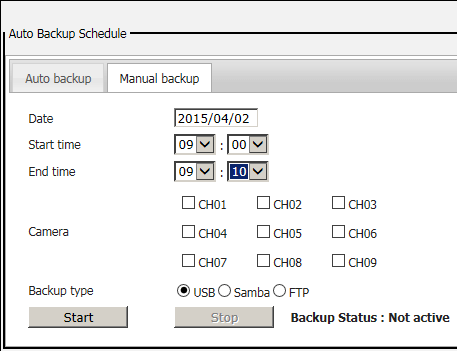
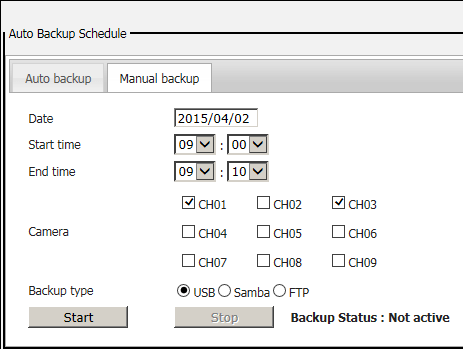
Step 5 – Select the camera(s) you wish to backup
Step 6 – Select the backup type you want to create, and where necessary (Samba and FTP) fill in the details
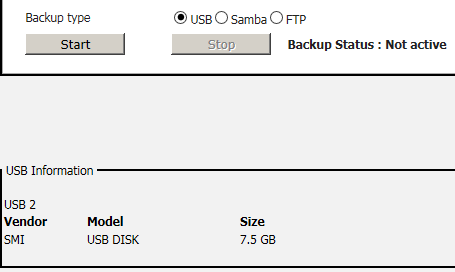

Step 7 – Once you have selected the backup type and filled any required data, click “Start”
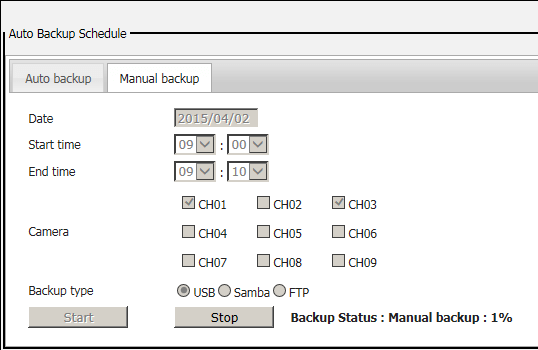
Step 8 – The DNR will then back up the video, and show the status. Whilst the backup is taking place, you should not navigate to any other page.
Step 9 – To setup an automatic backup every day at a specific time, click the “Auto backup” tab.

Step 10 – Click the “Enable auto backup” tickbox, set the time at which you want the automatic backup to take place, and the time period and which camera(s) you want to backup. (Please note that that “End time” must be before the “Daily backup time”.)
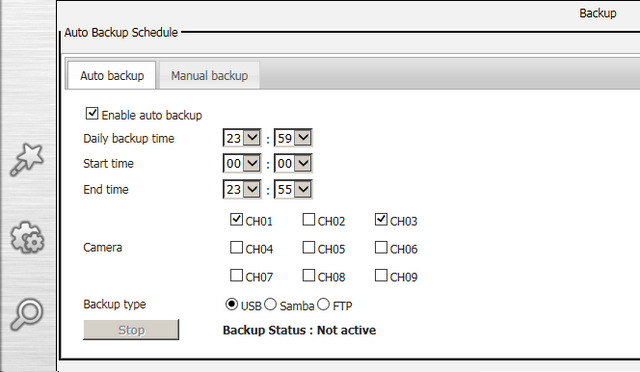
Step 11 – Select the backup type, USB or Samba or FTP; fill in any required details, and then click “Save”.
These may also help:
- How do I playback and export video on my DNR-312L Read Answer