
How to Setup Multiple SSIDs and VLANs - CWM-100
Scenario:
2x VLANs (default and CWM100)
2x SSIDs (Corporative and Guest)
Software and Hardware Used:
CWM-100 - Central WifiManager
DAP-2695 HW:A1
AP Module for DAP-2695A1
AP Installation Tool
Link Software:
http://www.dlink.com/
OS and Browser Compatibility:
Windows 7, Windows Server 2008R2 and Windows Server 2012R2
IE11, Firefox and Sarfari
As this document will be published on our site, it is also recommended at the time to check if newer releases of software and firmware have be published on our site.
Download the above to a folder (for example CWM-100). Once the above has been downloaded to your PC or USB storage, then proceed with the following:
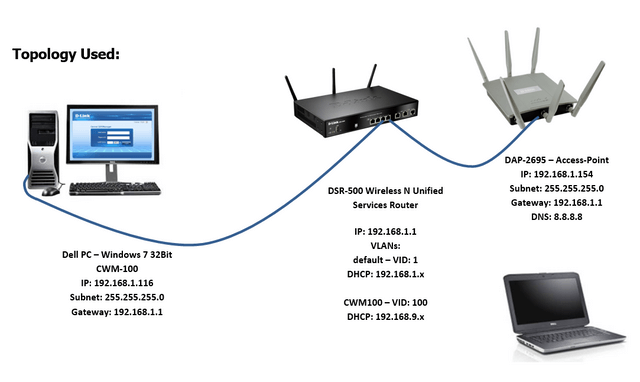
Step 1 – Setting up the VLANs. In our scenario, we have used the DSR-500N Wireless N Unified Services Router.
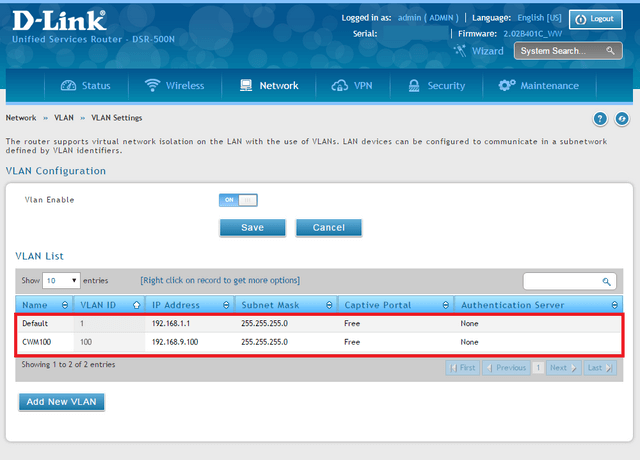
*InterVLAN Routing disabled on both VLANs
Step 2 – Setting up ports for our VLANs
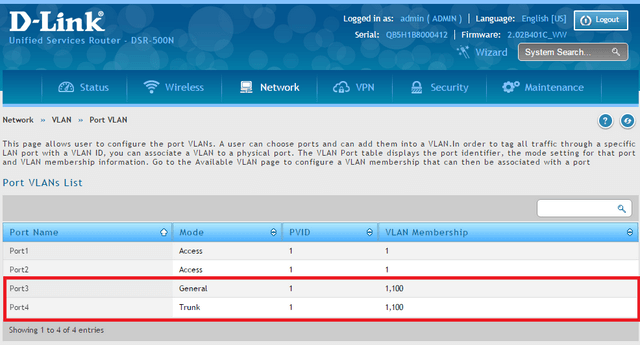
Port 3 – This is connected directly to our Dell PC
Port 4 – This is connected directly to LAN1 (PoE) Port on our DAP-2695A1
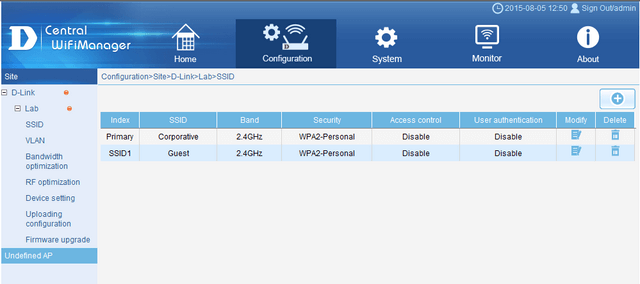
Step 3 – Multi-SSID configuration on CWM-100. In our scenario we have created 2 SSIDs; 1 will be used for Primary SSID and will have access to corporative network. The other SSID1 will be used for “Guests” to connect and only having access to the INTERNET.
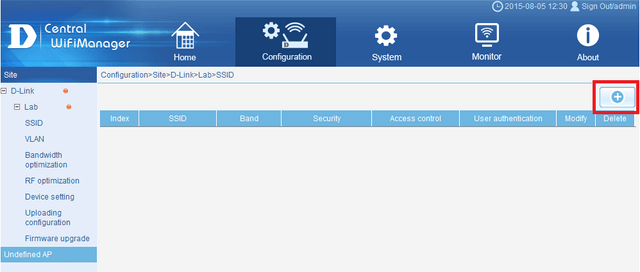
To add a SSID to your network, click on the “+” at top right-hand corner and enter the information using the following example:
Primary SSID: Corporative
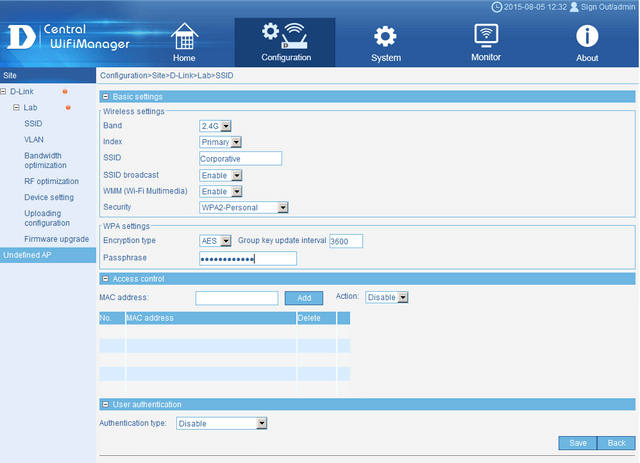
Click “Save”
SSID1: Guest

You could have the “Guest” SSID connect and authenticate with Captive Portal and Passcode. In this scenario, we have used a “Passphrase”
Click “Save”
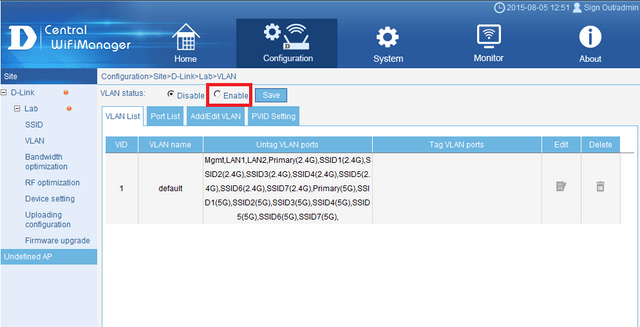
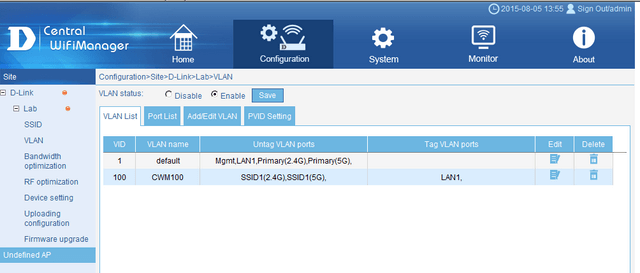
Step 4 – VLAN Configuration on CWM-100, in our scenario we need to ensure the same information is used for VLANs as per the DSR-500 Router. As default the VLAN status is “Disabled”. To enable, click the radio button “Enable” the click “Save”
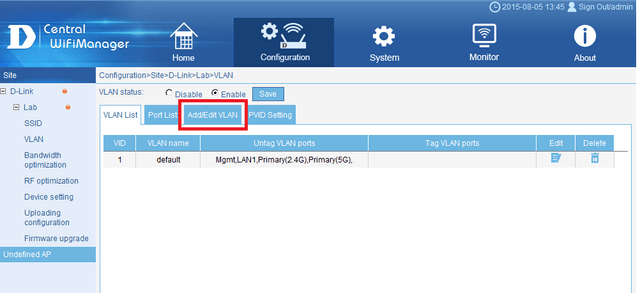
Step 5 – Modify the default VLAN to comply with our particular setup. To do this, click “Edit” and configure using the following example:
Click “Save”
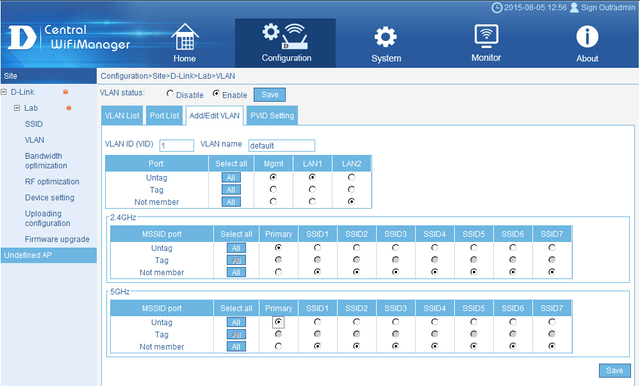
Step 6 – Create the VLAN “CMW100”
Click on “Add/Edit VLAN” and configure using the following example:
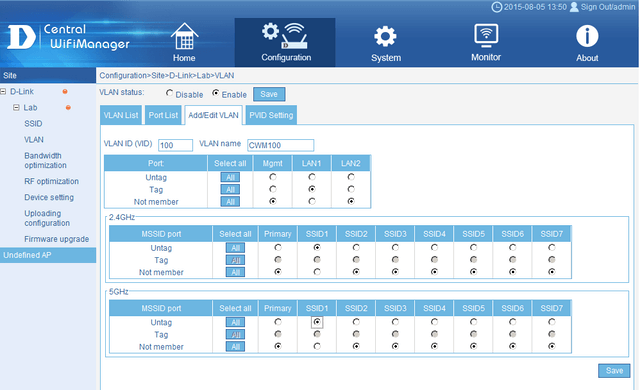
Click “Save”
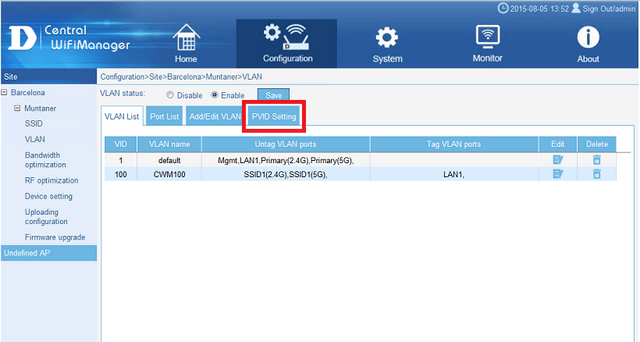
Step 7 – Configure PVID Settings. To do this click “PVID Setting” tab
Then configure using the following example:
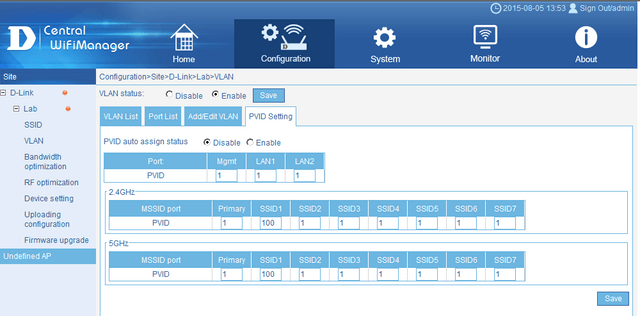
Click “Save”
You should see the following screen
Step 8 – Export the configuration. To do this you will need to go your “Site”. In our example we have named it “D-Link”
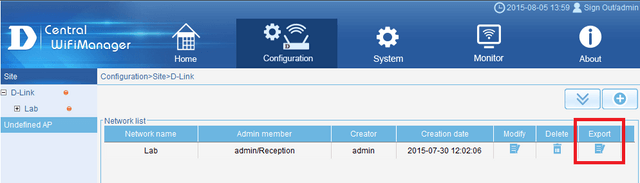
Click “Export”

Click “Save”
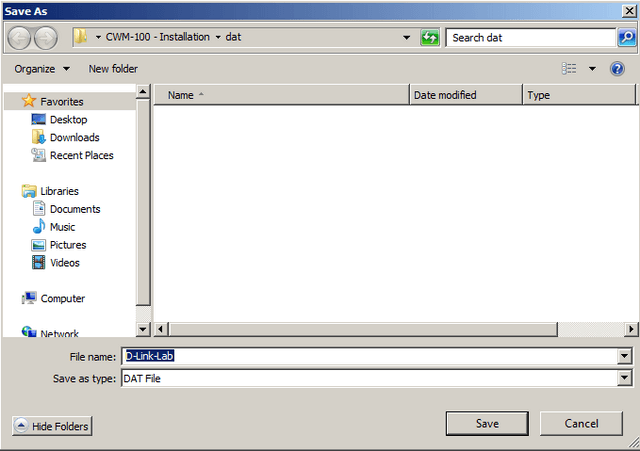
Click “Save” – this will save as “D-Link-Lab.dat” file
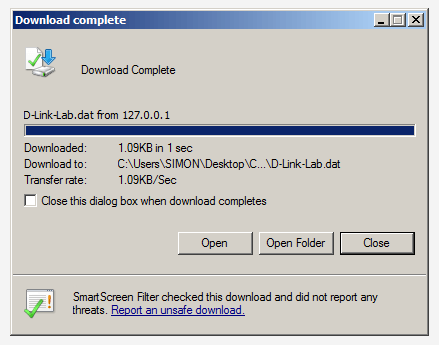
Click “Close”
Step 9 – Set the IP of the Access-Point. To do this, you will need to run the “AP Installation tool.exe”.
![]()
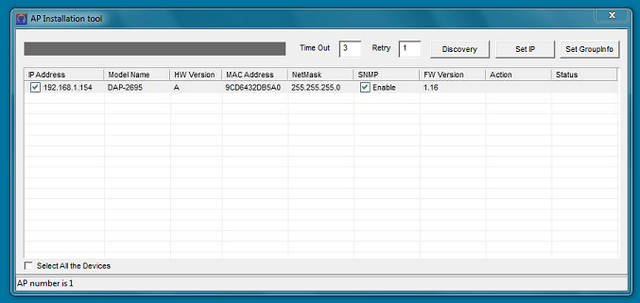
Click the box to select the AP then click on “Set IP”. Set it to “Dynamic IP address”, once obtained then set it to “Static IP Address”
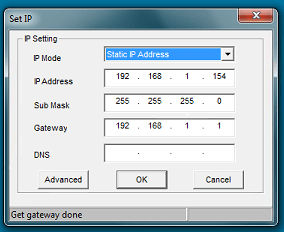
Click “OK”
Wait until “Status” shows “OK”
Step 9 – Upload the .dat configuration file to the access-point. To do this, again click the box to select the access-point then click “Set GroupInfo”
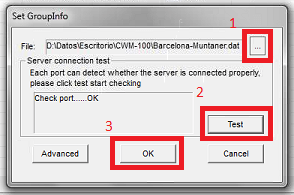
1) Search for the .dat configuration file in Step 8
2) Click “Test” – This should show “OK”
If this doesn’t show ok, you must check the LAN connection and the AP is on the same subnet
3) Click “OK” to finalise the upload
Wait until “Status” shows “OK”
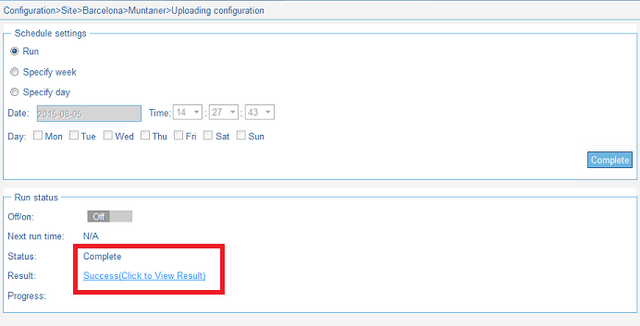
Step 10 – Upload configuration in CWM-100. To do this, go to the following menú
Configuration > Site > Network > SSID > Uploading configuration
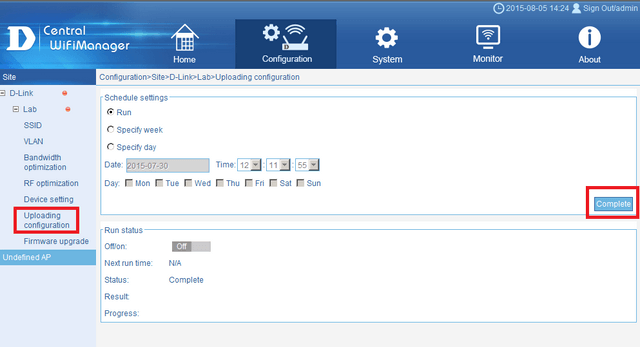
Click “Complete”
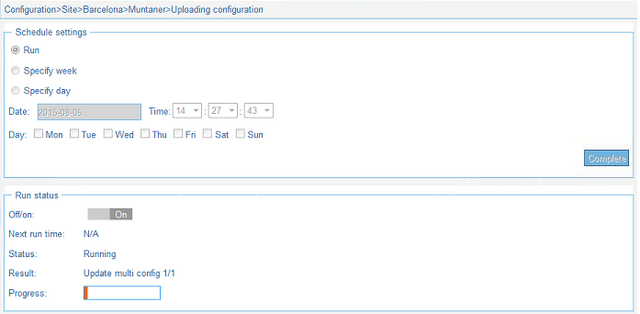
The process will go through a stage of “Rebooting”. Once complete, you should get the following output:
If you don’t receive the above and you get a “Fail”, you will need to check the following:
1) Network connections
2) VLANs are correctly setup
3) Correct Module has been installed
You should be able to connect to either of the SSID created and they should provide the corresponding IPs. In our example, if you connect to “Corporative” SSID, you will receive the IP within the range of 192.168.1.x and will have access to ALL LAN resources + INTERNET. If you connect to “Guest” SSID, you will receive the IP within the range of 192.168.9.x and have ONLY access to the INTERNET.
These may also help:
- CWM-100 Installation Troubleshooting Read Answer
- How to Setup Captive Portal and Passcodes CWM-100 Read Answer