
How to Configure SSH Connection DGS-1510-Series - CLI
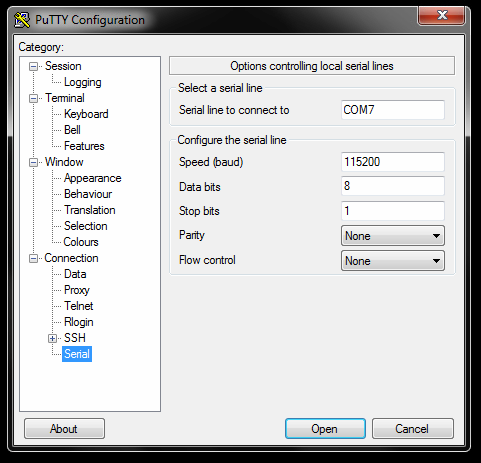
Step 1 – Connect to console port of DGS-1510-Series and configure PuTTy as follows:
Note: COM7 is used in our example, however it may be different on you PC/Laptop. (To check this, you will need to go to Device Manager)
Step 2 – Once configured, click on “Session” and enter a name in “Saved Sessions”. Click “Save” then “Load”
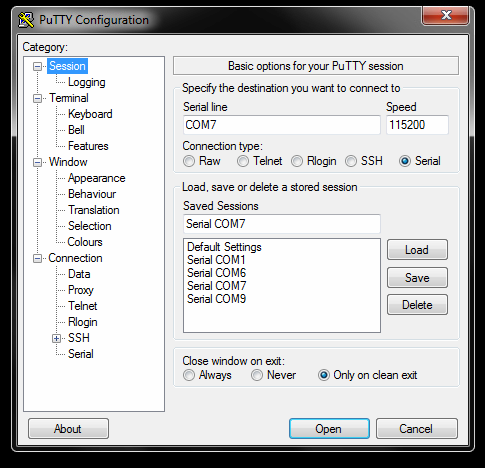
Click “Open”
Step 3 – Once loaded, hit the enter key and create a user
Switch>enable
Switch#configure terminal
Switch(config)#username admin password admin
Switch(config)#username admin privilege 15
Switch(config)#exit
Switch#copy running-config startup-config
Destination filename startup-config? [y/n]: y
Saving all configurations to NV-RAM.......... Done.
Switch#end
Step 4 – Generate a key that will be used for SSH
Switch#crypto key generate dsa
Generating DSA key...Done.
Switch#crypto key generate rsa modulus 1024
Generating DSA key...Done.
Switch#configure terminal
Switch(config)#line ssh
Switch(config-line)#password ssh
Switch(config-line)#login local
Switch(config-line)#exit
Switch(config)#ip ssh server
Switch(config)#exit
Switch#copy running-config startup-config
Destination filename startup-config? [y/n]: y
Saving all configurations to NV-RAM.......... Done.
Switch#end
Step 5 – Configure PuTTy for SSH connection using the following example:
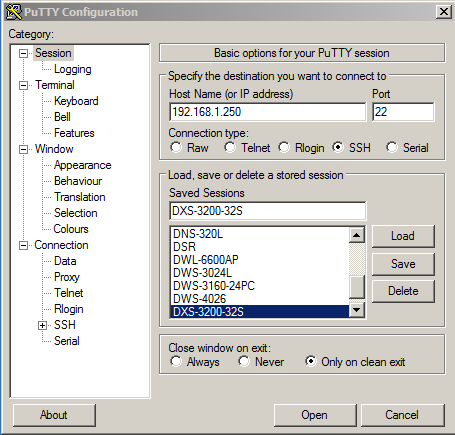
Enter the IP of the switch. In our example it was 192.168.1.250 and select SSH (Port 22) then click “Open”
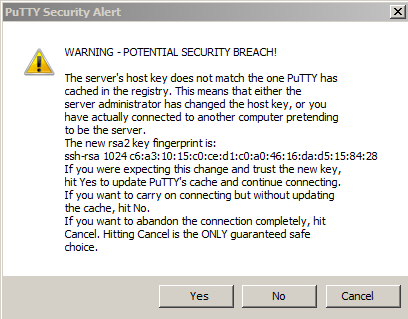
Step 6 – Except the “PuTTy Security Alert”
Step 5 – Hit the enter key then log in with the user and password you had created in Step 3