
How to Create Multi-SSIDs and VLANs - FW.4.4.x
Network Configuration:
2x SSIDs
2x VLANs
Devices:
This example will use the following devices and setup:
DSR-500N - Wireless N Unified Services Router (For VLANs and DHCP Server)
DWC-1000 – Unified Wireless Controller
DWL-6600AP - Unified Wireless N Simultaneous Dual-Band PoE Access Point
Firmware Used:
FW: 4.4.1.2 (DWC-1000 – Unified Wireless Controller)
FW.4.2.0.9 (DWL-6600AP - Unified Wireless N Simultaneous Dual-Band PoE Access Point)
Note: Please always check our website for updates for firmware
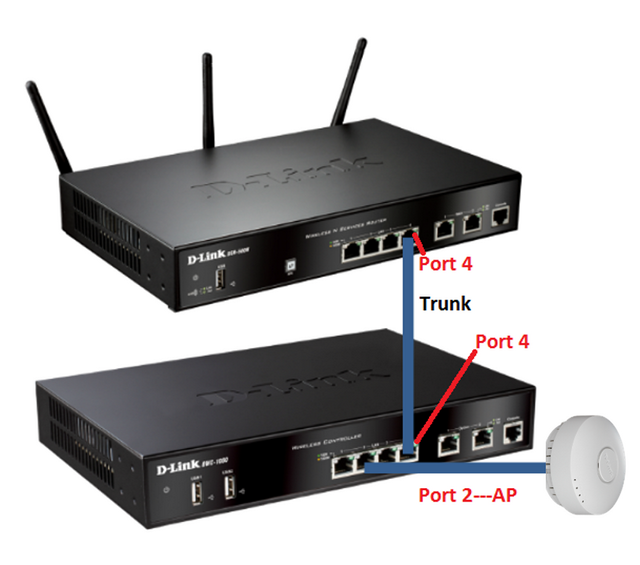
Topology Example:
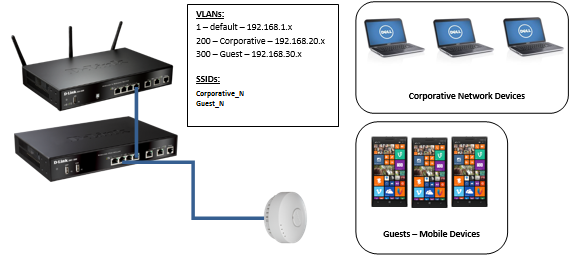
Step 1 – With regards to our topology we have used the DSR-500N Wireless N Unified Service Router to create our VLANS – Your topology may be different but the application of your VLANs will follow the same structure.
VLAN Settings:
VID – 200 – Corporative- DHCP Server:
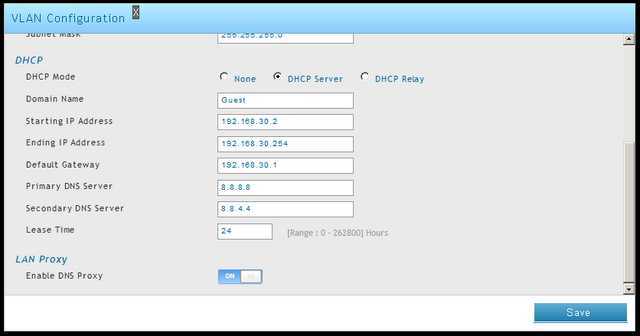
VID – 300 – Guest – DHCP Server:

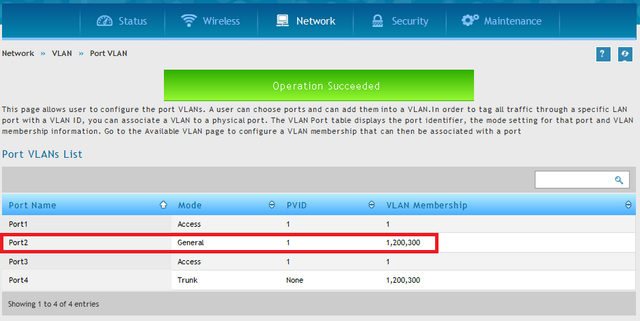
Port VLANs List:
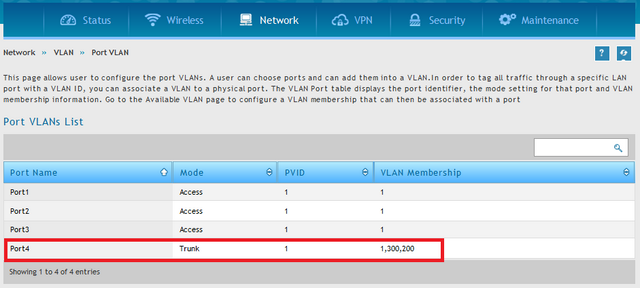
In our example we have used Port 4 on the DSR-500N in “Trunk” to pass ALL VLANs. The connection is as follows:
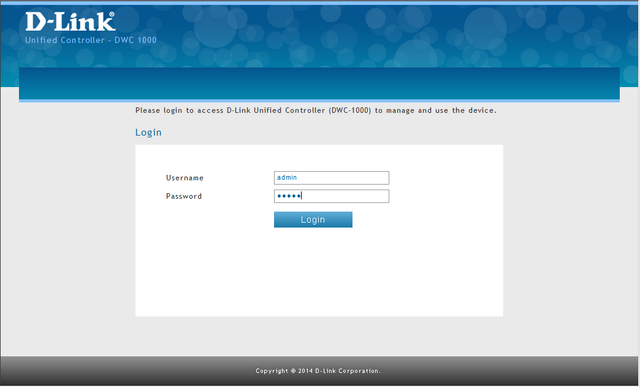
Step 2 – Enter the web GUI interface of the DSR using its IP address in a web browser. In our example we have used the IP address of 192.168.1.158

Accept any certificate warnings you may see, this is perfectly normal and safe
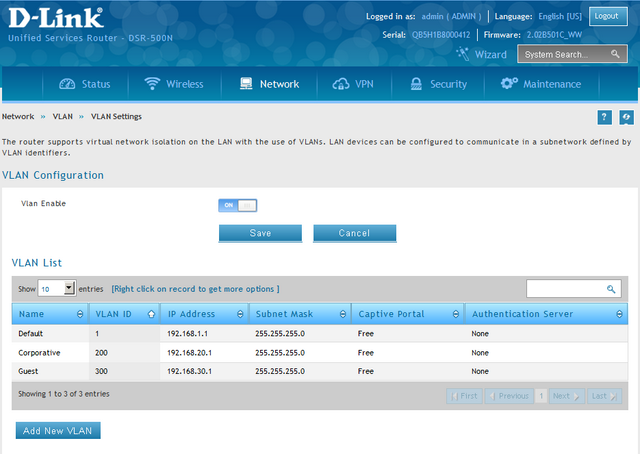
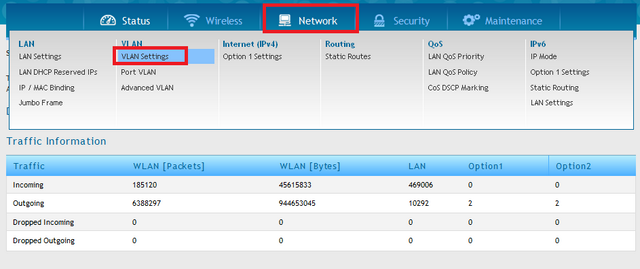
Step 3 – Once logged into the interface go to “VLAN Settings”
Network > VLAN > VLAN Settings
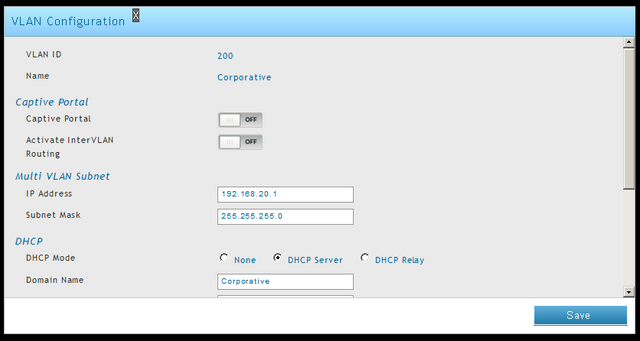
Step 4 – Create VLAN 200 – Corporative
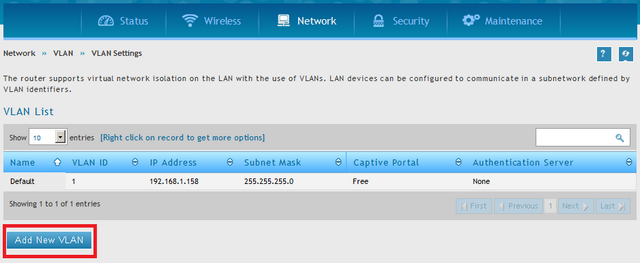
Click “Add New VLAN”
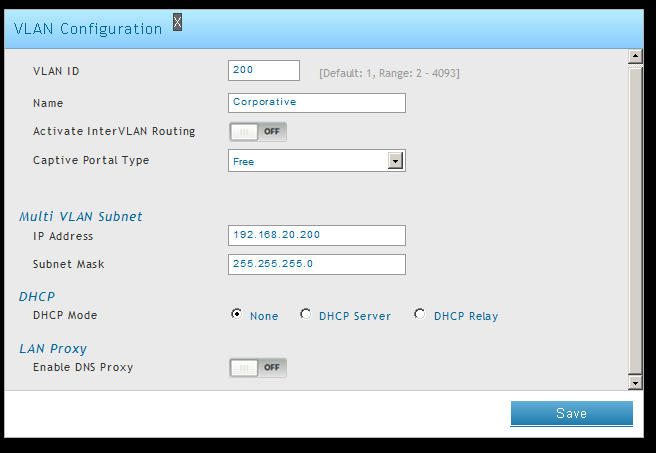
VLAN ID: 200
Name: Corporative
Activate InterVLAN Routing: Off
Captive Portal Type: Free
Multi VLAN Subnet: 192.168.20.200
Subnet Mask: 255.255.255.0
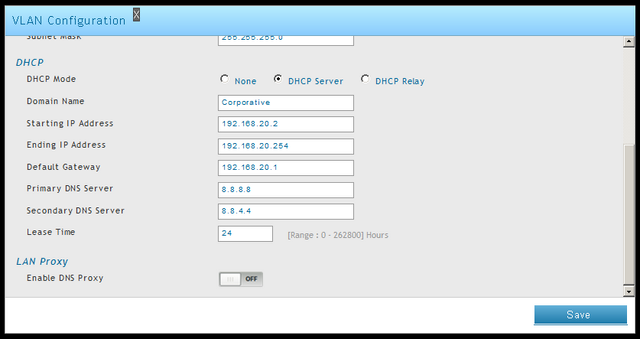
DHCP Mode: None
Enable DNS Proxy: Off
Click “Save”
Step 5 – Create VLAN 300 – Guest
Click “Add New VLAN”
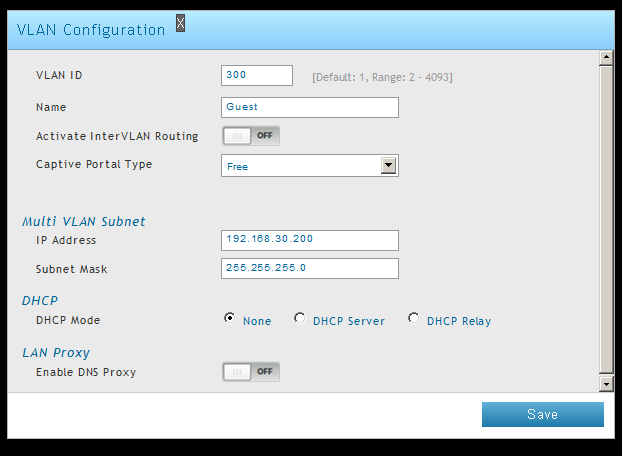
VLAN ID: 300
Name: Guest
Activate InterVLAN Routing: Off
Captive Portal Type: Free
Multi VLAN Subnet: 192.168.30.200
Subnet Mask: 255.255.255.0
DHCP Mode: None
Enable DNS Proxy: Off
Click “Save”
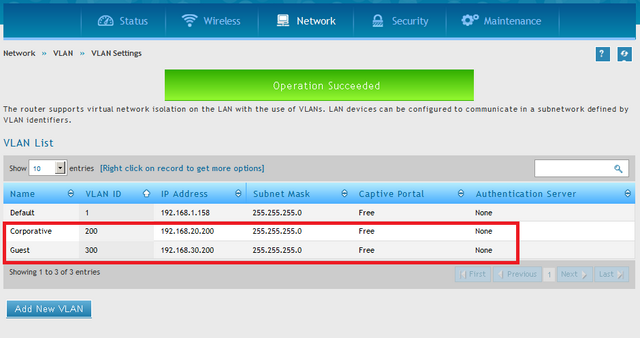
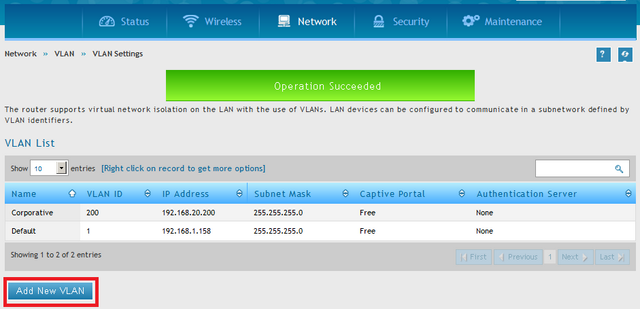
Once completed you should see the VLANs created as above
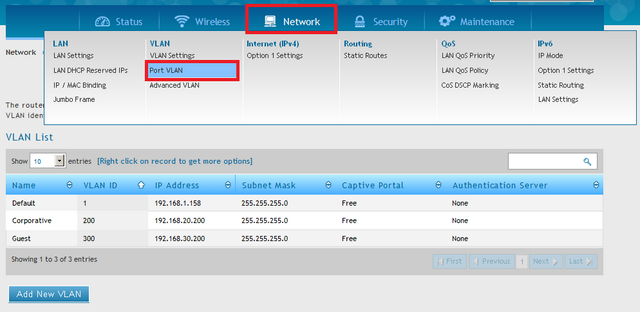
Step 6 – Associate VLANs to a Port(s). To do this go to “Port VLAN”
Network > VLAN > Port VLAN

In our example we are going to use Port 4 as the “Trunk Port” to connect to Port 4 on our DSR-500N – This will allow all our VLANs to communicate via this port.
Step 7 – Set Port 4 to “Trunk Mode” – To do this, right-click over Port 4 and click “Edit”
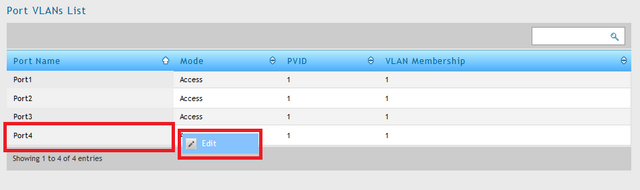
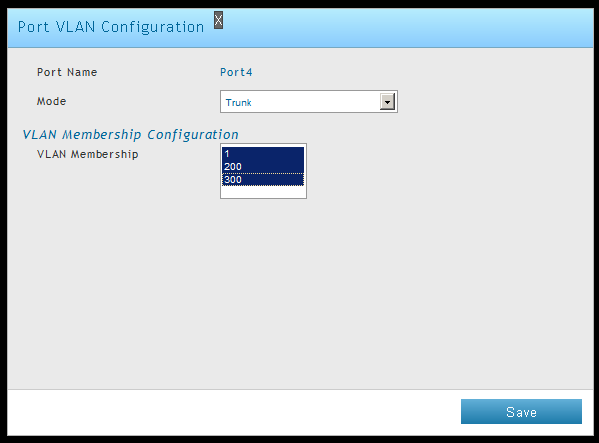
Port Name: 4
Mode: Trunk
VLAN Membership: 1, 200, 300
Click “Save”
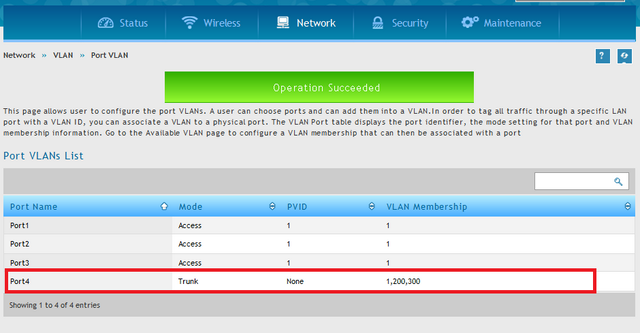
You should see the VLAN Mode has changed as per above from “Access” to “Trunk”
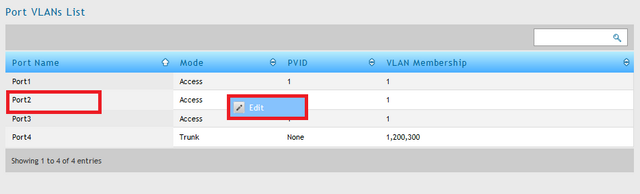
We now need to set the Port to be connected to our Access-Point. In this example, we are going to use Port 2.
Step 8 – Set Port 2 to “General Mode” – To do this, right-click over Port 2 and click “Edit”
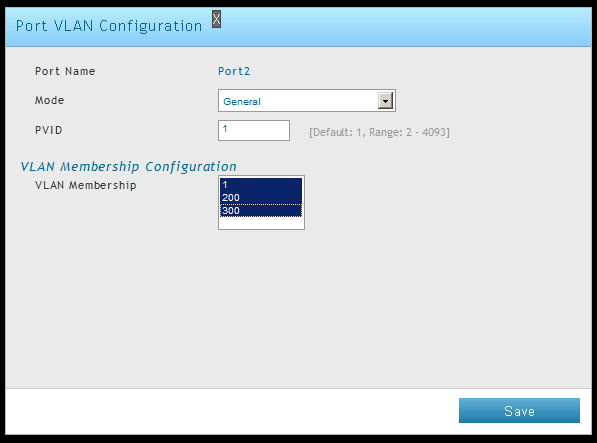
Port Name: 2
Mode: General
VLAN Membership: 1, 200, 300
Click “Save”
Once above has been completed, we need to create 2 SSIDs.
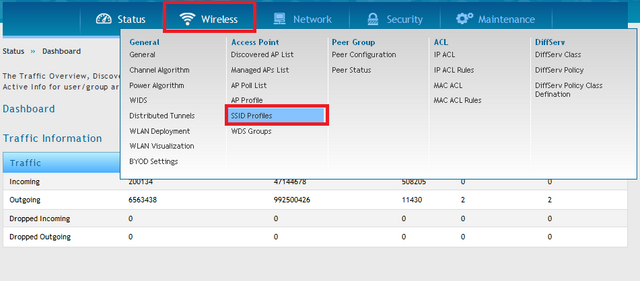
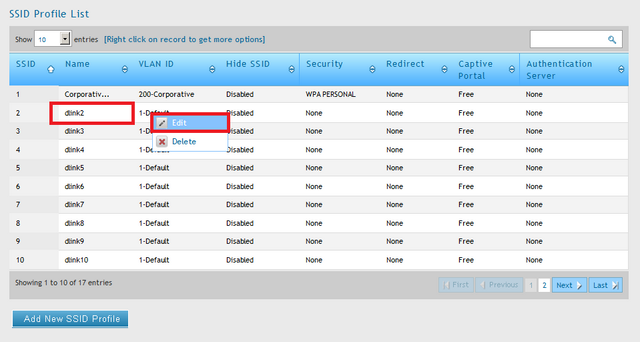
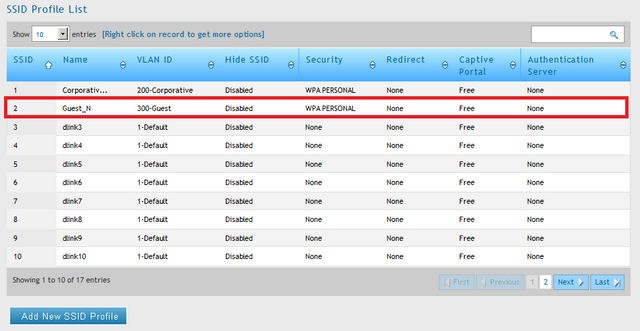
Step 9 – Create SSIDs – To do this, go to “SSID Profiles”
Wireless > Access Point > SSID Profiles
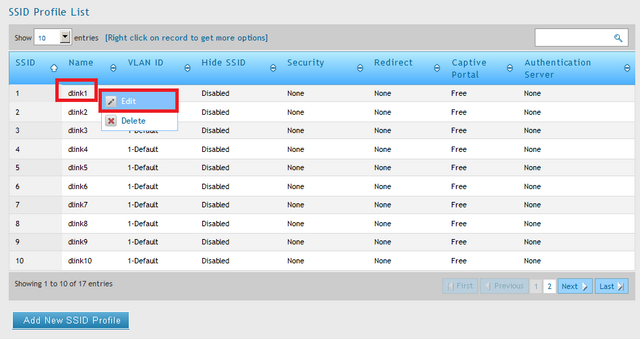
Right-click over “dlink1” and click “Edit”
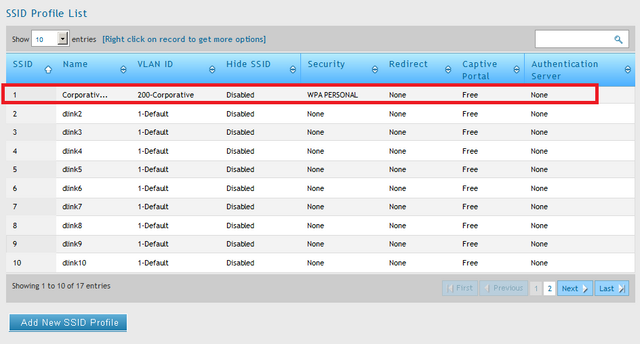
SSID: Corporative_N (VID 200)
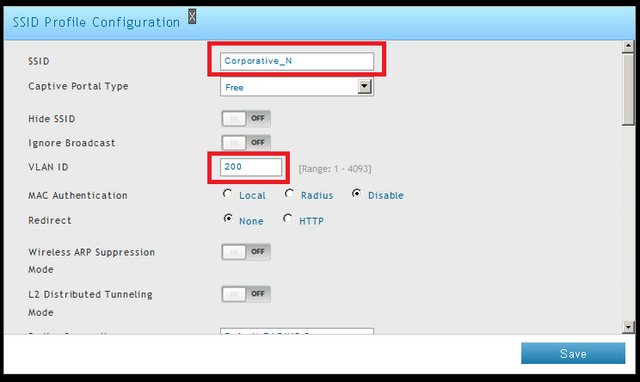
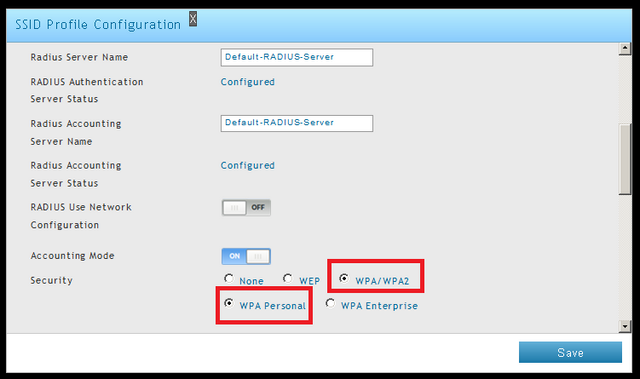
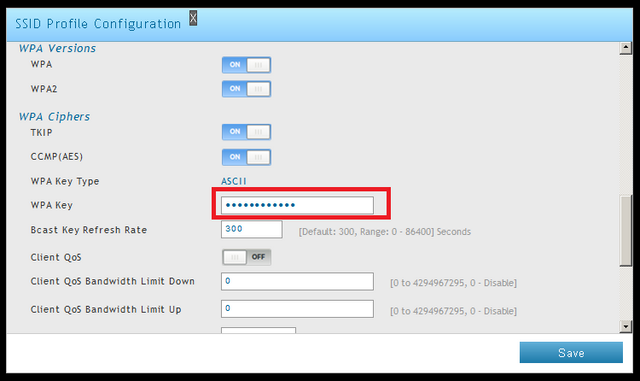
Click “Save”
Step 10 – Create the “Guest” SSID – Right-click over “dlink2” and click “Edit”
SSID: Guest_N (VID 300)
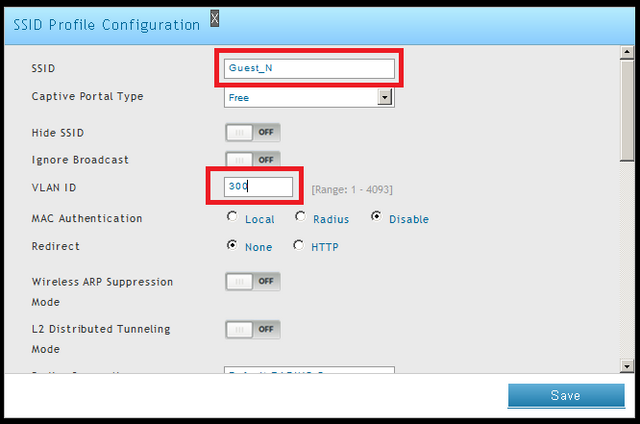
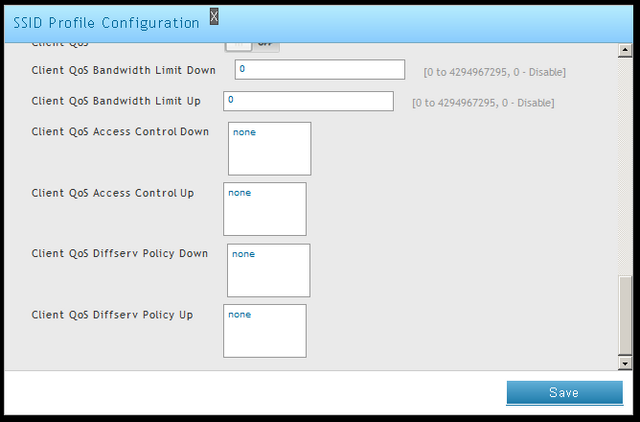
Click “Save”
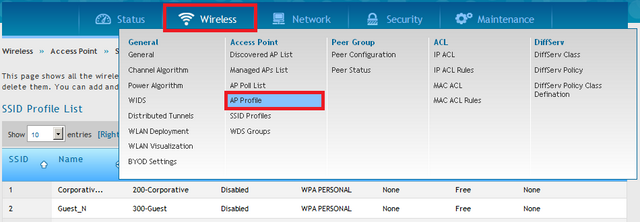
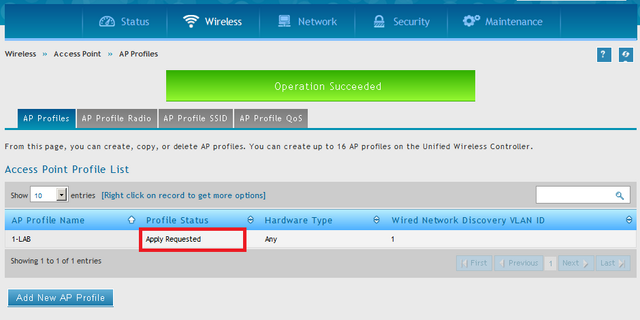
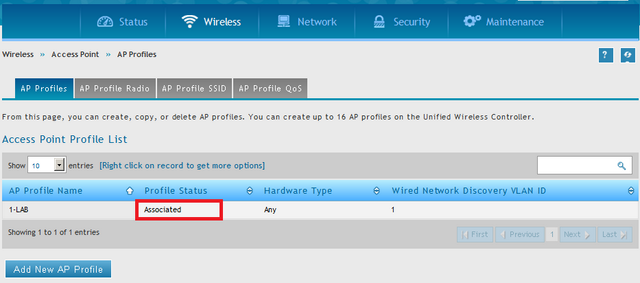
Step 10 – Push changes to Access-Points – To do this, go to “AP Profile”
Wireless > Access Point > AP Profile
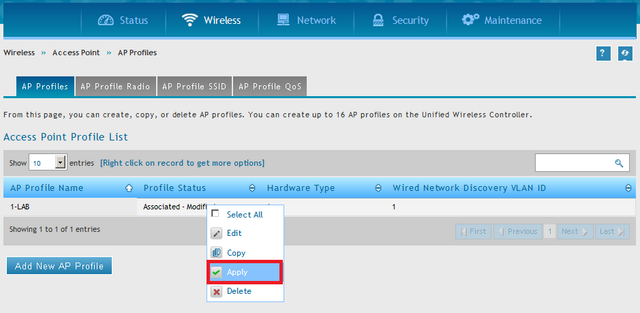
You will see the “Profile Status” shows “Associated-Modified” – To push new configuration to the APs, right-click over top and click “Apply”
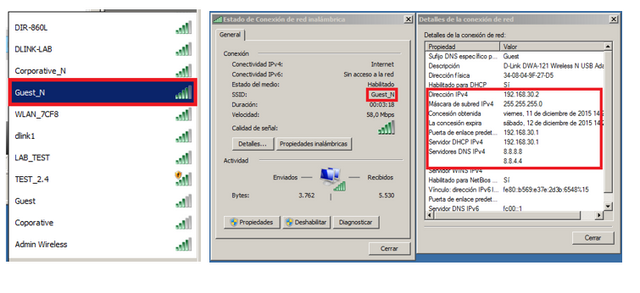
Step 11 – You should now be able to connect to either SSIDs and receive the correct IP. Our result is as follows:
SSID: Corporative_N:

SSID: Guest_N:
Otros usuarios también consultaron:
- How to Upgrade Firmware for Access Points with DWC-1000? Ver respuesta
- How to create captive portal on DWC-1000 – FW.4.4.x Ver respuesta