
How to Add Access Point and Configuration of Profiles in the DWC-1000 – FW-4.4.x
Requirements:
• Check that the DWC-1000 and AP have installed the latest firmware version available.
• Make sure that the access points are in the same subnet as the DWC-1000.
Step 1 – Log into the DWC-1000 interface.
Step 2 – In the configuration page of the DWC-1000 go to “Valid APs”.
Wireless > Access Point > Managed APs List > Valid APs

Click “Add New Vailid AP”
Step 3 – Enter the individual MAC address of the access point select “Managed” and give a location – In our example we have used “Office”.
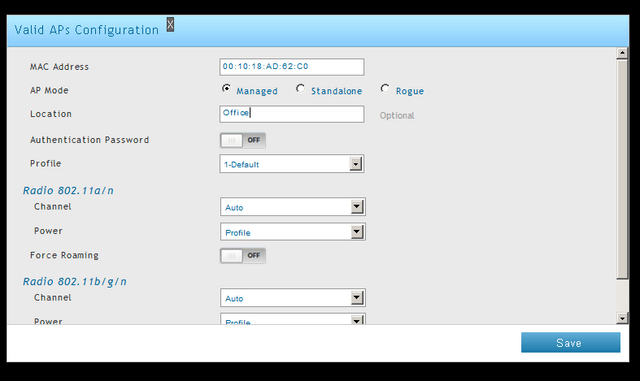
Scroll to end of page
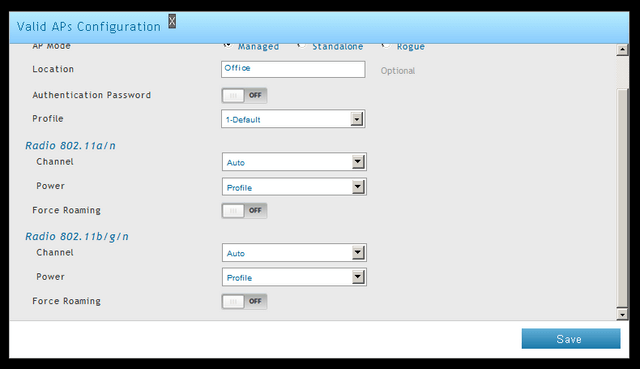
Click on “Save”
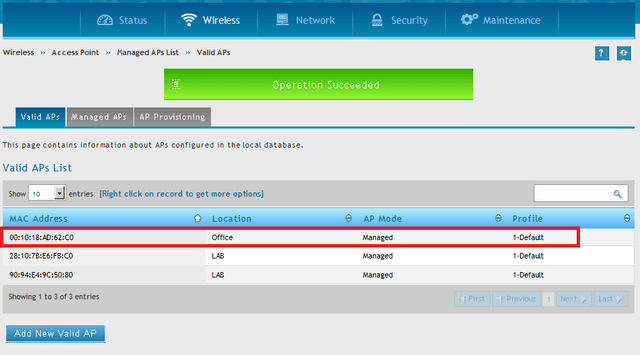
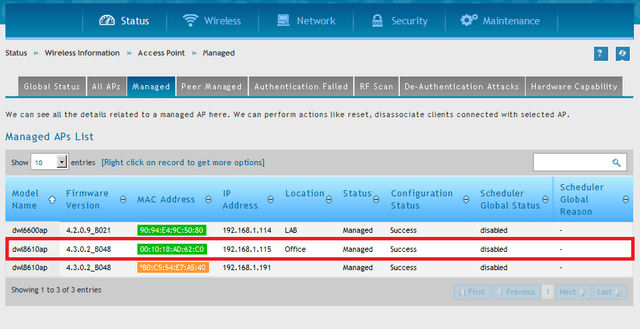
Step 4 – Once saved you should see the following message and the new AP added to the list.
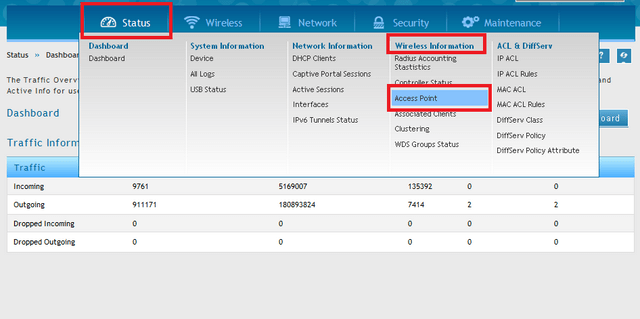
Step 5 – To confirm and check the status of the AP added go to “Managed APs List”.
Status > Wireless Information > Access Point > Managed
Step 6 – To edit the profile - Go to “AP Profile”.
Wireless > Access Point > AP Profile
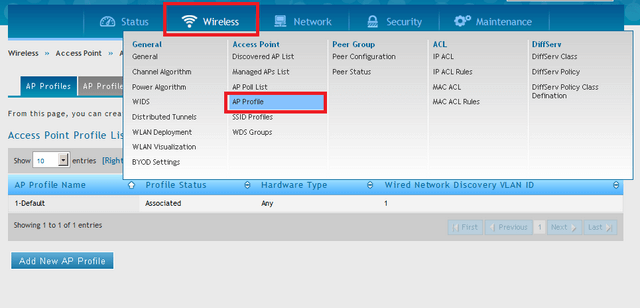
Here you are able to create a new profile. In this example, we are going to edit the exisiting “1-Default” profile.
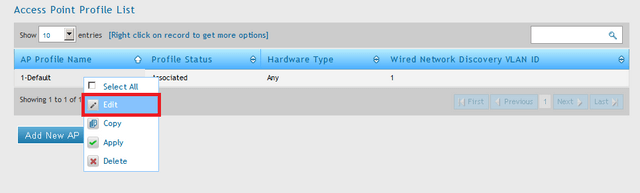
Right-click over profile and select “Edit”.
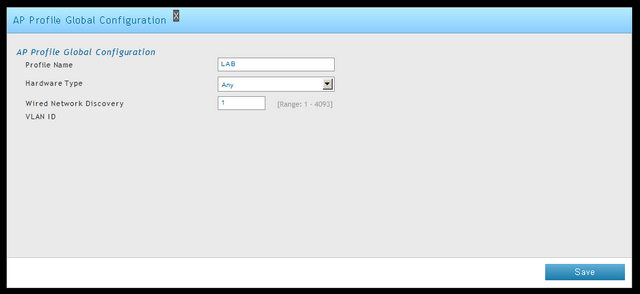
In our example, we have changed the profile name to “LAB”.
Profile Name: LAB
Hardware Type: Any (Or select the appropriate one for you)
Wired Network Discovery VLAN ID: 1
Click “Save Settings”
Step 7 – Once you have edited the “Profile Name”, click “Save”.
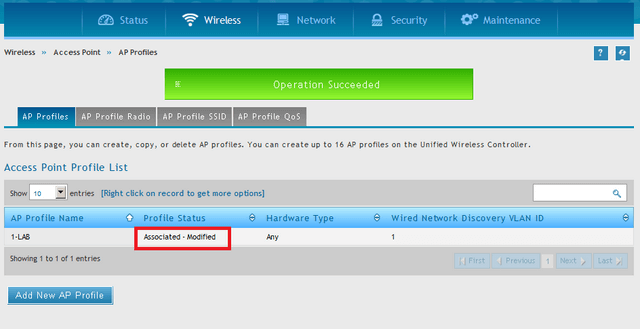
Once saved, you should receive the above screen and notice that the “Profile Status” is “Associated – Modified”.

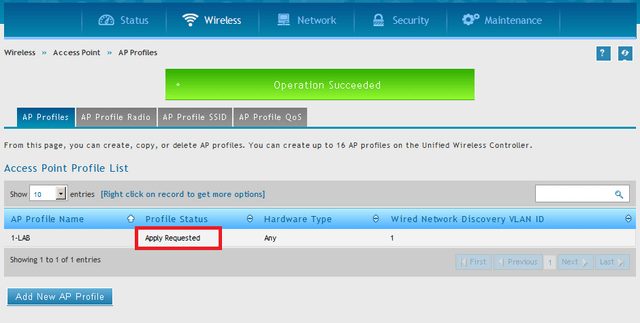
To push this new settings to the APs, right-click and select “Apply”.
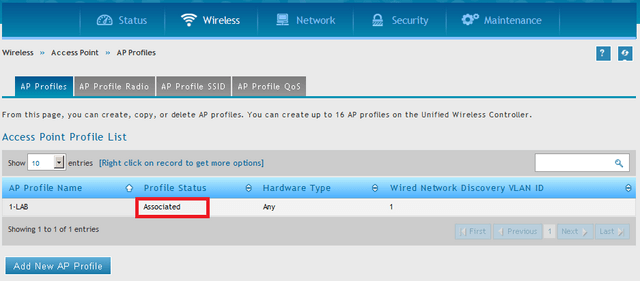
Once you see the above status “Associated” all changes have been saved and pushed to the APs.
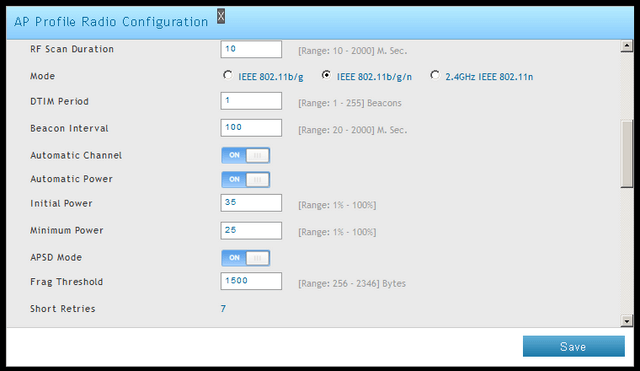
Step 8 – In order to configure the options for the radio profile you created, go to “AP Profile Radio”.
Wireless > Access Point > AP Profile

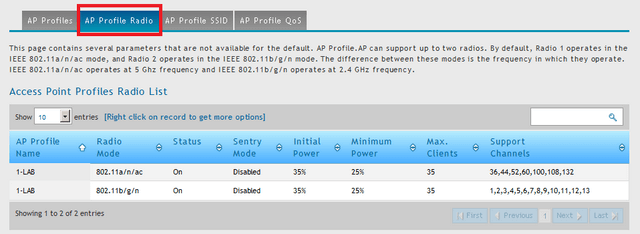
Click “AP Profile Radio”
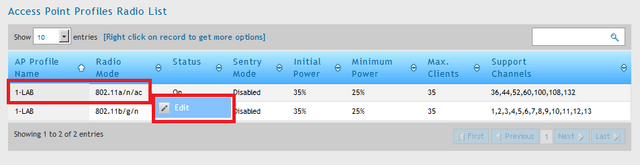
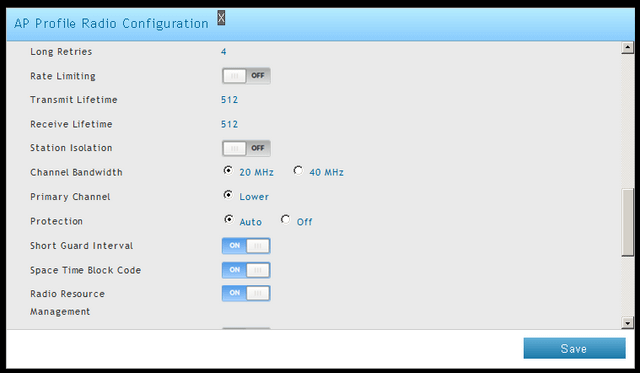
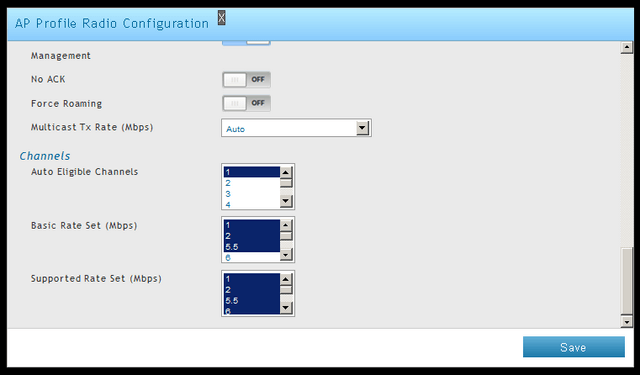
Step 9 – Right-click over 5Ghz Band and click “Edit”.
5Ghz Band Settings:
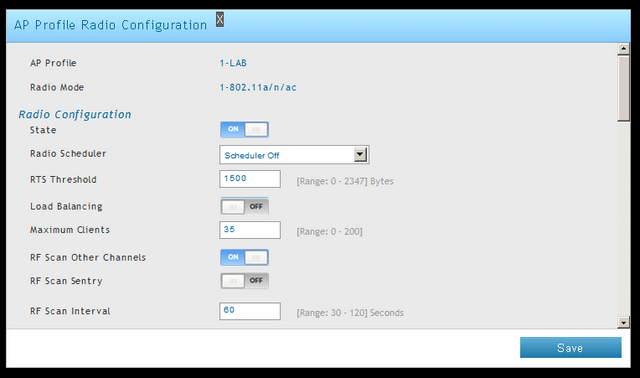
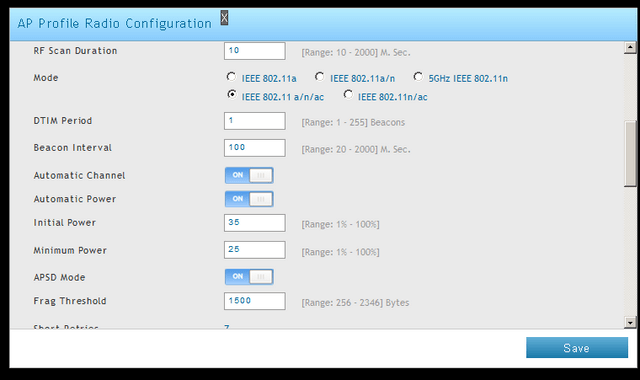
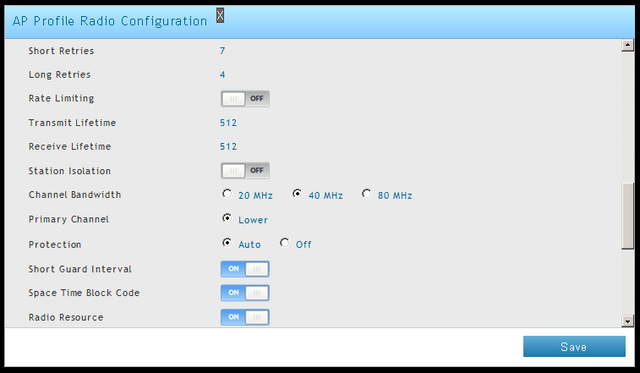
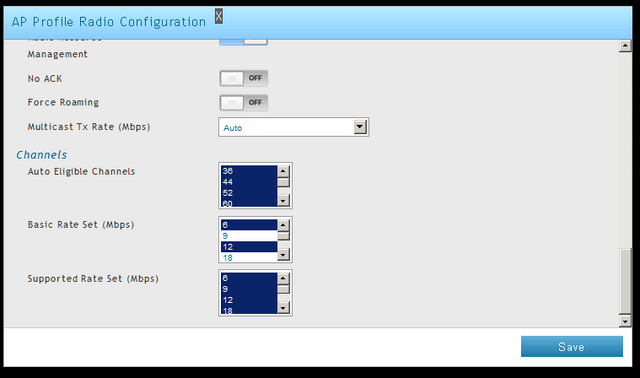
Click “Save”
Step 10 – Right-click over 2.4Ghz Band and click “Edit”.
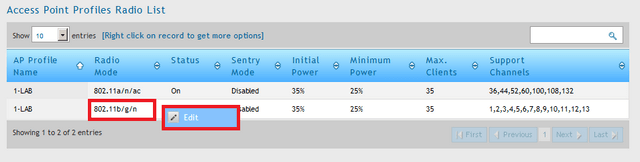
2.4Ghz Band Settings:
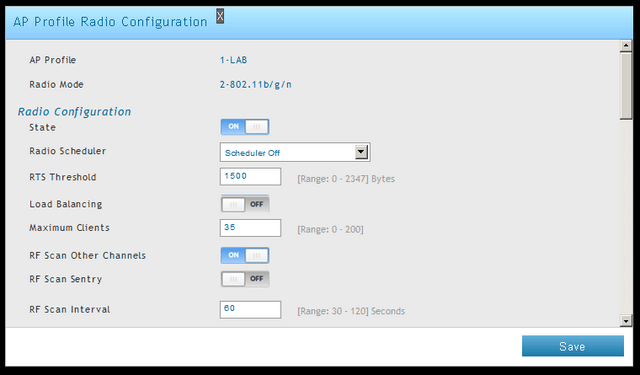
Click “Save”
Step 11 – Once saved, you should receive the above screen and notice that the “Profile Status” is “Associated – Modified”.
To push this new settings to the APs, right-click and select “Apply”.
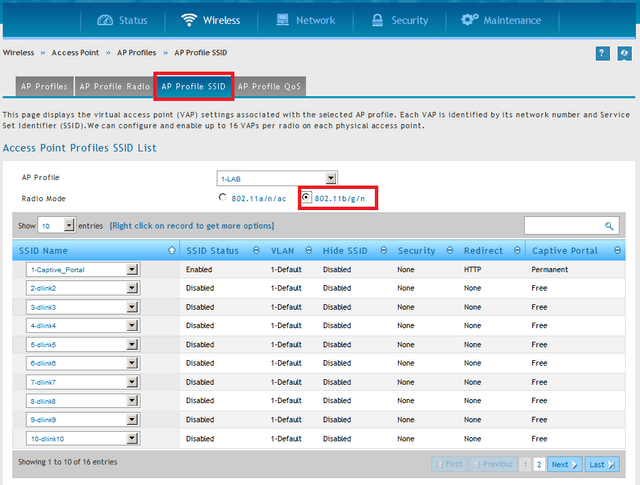
Step 12 – In order to configure the SSID profile you created, go to “AP Profile SSID".
Wireless > Access Point > AP Profiles
Radio Mode: 5Ghz:
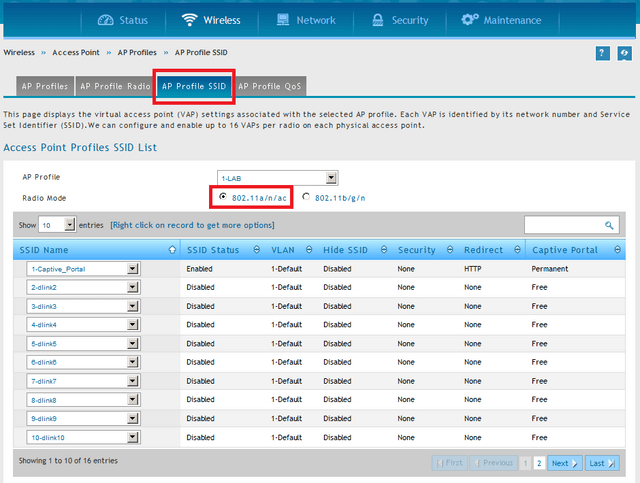
Right-click over the SSID – In our example it is “1-Captive_Portal” and click “Edit”.
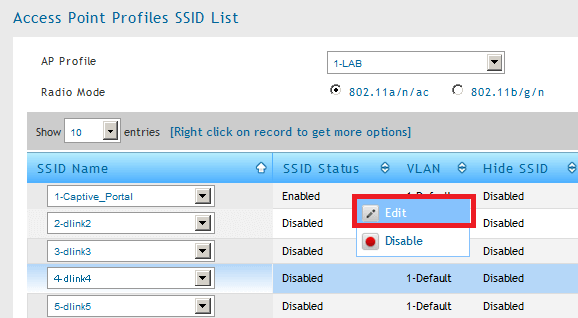
Radio Mode: 2.4Ghz:
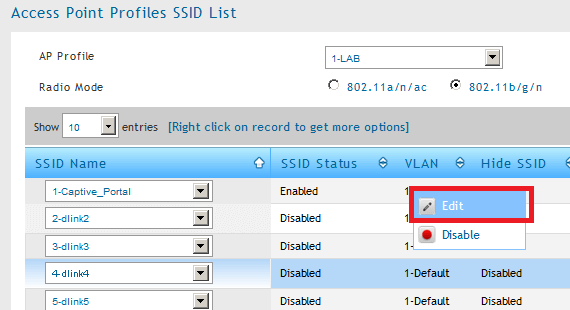
Right-click over the SSID – In our example it is “1-Captive_Portal” and click “Edit”.
NOTE: By default there are 16 SSID called "dlink" for each band. To customize the SSID, you need to click "Edit". If you need to change the parameters of the SSID, for example, first check “Radio Mode” is selected and then proceed with editing the SSID.
Step 13 – Now you will be able to see the SSID of any wireless device issued by the same Access Points(s).
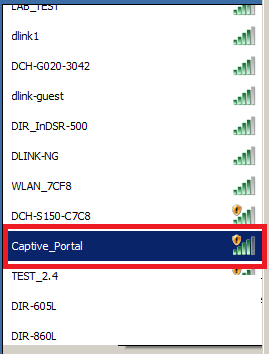
In this example, we used “Captive_Portal”.
Otros usuarios también consultaron:
- How to Upgrade Firmware for Access Points with DWC-1000? Ver respuesta
- How to Create Multi-SSIDs and VLANs - FW.4.4.x Ver respuesta
- How to create captive portal on DWC-1000 – FW.4.4.x Ver respuesta
- How to Upgrade Firmware for Access Points with DWC-1000 FW.4.4.x Ver respuesta